Sunday, September 26, 2010

Hold My Hand and We’re Halfway There

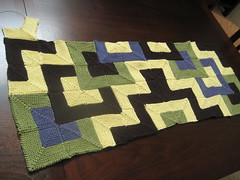
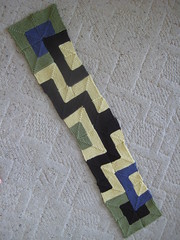
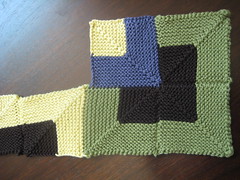
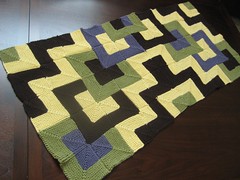
I just finished my 50th square on the Tamarix Quilt, and so now I’m halfway done. Or nearly so – I keep leaving out the applied I-cord edging in my percentage calculations. So let’s leave that out of the equation for now. Counting it just throws everything off and makes the whole how-far-do-I-have-to-go issue messy.

Work on this is uneven. It was a busy week, so Monday through Friday I made one and a half squares, and this weekend I made eight. It’s been like that. As I go along, the temptation to put this aside and start something new and shiny grows, but so far I’ve managed to remain monogamous.

50 bottles of beer on the wall, 50 bottles of beer…

Sunday, September 19, 2010

Real Quilters of Austin

I’ve been working on this Tamarix Quilt fairly diligently, but progress is slow. I’ve finished the fourth row, and started square 41. I had to rip out the smaller brown portion upon realizing it was supposed to be green. Almost always, yellow and brown are paired in the squares of this quilt, and I got lazy. But I’m back on track.

Yesterday, I got to see some real quilting. I, along with Jeff, my sister, my niece and my Aunt June, attended the 2010 Austin Area Quilt Guild Show and Sale, “Changing Gears.” I thought while I was sitting by the phone waiting to hear whether I’d won a beautiful quilt in the show’s raffle, I’d go ahead and do a quick blog post. Get on the phone, people – fall’s a-comin’!

The show is held biannually and Aunt June tries to come up for it each time. We had a good time wandering around all the wonderful works. There was some true talent on display. There was one quilt made of 1440 blocks, each of which was composed of nine tiny squares! I’ll think of that the next time grumbling about 100 squares. There were so many beautiful colors and styles, and I really enjoyed reading the stories behind the quilts. I ran into friends and neighbors, including a colleague at work who, unbeknownst to me, has her own quilting business set up with her sisters. All in all it was a great show. Aunt June got a glint in her eye and asked me when I was going to start quilting. I don’t know that I will. But I did tell her that it looked interesting and that it looked like it would be fun to do, which were almost my exact words over five years ago when I saw my friend Janelle knitting…

I took one picture of a quilt. I just loved it. Among all the log cabins and double wedding rings, cathedral windows and pinwheels, there was this charming little piece called “Friends.” The creator wrote that she thought that all the possible quilting motifs had already been explored, and she wanted to go in a whole different direction. Boy, did she! She also wrote that this quilt was “simultaneously repulsive and cute, gross and comforting.” It was fun watching people see it and trying to figure out what it was. I thought it was innovative, humorous, and well done. I didn’t get the border in the picture but the quilting stitch pattern mirrored the fabric pattern used for the border. I just love this thing. But don’t expect an intarsia version anytime soon.

Sunday, September 12, 2010

A Third

I’m slowly making progress on the Tamarix Quilt, but not much since last week. I”ve finished thirty three squares, so technically, I’m 13 short rows short of a third of the way finished.

I did two squares today, which was a bit of a marathon in comparison with what I’ve managed to get done on the blanket lately. Much of the rest of the week has involved dealing with contractors, noise, dust and pouty dogs. With the torrential rains we got earlier in the week, and shifted chorus rehearsals around the Labor Day holiday, they didn’t get the walks they needed or deserved.

Again, I’m happy with the progress on the blanket. The colors are matching up every time now that I’ve figured out how to count backwards down the selvedge chain to figure out where to initially join the squares together. It makes total sense, but it would be maddening to try and explain this in a pattern. I’ll try and write up a good description and include it in my notes at Ravelry.

67 squares to go. And now, I have to go get dressed for my appearance on stage with Margaret Cho...


Update: A picture!

Saturday, September 04, 2010

A Fifth

Not a whole lot to report on the knitting front this week. But I did just finish my 20th square on the Tamarix Quilt, which means I’m a fifth of the way there.

I didn’t do as much knitting this week as I’d like. I decided to get back to riding my bike to work more, which means I get home tired and sweaty and not inclined to touch yarn – even if it’s cotton. Also, we have minor chaos at our house these days with bathroom renovations afoot. Contractors in the house make me nervous as a cat. My fellow knitters at my knitting group this morning diagnosed it as a control issue. I think they’re entirely correct. Deep breaths, deep breaths. The dogs are handling this way better than I am.

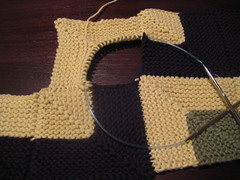
Speaking of issues – and back to knitting: at times, using the seams-as-you-go method outlined the pattern, one has to cast on and then join both the sides, knitting toward a corner. This happened twice on the second row, at squares 17 and 20. Square 17 I seamed as I went. I wasn’t entirely happy, and at Square 20, which involved seaming unmatched colors during the process, I was really unhappy. So for Square 20, I knit it independently and then seamed it afterwards. I liked this better. I’ll do that from now on. Looking at the pattern, I can see that this will occur exactly at least 19 more times. You can totally geek out numerically on this pattern, that’s for sure.

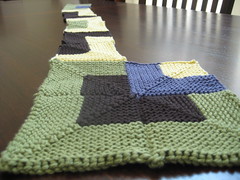
So on we go. It’s nice to see the pattern developing, especially the nested squares that occur on the corners. The second row, just completed, contained six blocks that were combinations of the yellow (primrose) and brown (VanDyke brown), which got a bit old. It was nice to get back to the moss (green) and purple (heathered pansy) again. I’m enjoying how the decrease lines create a faux seaming affect, as if squares on a quilt have been cut on the bias. This definitely looks better from a distance than it does close up. I’m still finding strange joins and weird colors showing through at points, but I”m still intrigued by the overall effect.

Saturday, August 28, 2010

Puzzling

12 down, 88 to go.

I’m a little dismayed with my inability to seam these squares together consistently. I’m pretty sure I’ve gotten down how to attach from side to side in order for the colors to line up, but I’m still having issues getting corners to match up.

The blanket is 10 squares by 10 squares. The 12 square, the second one on the second row, is the first one that is attached on two sides as it is knit. Fortunately for me, they were both picked up edges. Soon, though, I will be casting on half the stitches, picking up the other half, and then seaming on one side as I go. There are many possibilities. So while you’re basically doing the same thing 100 times, the way that each one is begun and seamed is a bit different.

I had to start several squares multiple times on the first row. There were a few times where I had to cast on half the stitches, and then figure out how to pick up while the yarn was on the wrong end of the needles. This just involved flipping the needles around, but it took me a long time to wrap my brain around this. In reading Ravelry, I see that others are running into similar confusion. My biggest fear right now is completing and attaching an entire squire only to discover that I put the wrong one in the wrong place. I’m constantly consulting the diagrams in the pattern to try to prevent this. If it happens, you’ll hear about it.

It looks like really sloppy right now, but hopefully things will come together as I go. And remember that there will be an i-cord edging around the whole thing that should hide a multitude of sins.

Saturday, August 21, 2010

99 Bottles of Beer on the Wall

All together now!

I’ve started the Tamarix Quilt from the Fall 2010 issue of Interweave Knits. It’s for Jeff’s cousin, who is expecting in December. I’m not quite sure what I’ve gotten myself into. I didn’t get to rest on my laurels quite long enough from my last project – “fiddly” is definitely a word that could be used to describe this. But I”m all about the fiddly.

This quilt is made of 100 tiny squares, about 3.5 inches across (mine are closer to 4). One can knit them, stack them like pancakes in an old cartoon, and then spend the whole time dreading what the Discovery Channel might dub “Seaming Week!”. Or, there are specific, if somewhat vague, instructions on how to pick up stitches and join sides together as one goes. That’s what I’m doing. And it’s really slowing me down as I figure out all the intricacies of hiding color jogs and figuring out how to combine picked up rows with cast on stitches, etc. etc. The instructions do advise to be careful in how you choose to proceed, noting that the careless knitter might end up having to join on all four sides of a square at one time. Really? Someone would knit the outsides first and then have to figure out how to join the squares in the middle? That might work in jigsaw puzzles, but not in knitting!

I’m using Cascade Sierra, a cotton yarn that is much less forgiving than the Palette I was just using for the vest. But I really like the colors. They are, from top to bottom: moss, heathered pansy (ahem), primrose and Vandyke brown. Can’t wait to see how it all comes together. Right now, it’s kind of like playing the world’s slowest game of Tetris.

“97 squares of quilt to go, 97 squares of quilt. Cast stitches on, miter like hell, 96 squares of quilt to go…”

Sunday, August 15, 2010

Vaila Versatility

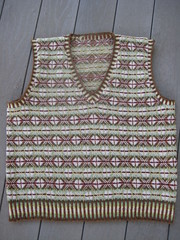
The Vaila Slipover is done! During the week I did one armhole and yesterday morning I cut the final steek and finished up the second. This was the one with all the knots behind it due to the color changes. It was so refreshing to be able to just snip them all away and not worry about all those ends. I got the armhole ribbing done by late afternoon, wove in some ends, threw the whole thing into some water to soak, and went to a neighbor’s pool party. When I got home, I put it out to block – with LOTS of stretching – and this morning it was dry and ready for its debut. In August.

I’m so pleased with how this turned out. Despite the many anxieties I had about colors and weaving in and gauge and all those other things, this went relatively smoothly. And, it didn’t take as long as I thought it would. I didn’t work all that steadily on it; there were a few Mondays-through-Fridays where I didn’t touch it. About seven weeks start to finish, which isn’t too bad. I actually started thinking toward the end that I might have enough yarn left over to put some sleeves on this thing, but I was kind of ready to be done and when I realized I would have to chart out the sleeve pattern on my own, I quickly abandoned the idea.

While working on this, two great 20th century figures who knew how to work the Fair Isle look came to mind, and for fun, I thought I might model the sweater with these two gentlemen in mind. I know I’m going to regret this…

edwardfairisle The first is the future Edward VIII during his Prince of Wales days. This portrait of him and what I’m guessing is a Cairn Terrier, appeared in the Illustrated London News in November of 1925 and helped popularize Fair Isle garments in Britain during the 20s and 30s. Of course this is a long-sleeved version (pullover vs. slipover?), but I like how the ribbing around the collar and waist are very similar to the Ann Feitelson pattern I just completed. Clicking this picture should take you to more information at the website for the UK’s National Portrait Gallery.

I don’t have a Cairn Terrier, but in a pinch, a Basenji (this is Kate) works just fine. Pona doesn’t look nearly so composed or graceful when being carried (think baby giraffe), so I went with Kate. It was already a bazillion degrees outside, so we had to work fast. And those are shorts I’m wearing, not heavy wool pleated trousers like I’m sure HRH is wearing. I almost went looking for a cool hat like that, but then decided it just wasn’t worth the trouble for one shot. I really like this picture though. Kate is quite stunning in it! (Thanks, Jeff!). Also, be-heathered  Scottish braes are hard to find around here, so we had to go with a background of house.

onslow The second great icon of 20th century Fair Isle fashion is Our Onslow from Keeping up Appearances. Onslow is often seen wearing a sleeveless t-shirt or one of these sleeveless Fair Isle vests, which his stuffy sister-in-law Hyacinth is always trying to get him cover up with a jacket or something. Onslow has let himself go a long time ago, but he can strike up a conversation with anyone, is addicted to the horse races, loud television and crisps (smoky bacon flavor!), and has a keen interest in theoretical physics. What’s not to like?

So I thought I’d give it a shot. I don’t run around in heavy construction circles, so I don’t have access to a Fulton Hogan hat, but I did have one in a similar blue. I don’t think I could dress like this in real life, but I love that Onslow does. He must dress like this more often – note his lack of and my abundance of farmer tan!  I remember several episodes in which Onslow and Daisy’s large dog, who usually lives in the abandoned car in the front yard, was stretched across Onslow’s lap (and sometimes Hyacinth’s, to her dismay). I started to see if I could replicate this with Kate, but I think she’d had enough modeling for one day.

“Aw, nice!”
Sunday, August 08, 2010

Colllar-ed Greens (and Yellows)

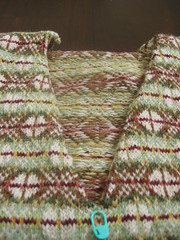
Despite my fears that the recently cut ends of my steek would fray, unwind, unravel and otherwise disassemble themselves overnight, they stayed put. I spent a good chunk of the morning picking up stitches around the v-neck collar of the Vaila Slipover.

Ann Feitelson makes a point in her chapter on Fair Isle techniques that Shetlanders draw the yarn up from behind the fabric when picking up stitches. They find it distorts the pattern stitches less than pulling up bars and pulling the yarn from the front of the fabric. This made sense to me, so I did it. This meant a lot of yarn manipulation in the vicinity of my unreinforced steek cuts, but it didn’t seem to cause any problems, despite starting over several times. Whew. Clicking on the picture above takes you to the photo at Flickr with notes for more details.

Once I got them picked up (on a size 1 needle), the rest was a piece of cake.Just nine rounds of k2p2 alternating colors and switching the purl color every few rows. There’s a tidy little 3-stitch decrease at the bottom of the V, and that’s it. I had to agree that the join between these two fabric types works well and I have to chalk it up to drawing yarn up from behind. It’s a little weird at first, and I somehow managed to get all the oyster heather-colored stitches on backwards, but the overall effect is nice. I should do this all the time.

As you might be able to see, there is a bit of curliness to the bound-off edge of the collar ribbing. One of the finishing instructions suggests running a basting thread through the ends of the ribbing and drawing it in during the blocking process to take care of this. I’ll definitely try it.

So far so good. All that’s left to do is cut the armhole steeks and do the ribbing for them. And then some blocking and finishing. But the end is in sight! I’m really pleased with the retro look this is taking on. Seeing the collar ribbing does improve the overall look.

Saturday, August 07, 2010

In Wool We Trust

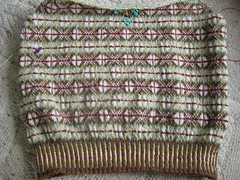
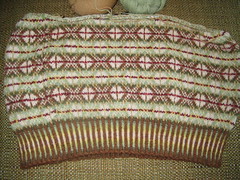
Last night I finished knitting the body of the Vaila Slipover. Here it is, in all of its sack-o-potatoes glory.

And this morning, while knitting with friends, I did a 3-needle bind-off across the shoulders. It’s a cool construction. After putting some of the stitches at the back of the neck on a holder, a mini-steek about 6 rows long is added across the gap. Then, during the 3-needle bind-off, the mini-steek is connected to the main v-neck steek. This would only work if you had the correct number of stitches across the shoulders, which I had, because I’d changed the number of decreases as mentioned in the last post. I wish I could say that I’d done the math to figure it out, but I didn’t. This pattern doesn’t give much in the way of stitch count checks, but at the one point the pattern told me how many stitches I should have, I was spot on. So I was right. Yay, me!

I agonized over whether to sew this steek to reinforce it. So, after reading a bit about this yarn and thinking about it, I took the plunge. I decided to just trust that this wool would be grabby enough to just hang on. The next part of the instructions read, with alarming simplicity and off-handedness, “Cut neck extra sts up the center.” So that’s what I did.

Behold, the power of 100% wool! No reinforcing. No crochet chain. No hand sewing. No machine sewing. Just the yarn wanting to stick to itself. Now, I haven’t gotten all fiddly with it yet, so it remains to be seen how well this all sticks together. I’m thinking of running the steamer over the cut edges and giving them a little zhuzh to encourage the fibers to interlock. But so far, with the minimal amount of handling I’ve done, all is well. After the steam treatment, I get to pick up the stitches around the neck edge. That’s when we’ll find out whether my faith was warranted.

And even though I’ve cut steeks before, you have no idea how much my hands were shaking during all that snipping.

Monday, August 02, 2010

Neck and Neck

image Still plugging away, but as you can see, I’m getting closer.

This picture shows my progress up to about 18 rows before 6 rows or so of neck shaping. However, I’ve run into a bit of an issue. I’ve come across part of the pattern that I don’t think is correct. I tell myself (and others) to always trust the pattern, but I’m still apprehensive. I’ve checked for errata and written an email to Interweave to see what they think. Only a dozen or so people in Ravelry have made this pattern, so maybe it’s not well known?

Here’s the deal. The instructions for the decreases for the v-neck area say to decrease a total of 18(25,21) times. I’m making the large size. I’m thinking that the decreases should run 18(21,25), from smallest number to largest. The main reason I think this is that 25 decreases, in the row spacing required by the instructions, come to within 1 round of the total number of rounds needed before neck shaping. So that’s what I’m working with.

I’m nervous that when I get to some later part of the pattern, I’m going to have an “Oh, that’s why” moment. But I’m going to do it anyway. I’ll let you know what the good folks at Interweave say.

Oh --the men’s knitting get-together was fun on Sunday. There were four of us and everyone was very pleasant --- and talented. The other guys were relatively new to knitting and crocheting, or re-learning it after a long hiatus, but I was extremely impressed with their grasp of how knitting works and how fast they were learning (and wanting to learn) new skills. They were way ahead of where I was as a newbie knitter. We talked yarn, patterns, jobs, and life in general. All in all a great way to spend a Sunday afternoon.

Tuesday, July 27, 2010

Guys in Austin with Yarn

Dougup67, a fellow Austinite and customer at The Knitting Nest, contacted me through Stacy about setting up a gay-friendly men's knitting group for the Austin area. Stacy knew that I and a few other customers had been talking about doing something like this for a while. We contacted some people we know, and we're planning on having our first get-together at The Knitting Nest this Sunday, August 1st from 2-4pm. Nothing formal -- just show up! If you know someone who might be interested, let him know.

As an adjunct to this effort, we started a group in Ravelry, Guys in Austin with Yarn (get it?) Please feel free to join -- being careful not to twist! And if you know of anyone who might be interested, pass the word along.

I now open up the floor to mockery of my lame photo manipulation skillz:

Saturday, July 24, 2010

Two Steeks Well Done, One Medium

I really ought to work on something else so that you can read about something besides this same garment post after post. But I’m all about sharin’ the love.

I’m still enjoying working on this, which is the real reason nothing has distracted me. I was a little tempted by the Tamarix Quilt featured in the latest Interweave Knits magazine to land on my doorstep – I want to knit it for Jeff’s cousin who is expecting at the end of the year – but I really don’t want this vest to languish. So I queued Tamarix up in Ravelry, and got back to the vest.

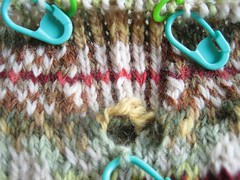
I’m at the steeks now, which is exciting. There are three. One at the beginning of the round for the left arm, one at the front for the v-neck opening, and one for the right arm. The latter two are the ones that are well done. It’s the steek that occurs at the beginning and end of the round that’s giving me fits. Because it’s at the beginning of the round, it’s where the colors change – right in the middle of the 12-stitch steek. So things are a bit loosey-goosey. It doesn’t make sense to weave the colors in as I was doing earlier with the color changes, since this section will be cut. I’ve tried tying the new color to the old with a square knot, but more often than (k)not, the knot is pulling through the first stitch of the round. It started out okay, but it’s getting rapidly uglier. I, uh, didn’t take a picture of that steek.

The next round I’m going to try just adding the new color, doing a bit of knitting, and then coming back to knot later. That way I can get the tension right before knotting. I probably shouldn’t be fretting about a section that’s going to be cut anyway, but since I plan to trust the physics of wool fiber rather than crocheting or sewing to reinforce the steek before cutting, I want things as neat and tidy as possible.

An interesting note that Ann Feitelson makes about the decreases: she instructs the knitter to always slant them toward the steek (or “extra stitches” as she calls them) rather than toward the knitted fabric. I’ve always done the opposite with decreases around neck and armholes in sweaters, and she notes that most American knitters do this. Feitelson points out that slanting toward the fabric actually exaggerates the edge of the fabric. Having followed her instructions,  I can see her point. Clicking on the picture above will take you to the Flickr photo with notes showing which kinds of decreases I’m doing on each side of the steek.

I’m somewhere near row 100 of the 160 rounds I get to knit before shaping the neck. Over halfway there! The decreases are getting a bit strange and hard to track (at 4 places every 2 rounds 13 times and at 2 places every 3 rounds 21 times), but so far I’m keeping up.

Saturday, July 17, 2010

A Basenji of Interest

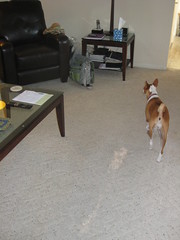
We had a little crime scene at our house this afternoon, and we’re pretty sure who the guilty party is.

Every once in a while, Kate can’t resist plucking a ball of yarn from out of my knitting bag. She doesn’t dig in there, or anything – she just waits for me to leave it open. And then she carefully plucks it out and wreaks her havoc. I’ve caught her in the act a few times. But this is the most damage she’s done. Luckily, I overbought in the main accent color for the Vaila Slipover (Oyster Heather), so I don’t think we’re going to have much of a problem. There wasn’t much left in the ball. I have four balls left and I’m a third of the way through the project. So I think I’m good! Still, I hope I’ve learned a lesson about keeping the bag closed and putting my projects away after working on them.

Progress on this project continues – not rapidly, but steadily. I’m 3/4 of the way through the third of four pattern repeats. Then it's ten more rows before starting the armhole decreases and the arm and neck steeks. When that happens, I’ll really feel like I’m getting someplace. I’m quite comfortable with the pattern at this point – it’s just finding the time to work on it. That, and having to take frequent breaks from having a wad of wool on my lap in 95-degree weather. Ugh. It’s definitely July in Texas.

I decided to give the vest a haircut today – all the woven in ends were starting to drive me crazy. It was just a matter of moments to trim them all back. I left about 1/4 inch on each to give them a chance to felt into the back of the work with wear. That’s the idea, anyway. I’m still a bit freaked about having only a few inches of loosely woven-in yarn at the beginning and end of each round, but to date there have been no signs of unraveling. I’m going to trust that this yarn wants to to stay knit.

Back to it!

Thursday, July 08, 2010

Weaver & Weber

My ancestry includes my maternal grandmother, born with the surname Weaver, and a paternal great-grandmother with the surname Weber (German for Weaver). So perhaps my reluctance to knot the ends behind the work of my stranded knitting has an ancestral origin. Abbe asked if I was worried that Elizabeth Zimmerman would haunt me in my dreams –which may well have something to do with it. But for whatever reason, weave I will.

The process I discussed in the last post is working pretty well, and I’m getting faster at it. I’m not entirely consistent, but I try to start weaving in the new colors behind the working strands about 10 stitches before the round change. Then, I weave the ends of the old colors behind the strands of the new colors for 10 stitches or so into the new round. Most the time I switch from two colors to two different colors, but often I’m only changing the background color while keeping the oyster heather pattern color. And in a few rows, I get to work with the same two colors for two complete rounds  -- my favorite.

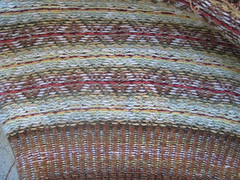
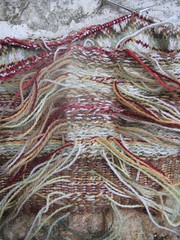
It’s amazing how grabby the yarn is. Probably not as sticky as actual Shetland wool, but it does work its way in rather quickly. After weaving in behind one stitch, it slips out at the slightest tug. But by the time the yarn has been woven in behind three stitches, it would probably break before coming unwoven. I’ve chosen to leave the ends hanging just for shock value, but in truth, all of the ends you see dangling in the first picture are ready to be trimmed. I’ll trim them eventually.

Progress is going faster than I thought it would. My two-fisted knitting is getting more coordinated. Things still look lumpy on the needle, but when I spread the fabric out, it looks pretty good. Unlike some projects, I’m really looking forward to the blocking on this one. I’m just shy of 2 full pattern repeats. At 4.5 repeats, I get to decrease for the sleeves and start the sleeve and neck steeks.

Saturday, July 03, 2010

Fair-to-Partly-Cloudy Isle

After second-guessing myself on gauge and monkeying around with needle sizes, I’ve decided to stick with the original size 3 needles called for in the pattern. Knitting loosely, I’m coming up with mostly 8 stitches per inch, and sometimes the specified 7.5.  I’m gambling that I can make this work in the blocking. If not, I’m going to find someone slimmer than me to wear it , because at this point it’s more about the process than the final product.

My tension is a little more uneven than it was on the swatch. I’m getting a bit more puckering around the diamond patterns, where several stitches in the same color occur. But I’m confident these will flatten out with the blocking.

Right now, I’m experimenting with weaving in ends as I knit. I’ve seen several examples, including techniques at the TECHknitting website and at Knitting Daily. But while I understand how these would work while changing from one color to another, my brain hasn’t been capable of expanding these two changing from two colors to two other colors. So right now, I’m kind of going with a variation of the “3rd stitch” that’s described in the Philsopher’s Wool video for catching yarn behind the work.  The trick that’s taken me a while to figure out is that you have to do this every other stitch, or it won’t work. I thought that doing it every stitch would be “better,” but it actually keeps the yarn from weaving in.

I’m not doing this for the main part of the vest, since I’m comfortable with 5-stitch floats (this maximum in this garment), but a variation of it seems to be working for introducing the new yarn 10 stitches before the round change and then also weaving in the old yarn for 10 stitches into the new round. It’s fiddly and really slows me down, but I think it’s working.

I’m also going a bit faster than I thought I’d be able to. Rather than constantly consulting the chart, I can usually break the 20 stitches of the pattern into multiples of 3, 5, or 7-stitch patterns that are pretty easy to memorize. About the time it becomes automatic, though, it’s time to change. I think that once I’ve gotten past the first 20 rounds of the pattern, I might not have to look at the chart much at all. Never a dull moment with this pattern, that’s for sure!

Sunday, June 27, 2010

Crochet-Magnon Man

I picked up a new yarn craft today! Well, at least I  made a start at it, anyway. I took Staci’s two-hour Crochet for Knitters class today. Totally worth every penny and then some.

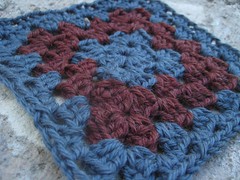
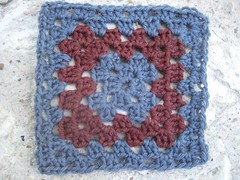
The great thing about this class was that, as knitters, we all had a grasp of what a stitch was and how to make a slip-stitch – you know, all those little things that can be hard for beginning crafters to grasp, but once you’ve got it, you can’t ever remember not knowing them. So we moved along pretty rapidly from chain stitching, to slip stitches, to single and double crochet. Within an hour, we were starting our very first granny squares.

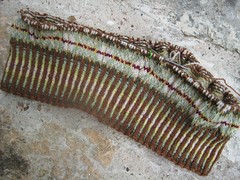
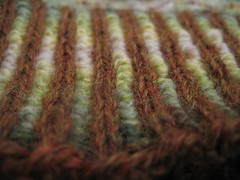
I clearly have some tension issues to work through, but I think I got the basics down.
I know I just got started on the Vaila Slipover, but I so totally want to just drop everything I’m doing and learn more about crocheting. And make a big, huge granny square afghan. Thanks, Staci. And Stephanie – I’ll never make fun of crocheting again. However, I will reserve the right to gasp at some  crocheted things

Friday, June 25, 2010

Swatcheroo

I spent a few evenings this week working up a swatch with the yarn I chose  for a Vaila Slipover. Reviews are mixed.

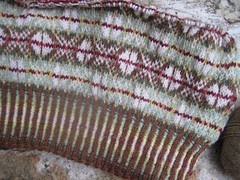
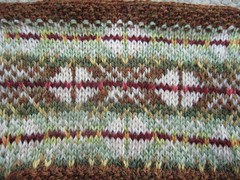
I like the overall pattern and don’t think it will be hard to follow. I’m a little concerned about the green sections. A darker green that I had originally wanted was on backorder until September(!), so I shifted the whole green family one shade lighter. I’m just not sure what I think of the main green color through the middle of that section – it’s called Celadon Heather, and is just a bit lighter than I’d like.

I’m afraid that the large X pattern that runs between all the crossed diamonds will fade out too much through the green sections. Could it be that when there are more brown and green striped sections that they eye will be able to follow the Xs better?

I’m also a little worried about gauge. Before washing, I’m getting about 32.5 stitches over 4 inches. The gauge calls for 30. I don’t want to go down to size 2 needles (I’m currently on 3s), and I don’t want to go down  size – that would be too drastic, I think. I could knit tighter. My gauge with the background colors, which I’m throwing with my right hand, is terribly inconsistent.

I’m going to take this to some experts this weekend and see what they have to say. I’m hopeful that it will all work out. I still can’t believe that stack of balls of yarn from my last post could turn into this.

Tuesday, June 22, 2010

Stranded

I’ve been thinking of doing a stranded knitting project, and I’ve settled on a pattern, yarn and colors. I think I’m pretty much committed at this point. And the yarn showed up in the mail today. Yay, yarn mail!

The yarn is Palette from KnitPicks. I’d gotten some of this a while back for a hat. I swear back then that they had only a handful of colors. Now they have over 80 – quite a choice! These are the 12 colors that I settled on. Clicking on the picture will take you over to my Flickr site where I have notes with all the colors names. Let’s just say the word “Heather” features in most of them. Oh – and to get free shipping I had them throw in a couple of balls of Felici sock yarn in the colorway Green Veggies. Yum!

All this Palette going to become, if all goes according to plan, a Vaila Slipover from Ann Feitelson’s The Art of Fair Isle Knitting. The original one calls for very muted browns and tans – and those will be in mine, but I wanted to feature green, too. Which is kind of predictable, I know.  The original pattern’s blue horizontal line will be replaced with a deep red. And don’t worry about all those deep pinks and bright oranges. They’re little accent colors that probably won’t register all that much. That’s what I’ll keep telling myself, anyway.

I can’t wait to see how all this comes together. Let the swatching begin!

Saturday, June 19, 2010

Lace on the Edge

I didn’t do a lot of knitting today, but I certainly knit in public, thought about knitting, learned about knitting and hung out with some fabulous knitters.

This morning, I went to a cafe for breakfast with some knitterly friends. An elderly woman came by our table to find out what we were doing. I loved her direct way of asking each of us what craft we were practicing (three different ones), what we were specifically working on, and what we called ourselves. She, in turn, had strong opinions on how long orange juice could be left out at room temperature. It was quite the WWKIP day experience.

Then, I headed over to the knitting nest to do a little more public knitting while waiting for my afternoon class on knitting lace edgings with Franklin Habit. The Knitting Nest had some new Lorna’s Laces Shepherd Sock in that was dyed specifically for the store’s grand re-opening, and since some it was dark green, i had to get my hands on some. Stephanie and I grabbed some lunch for Franklin and we wolfed it down before class began.

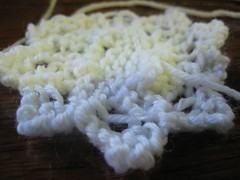
The Stupid Little Snowflake We learned three main schools of thought for knitted on edges, and I definitely had my favorite by the end of the afternoon. We did samples of all three. Pictured here is what Franklin dubbed  The Stupid Little Snowflake – which Franklin designed specifically for the class. He says its the smallest possible sampler of Orenburg lace knitting that can be made!

The class was, of course, awesome. I love Franklin’s approach of mixing history, hands-on activity, detailed explanation and finely made examples. He’s so patient, supportive, and informative. For instance – I learned something about sipping stitches along selvedge edges that I’d never known before. Apparently, if the second stitch in the row is to be knitted, the slipped edged stitch should be slipped with the yarn in front. Conversely, if the second stitch in thee row is to be purled, the slipped edge stitch should be slipped with the yarn in back. When I did this, I could immediately see the clean, smooth chain along the selvedge edge. Before, I’d always had strange bumps. Why didn’t I ever know this before? Have I just not been paying attention? That was worth the price of admission right there.

On top of it all, I got to meet some Ravelry friends that I’d never met in person before, which is always a good thing. All in all – a very nice way to spend World Wide Knit in Public Day.

Wednesday, June 16, 2010

Homework

I’m going to be taking a class from Franklin Habit at The Knitting Nest on Saturday -- Lace Edgings: Before, During and After. I may have mentioned this a few times! Today, I got an email with my pre-class homework assignment, which I took care of tonight.

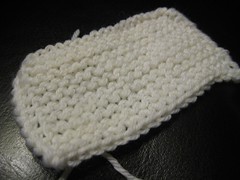
Our instructions were to knit a 20-stitch wide, 20-row long swatch in Dalegarn Baby Ull (or equivalent) on size 4 needles. I still had some Baby Ull from the lace class I took from Mr. Habit last year. I can’t believe this will be the third time I’ve met him. I’m really looking forward to it. He’s informative, helpful, patient and funny. All good educative skills.

(I just had to use the word “educative.” I’m reading a book about the making of Gray’s Anatomy (yes, the medical reference book, not the television show – which I have only just realized spells the name Grey) and the author discusses the book’s publishers and their role in disseminating 19th century British “educative” literature. Trust me – it’s interesting.)

Ahem. I found the exact same yarn I’d used last time and made short work of my homework. I’m going out on a limb here, but I’m thinking that we might be adding some lace around the edge of this thing. We’re supposed to bring some size 4 dpns, and so far I’ve only located size 3 metal dpns – very slippery. I’m going to keep digging.

Can’t wait for the class. Saturday is also World Wide Knit in Public day. So I hope everyone grabs a project, gets out there and recruits for the cause. I’ll be doing so, working on a new version of the Oliver socks I had to abandon a while back. More on them later.