Saturday, September 05, 2015

Both Sides Now

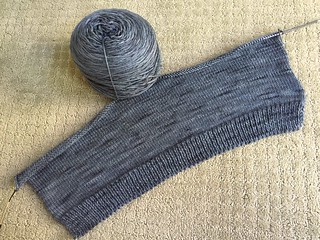
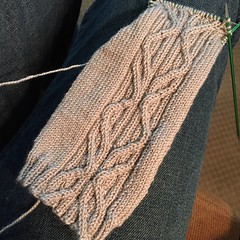
When I've had a chance to sit down and knit in the past month, which hasn't been often, I've been slowly working on my Shadows and Light v-neck.

I finished the back several weeks ago, following the dimensions listed in The Knitters Handy Book of Sweater Patterns. When I held it up, well...it didn't hold up. It was too short. My knitting friends and Jeff all agreed -- it needed another inch and a half. I should have anticipated this modification. My brother and I have a four inch difference in height, but we have the same inseam. All the difference is between my hips and my shoulders. I think I have chunky Neanderthal vertebrae.

So I started the armholes for the front side of the sweater 1.5 inches higher with the idea of comparing later. Much better. So now the plan is to rip back to the start of the armholes and add those extra rows, and then finish up. I'm hoping that I'll have some time to get that mostly accomplished while visiting the in-laws this holiday weekend in north Texas.

I'm eager to get this finished. And I'm eager for some cooler weather. Bring it on, Mother Nature. I'll be ready.

Friday, August 07, 2015

Recipes

I'd been trying to find a good pattern for some yarn I bought at the Marylamd Sheep & Wool Festival a few months ago, but I kept running into obstacles. Using Ravelry, I'd find patterns I liked, but most of them were in pattern pamphlets that wouldn't be easy to get my hands on. I found one that I thought was interesting, but when I got started I quickly realized the yarn didn't want to do what the pattern required. The shiny smoothness of the Spirit Trail Fiberworks Brigantia wasn't liking the cabled patterns I was drawn too. I started at different needle sizes three times before I decided to change course.

I have a book that I refer to from time to time when I want to make a minor modification to a pattern , but I've never knit a whole garment from it before. It's The Knitter's Handy Book of Sweater Patterns by Ann Budd. It's a recipe approach to knitting a sweater. You choose the style (raglan, drop-sleeve, saddle-shoulder, etc.), find your yarn/needle gauge, and then your'e off to the races with instructions in a table format. After my various attempts above, I decided I'd make a plain, v-neck sweater with set-in sleeves using this book and just let the yarn shine. The silk content certainly helps with that last bit. The colorway is called Shadows & Light, so that's how I'm going to refer to the sweater, I think.

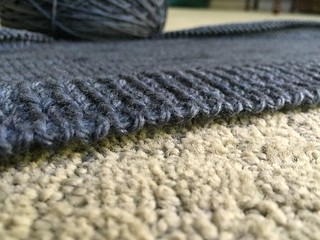
I couldn't quite get gauge for the size 42 sweater I need, so I checked the numbers, and mine matched the size 46 instructions. So far so, good -- the back is exactly 21" wide with 116 stitches. I could cast on any way I pleased, so I chose the tubular cast-on using Staci's instructional video. Yes, it's fiddley, but I love the way it looks. I always feel that long-tail cast-on edges have a certain fragility about them . The tubular cast-on feels more durable to me, plus it has just the right amount of stretchiness and a clean, tidy, rounded appearance. Well worth it, I think. After adding the v-neck ribbing, I plan to attempt a tubular cast-off to match.

Speaking of recipes -- I got a great one at the family reunion I attended last weekend. My cousin Sandra (first cousin, once removed, technically) made a framed copy of my Great Grandma-Weaver's yeast roll recipe, which I won in the auction. Grandma Weaver was kind of known for these and her biscuits. Sandra remembers her coming over and making these. I asked about how many this yielded and she guessed about three dozen, which would have worked well for a family with 11 children, I suppose. My aunts remembered her as not being especially tidy in the kitchen and always being covered in flour after baking, a tradition I'm sure to continue when I attempt this. I love everything about this, from the fact that she typed it (she had bad arthritis in her later years and couldn't write easily), to the misspellings and typos, to her sugar brand loyalty. And, you can tell it's one of those old-school typewriters on which you had to use a capital "I" as the number 1.

So, I have a few recipes I need to get working on. One involves rows and rows of gray stockinette stitch. The other calls for yeast cakes. Does yeast even come in cakes anymore?
Saturday, July 25, 2015

We Come 'Round Right

I'm going to be attending a reunion of my grandmother's family, the Weavers & Armstrongs, next weekend. She was one of eleven children, so as you might imagine, it's quite a crowd. My early memories of summer visits to Texas involve this reunion, and being greeted by dozens of people whom I'd never met, but who all seemed to know me and my place in this large group. It's a day for warm memories, great food, bad jokes and just catching up. I love it.

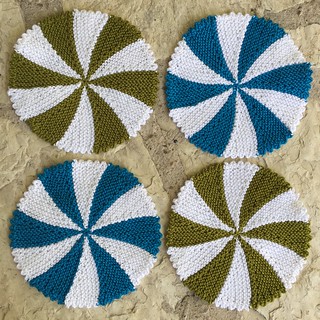
To raise money for renting the space and catering some of the food, relatives bring handmade items to be auctioned off in a silent auction -- or maybe not so silent -- we are talking about Weavers here. Items can run the gamut from preserves and jams, to handmade quilts and wooden toys, My contribution this year is a set, or possibly two sets, of Shaker Dishcloths as designed by Staci Perry at VeryPink. I made some versions of these in placemat and coaster sizes a few summers back.

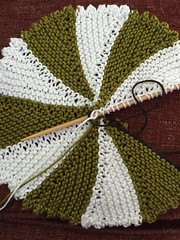
Because I went rogue and chose a different yarn than the pattern called for, I had to make an adjustment. This yarn, Cascade UltraPima, while beautifully shiny, is a bit on the thin side for this project. This picture shows what was going on -- a strange gappiness right before the color change, most noticeable in the white (see photo). I tried going down a few needle sizes, but didn't like that. I settled on wrapping the slipped stitches, like one might do on a short row heel on a sock. Then I tweaked things even more by twisting the wraps just before knitting them together with their accompanying stitches. This added a bit more density to the final row, but I preferred that to the weird laciness I was seeing.

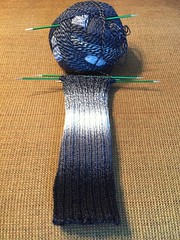
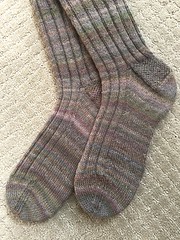
In other projects, I'm working on a pair of ombré socks using the Crazy Zauberball yarn I got in Pennsylvania in May. I love just working the 2x2 ribbing. You can't really get a matched pair with this yarn, but I did at least want to keep the patterning a bit more symmetrical, so I'm going to use afterthought heels in solid black. The toes, too. That way, even though they'll be striped quite differently, they still have the same heels and toes and look a bit more like a pair. That's the plan anyway. We'll see how that pans out.

Sunday, July 19, 2015

The Braid-y Bunch

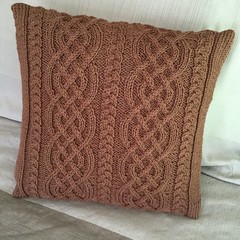
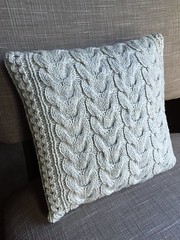
I finished what I think will be the last installment of my knitted pillow project. If you've been following along at home, I was originally going to make three, but a gauge problem saw me buying an extra (smaller) square pillow form, so I just had to knit another. And the extra pillow ended being the Celtic Knit Aran Pillow, finished this afternoon.

I loosely used a pattern that appeared in Canadian Living that I saw on Ravelry -- with some modifications. The pattern says it makes a 16"x16" pillow. I had a 14"x14" form, so I went down a needle size (US 6, 4mm) and trusted that the worsted Cascade 220 I was using would be a bit thinner than the Aran weight called for in the original. And it worked. The original also called for a split back with buttons But I didn't like how all the examples gapped around the buttons in the back. This can be fixed with a bit of ribbon, but the whole thing was shaping up to be way more fiddley than I was in the mood for. Ain't nobody got time for that. I was mostly interested in the braided Celtic knot motif, anyway.

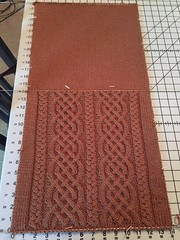
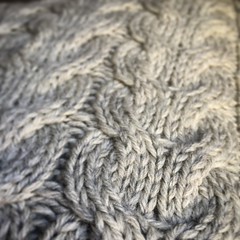
After getting 14" of the cable pattern finished, I continued knitting plain stockinette for another 14". After blocking (see right), I used an invisible horizontal seam to join the top and bottom. I don't know about you, but mine are always quite visible. Perhaps I tension the yarn too tightly? Then I just seamed up the sides. Just before sewing up the final side, I found a place on the back where I hadn't caught all of the yarn and it looked quite weak. To reinforce things, I darned a bit of yarn across this spot on the inside. That was close. It's a little noticeable when you rub your hands over it, but not too bad.

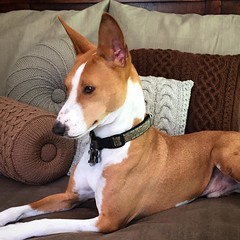
So what was originally meant to be a series of quick springtime projects dragged quite far into the summer. I'm overall pretty happy with how these turned out, even if I'm not so sure about the colors going together. I've never really trusted my color sense -- and it doesn't help that I'm drawn to grays and browns. But I think they'll do. In any case, Pona seems pleased. I hope he lets me enjoy looking at them for a while before he chews them up. I can almost see the wheels spinning in that tiny little head of his.

Next up -- yet another pair of socks.


Wednesday, July 08, 2015

Buttoned Down

Who's got the button? Me -- and two of the pillows I recently knit.

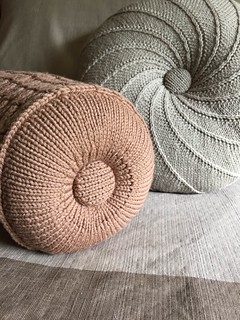
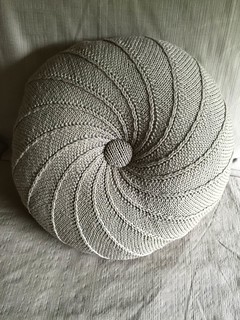
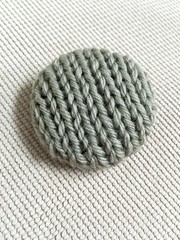
I'd been fretting about buttons for these pillows, especially the round Spiral Galaxy Pillow, for some time. I looked for a fancy glass button at the Maryland Sheep & Wool Festival this year, but couldn't find anything I liked. As I thought about it, I decided I wanted it too look like those old shiny, silky pillows my grandmother had in her living room, with a button out of the same fabric. Something to draw it all together, but that wouldn't steal the show. For the just-completed Smocked Rib Stitch Pillow, I needed buttons to rein in the end caps, which were being pushed out by the pillow form and were decidedly nipple-ish. Not a good look.

Knitted buttons made from the same yarn as the pillows themselves would be the way to go. So while running errands this morning, I stopped by Bolt Fabrics and got some Dritch cover button kits and heavy upholstery twine. The salesperson was so helpful to walk me though the process. It was pretty obvious I was in over my head.

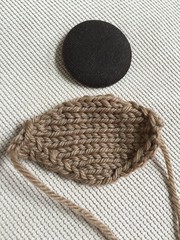
Based on our conversation, I realized that my knitted covers would be too thick to snap on the backs. Kindly, Jeff sacrificed an old brown t-shirt so the buttons would have a base that wouldn't let the metal shine through. Then, I knit some small covers using matching yarn and constructed as follows:

  • Cast on 4 stitches
  • Purl a row
  • Increase one inside each edge stitch every right-side row until 12 ston needle
  • Make two rows plain
  • Decrease one inside each edge stitch every right-side row until 4 st on needle
  • Bind off

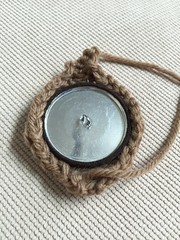
I ran the tails through the inside edge of every other selvedge stitch around the edge and drew the cover in tightly. And, voila -- a knit-covered button!


I found some instructions on sewing buttons on pillows and away I went. Drawing the thick twine through the long pillow was a bit of a chore, and upholsterers would probably have a special tool for such purposes, but I can report that a seaming needle, squishing hard and grunting can work in a pinch.

Way easier than I thought it would be and I'm happy with the results. Now, I have one more naked pillow form to get covered...

Sunday, July 05, 2015

Smock and Awe

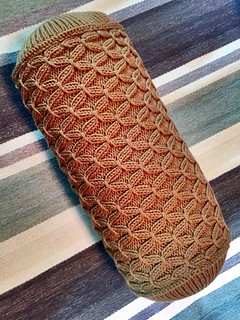
A flash of genius and a little help from my friends helped me all but finish my Smocked Rib Stitch Pillow this weekend.

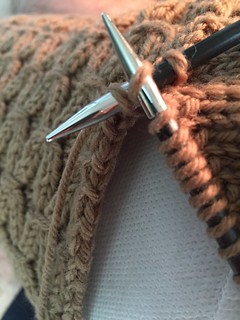
I had some real hiccups with this, mostly because I was making it up as I went along. The crochet provisional cast on worked, but it didn't unzip correctly. Which I should have anticipated if I'd thought a bit harder about it. Flipping the yarn back and forth over the chain to k2p2 meant pulling all the yarn through a loop every other stitch when trying to remove it. What should have taken 3 seconds ended up taking an hour.

Then I tried to focus on seaming the thing together by grafting the 2x2 ribbing. Staci has excellent instructions for doing this, but I just kept messing it up. I have regular stockinette Kitchener grafting so stuck in my head that I couldn't get the rhythm. And the squished together stitches made it hard to see what I was doing. I must have started and stopped four times. I grumbled about this with my knitting crew, and they convinced me that a 3-needle bind-off would work just fine. And they were right. Not totally invisible, but not too jarring. And it's a tube, right? The seam can always be rolled out of view.

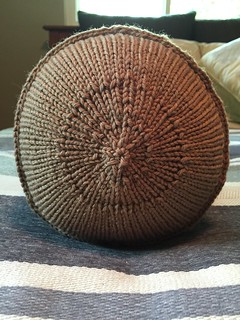
The part I was on my own with was the end caps. I wanted round pieces, which aren't the easiest thing to do in knitting. I toyed with the idea of crocheting round pieces, but thought the styles would be too different. So I went with Elizabeth Zimmerman's pi method, wherein the number of stitches is doubled after the number of rows has doubled. I'm sure I learned some theorem or proof about this in Mr. Ashorn's geography class back in high school, but if so I've since forgotten. The basics are:

  • Start with 8 stitches
  • Knit a round (2 rds) then double the no. of stitches (16 st)
  • Knit until 4 rds from previous increase then double the no. (32 st)
  • Knit until 8 rds from previous increase then double the no. (64 st.)
  • Knit until 16 rds from previous increase then double the no. (128 st)

I ended up knitting one more round just to tidy things up. The 128 stitches around the end panel happened to be only four fewer than the 132 stitches on the selvedge edge of the tube -- 11 repeats of the 12-row motif. I didn't plan this -- math, geometry, gauge and tension just worked out in this case. I couldn't have planned it.

Then I needed to figure out how to get this attached. I had live stitches on the end pieces, which needed to be both bound off and attached, so I did what amounted to a combination gusset pickup and bind off. I put the needle through a live stitch on the end panel, grabbed yarn through a selvedge stitch from the tube, pulled it through both, then bound it off on the next stitch. This created a nice exposed crochet chain edge, that was almost one-for-one between the two pieces. Every 32 stitches I skipped one and the count lined up perfectly.

The first panel was easier than the second, because I had to have the pillow form stuffed inside for the latter. And I don't think I'm quite done. The form poofs out a bit on the ends, making the pillow look like one of those canisters you put in the pneumatic tube at a bank drive-through. I'm thinking of pulling them in with some upholstery buttons.

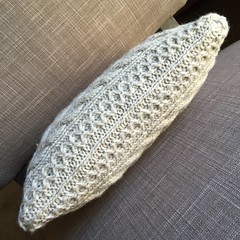
I like how the smocking pattern makes it look like the pillow is covered with dragonflies when viewed at the angle in the first photo above. Very appropriate now that our sultry Texas summers seem to have finally arrived. Hope you're enjoying your summer as much as I am!


Sunday, June 21, 2015

Socks and Smocks

Uh, hi.

A topsy-turvey work schedule, along with a professional meeting, a chorus concert, a mini-vacation and getting the interior of our house painted, have all conspired to make knitting a rare thing lately. For weeks all I did was work on a pair of socks on Saturday morning with my regular knitters. That was it. Two hours a week for nearly a month. And it really bugged me. But this weekend I dusted off the cobwebs, literal and figurative and mental, and resumed some semblance of momentum.

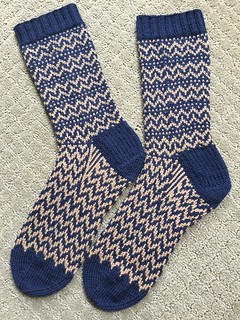
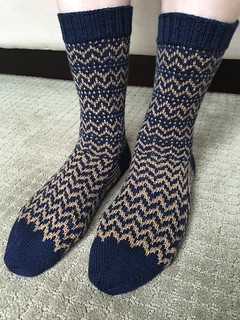
Yesterday, I finished the Moorish Stripe Socks, one of the Six-Stitch Stranded Patterns from Charlene Schurch's More Sensational Knitted Socks. I used the yarn I bought at The Quilted Skein in La Grange when I visited with Leah Wilson King back in March.

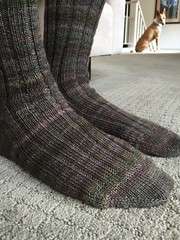
I think these turned out fine. I did do the gussets differently on each sock, a danger when the two are knit so far apart. You can see the one on the left above has a gold line on the top of the gusset that the other doesn't have. I also managed to repeat an extra row on the sole/instep of the second sock, but didn't catch it unti just before,working the star toe. Oh, well. I'm over it now that I've confessed. My sock model, who normally doesn't go in for handknit socks, declared these "wonderfully soft" and that he wouldn't mind a pair like these. Maybe it was because the gold color has silk in it? He better not hold his breath. It may be a while before I tackle stranded knit socks again.

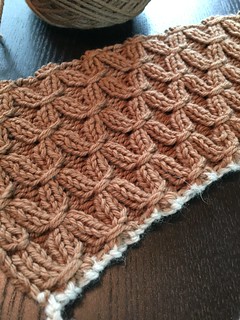
After completIng that pair, I started right away on another installment of my knitted pillow project. I'd toyed with the idea of a honeycomb cable for a bolster pillow, but wasn't sold. Staci suggested I take a look at a smocked rib pattern that she'll be posting an instructional video for soon. She graciously sent me the instructions and I've set to work. The idea I have is to knit this with a provisional cast on so that I can graft it closed once the tube is the right circumference. However, this means that I had to both knit and purl into the provisional crochet chain. No easy feat, that. I had to use a tiny crochet hook to help get the purl stitches on the knitting needles. And it took forever. And I have to find instructions for grafting 2x2 ribbing. I'm sure that's a thing (he said, without ever having checked).

But it's going well now. All the fiddliness happens every six rows, way better than what I would have faced with honeycomb stitch. And I like the pattern it makes. It reminds off the gathered fabric I've seen on top of old sewing boxes.

So something finished and something started. Here's hoping that my slump is over.

Saturday, May 09, 2015

Maryland Sheep & Wool Festival

This spring has been so busy, with little time for knitting, and even less for blogging about it. But for the first time in 10 years, I was able to slip away for a few beautiful days and attend the Maryland Sheep & Wool Festival. It was the perfect long weekend.

I stayed with Sharon and Janelle and family. (See her excellent account of the day.) The day before the festival, Janelle graciously drove me around the Mason-Dixon Line southwest of Gettysburg, PA, looking for a place called as Shockey's Cave, the lair of a notorious counterfeiter in my ancestry.

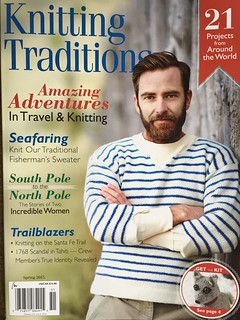
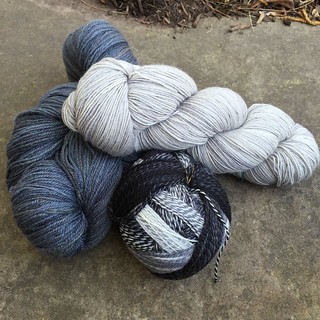
We never did find it, but we did find a shop called The Knitting Cottage near Waynesboro, PA. The owners were very sweet and I ended up getting some Schoppel-Wolle Crazy Zauberball sock yarn (at bottom of picture below), which I've always wanted to try, plus a recent issue of Knitting Traditions dedicated to patterns based on exploration and adventure travel. Knitting and exploration and history? Yes, please.

The next day we got up bright and early to beat the crowds to the festival. Janelle is always so organized about these things. I was a bit overwhelmed and mostly just followed her around as she checked off her list of vendors to visit. But along the way, I found a few things. My superpower seems to be going into a shop or booth full of colorful yarn and coming out with the only gray skein in the place.

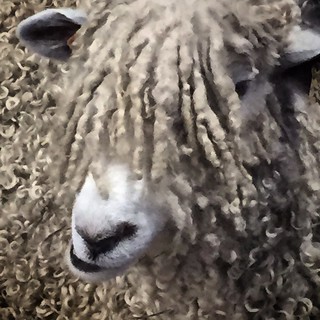
For example, at the Hobbledehoy booth I found a BFL superwash in a light gray (right) that was put up in a 250g skein -- perfect for extra long socks, or socks with elaborate cables. And at the Spirit Trail Fiberworks booth I dithered and hemmed and hawed and finally committed to several skeins of Brigantia, a Polworth(85%)/Silk(15%) DK-weight yarn in a steely blue-gray with slight hints of a greenish-yellow that I'm thinking of using for one of the new Brooklyn Tweed men's designs (left). In between we got to eat kettle corn, see dozens of sheep breeds (and other fiber-bearing animals like rabbits and alpacas), see spinning demonstrations, and meet up with many of Janelle's local knitting friends.

Local knitting friends was what the next day was all about. Several of the Gettysburg knitters came over to Sharon & Janelle's house for knitting and chatting. A very talented bunch, to be sure. It was fun to compare notes on the day and just relax. It was good to meet all these women. I even got to drink "the pink stuff," their official group beverage.

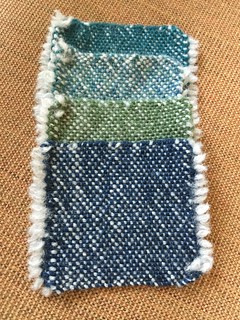
So much more happened this weekend -- great meals, relaxing walks, student tumbling exhibitions, art shows, a family book group discussion, and a gamelan rehearsal and performance. I even got to try my hand at weaving on Janelle's Cricket loom and brought home the resulting coasters. But despite being so busy, I came back quite refreshed.

My thanks to Sharon, Janelle and family for a wonderful weekend. I won't wait 10 years for the next trip.

Sunday, April 19, 2015

Spiral Galaxy Pillow

I finished up the second installment of my springtime throw pillow project today. Or at least I think I have.

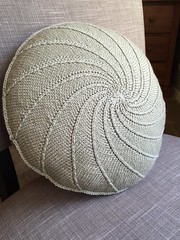
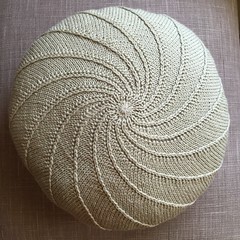
This pattern knits up much faster than I thought it would. And used much less yarn. It's a pretty simple three-round pattern. Increases happen in every one of the 15 segments on each round, but decreases happen in only two out of three rounds. This makes the spirals fan out in a rather gradual manner. Basically, you just keep this up until there are 17 stitches in each segment. Oh, and then you do the whole thing again for the second side, of course.

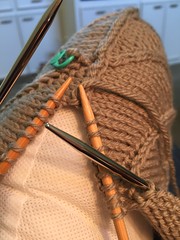
Putting it together started out rather tedious (I had 255 stitches to bind off), and then, about halfway round, descended into downright chaos. The two sides are joined with a 3-needle bind off. Usually, this is done on the wrong side of the work. But since you can't really knit on the inside of a soon-to-be enclosed space, this seam is exposed. About halfway around, I put the pillow form in. And then I happened to look down to see that I hadn't quite caught one of the stitches on the backside about 20 stitches earlier (caught with a greenish clip stitch marker in the picture). So I had to unseam backwards, while trying to keep the building pressure of the pillow form from popping the edge stitches out. I grabbed some DPNs to assist in corralling everything back together. I wanted to yell "clamp!" Like some surgeon on TV. Instead, I stopped for a few calming deep breaths and a picture before moving on. Disaster averted. Did I mention that the cables have started separating from the old Knit Picks interchangeable needles I got that when I first started knitting? That also involved over 40 dropped stitches and dropped profanities...

But all's well that ends well. And I think this is mostly finished. I still think this needs a big fat decorative button in the middle. I bought some wooden ones that I thought might do, but they're clearly the wrong type. They need to be the kind with the securing ring behind, not with holes visible from the front. And the yarn I have won't be able to withstand the springy force of this pillow form. So I'm thinking of taking it to an upholsterer for some guidance -- or to perhaps just do it for me. I'm not proud.

So, two pillows down -- one (or maybe two?) more to go. And I need to get back to those Moorish Stripe Socks.

Sunday, April 12, 2015

Stripes and Spirals

The flowers are blooming, the weather is warming, and I'm entering into my annual springtime knitting slump. I still have projects that are grabbing my attention, but I just don't seem to have enough time to do much knitting. Plus, the looming warmer days put me off the idea of handknits. I'll get over that soon, I'm sure. In the meantime, I've made some progress I can share.

It may be a bit premature to post this, but I finished the first of the Moorish Stripe Socks. There were options for knitting pinstripes into the heel flap and the toes, but I decided for solid navy. As Tim Gunn might say, these socks are already "a lotta look," so having three solid patches gives me eyes a chance to catch their breath. I know I'm confusing senses and mixing metaphors there, but you get the idea. The hard part for me was realizing that the pattern across the instep is meant to be continued as if the gusset wasn't there, so that when the gusset does eventually draw together, it just disappears into the pattern. I didn't get that at first, overthought things, and ended up having to un-knit a few rounds to get back on track. Such a lot of fuss for something that will be covered by shoes most of the time, right? Now to cast on for the second one and do all this all over again before Second Sock Syndrome sets in.

I also got started, yesterday, on the second of my pillow projects, the Spiral Galaxy Pillow. I needed something round that would knit to 16". This one is scalable out to nearly any size, really. It's designed by Daniel Yuhas, appears in 10 Secrets of the LaidBack Knitters, and came to me through the magic of Interlibrary Loan. Thanks, Dallas Public Library!

It's knit from the center out and is pretty simple to follow. Except for the instructions about slipping stitches and moving markers around. I overthought those, too, starting over three times before figuring out that keeping the same number of stitches between the 15 spiral segments is really the goal here. The first side is about 10" across right now. I still have quite a bit of yarn left, but I also know that it gets eaten up faster and faster as the circumference grows. I'm thinking of putting a big button right in the middle of this. Maybe a big wooden one? Or maybe a knit-covered one?
Not to let sheep out of the bag, but as it happens, I have a little trip planned soon that will surely shake me out of my spring slump. More on that later...

Saturday, March 28, 2015

Texas Two-Step

After finishing my pillow, I found myself this week in a bit of a lull between projects. For the next pillow, I had the yarn but not the pattern. It's coming, but I'm at the mercy of the Interlibrary Loan system. For a runner I'd like to make, I have the pattern but haven't settled on the yarn. So I decided to fall back on my favorite thing to knit. Socks. I'm not a big yarn hoarder, but I always try to have some sock yarn around.

I decided to return to one of my Charlene Schurch books, More Sensational Knitted Socks for inspiration. There are several stranded patterns in this book that I haven't tried. And with good reason. They take twice the yarn and are thus twice as warm as normal handknit socks. Not exactly necessary in Texas. But some of the patterns intrigued me, and I had just purchased two skeins of yarn that would work well together.

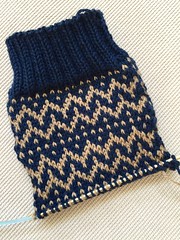
The pattern is called Moorish Stripe. I like the little one-stitch lice pattern interspersed with the geometric stripes. On the foot, a much jazzier stripe that is a variation ofthe one on the cuff runs around the sole and instep -- pictures to follow when I get there. The tan color contrasts pretty well with the dark navy, but I think the effect might pop more if the contrast color were a variegated or semi-solid yarn. This is looking a little flat to me. I still like it, but if I do more of these stranded patterns I'll try to remember that.

I bought this yarn last week while I was on spring break. I met my childhood piano teacher and longtime friend Leah for lunch in La Grange. Non-Texans probably know La Grange from its most infamous business, but it's a great Texas small town with lots of little cafes and shops. One of its big draws is The Quilted Skein, just a block off the Fayette County courthouse square. It's right next to the Texas Quilt Museum, which unfortunately, was closed.

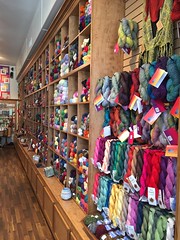
The Quilted Skein, which is dedicated almost equally between yarn and quilt fabrics, is one of the most beautiful yarn shops I've ever visited. Everything is new shiny wood, and the ceilings go up forever. The selection is really wide, with lots of yarns I'd never heard of. The back of the shop has large windows that overlook an intimate garden space. The staff were very friendly, too. I didn't get to meet the owner, Stephen, when I was there, but hope to get to on future trips. Because there will be many more trips down there, I'm sure.

Sunday, March 22, 2015

Spring Break Squared

Turns out my college's spring break framed my latest knitting project from start to finish. I cast on just hours after getting home a week ago Friday, and finished sewing up the seams this morning. I'd been wanting to make some cabled pillows to match our duvet cover and had bought yarn in colors I liked in January. Then I got side tracked making toys and socks. But as spring break loomed I found a pattern with cables I liked -- the Christmas Cables Pillow.

The only thing that read "Christmas" about this was the red color, but I had to change a bit more than my mindset to make this work. I had already bought some pillow forms, and didn't have one in the 16" square size that the pattern was designed for. I "knew" I had a 12" one, so I swatched carefully with the needles and yarn I wanted to use and reduced the number of horseshoe cabled from 6 to 4 to get close to a 12"x12" square pillow and set to work.

It's really an easy pattern to memorize. The edges have a cable motif that crosses stitches on every right-side row, and the larger horseshoe cables only cross every eight rows. The whole thing is made in one long piece and then folded over the pillow form and seamed on three sides.

I worked along until it was a little over halfway done and then grabbed the pillow form to see how things were looking. The form that I'd had in mind (and now had in hand) was for a 14"x14" pillow. Sigh. For a while I played with the idea of just stretching the hell out of it during blocking, but figured it would just look too stretched and strained. The cables would have been distorted beyond recognition. So I bought a new 12"x12" form. And, looking on the bright side, I now have an additional pillow size to experiment with. Not exactly a win-win situation, but close.

The new pillow turned out fine, with just the right amount of stretch across the form. The edges of the pattern have built-in knit column runways perfect for mattress-stitch seams. And I was able to line up the cast-on and bind-off edge stitches so that they flow into each other on the final edge seam -- it doesn't look that different from the opposite, folded-over edge. I only had one cable snafu, but it wasn't too difficult to rip back and get on the needles, even without a lifeline. The looser-than-usual gauge helped with that.

So now, I get to troll around for some new pillow patterns on Ravelry. I have a 16" circular form (yes, I just double-checked the size!), so I think I'll tackle that next.

Friday, March 13, 2015

Two by Fours

I started some new socks in late January, and just finished them last weekend. But I haven't gotten around to writing anything about them until today.

I knit these on size 2.25 (US 1) dpns. I go back and forth between using dpns and a long circular needle for magic loop sock knitting. Right now, I'm in a distinctly double-pointed mood. Sadly, I seem to have lost one of my favorite green Signature Needle Arts size 1s, so I may have to go back. I'm sure it will show up somewhere. I imagine it's lurking in a cushion or pillow, waiting to impale me at some opportune moment. I just discovered that you can replace these singly if necessary. I think I'll put that off since I still have the bare minimum of four, but it's nice to know it's possible to get single needle replacements. I love these sharp pointy things so much.

I didn't really follow a pattern, but used my standard personal sock recipe. I did a German twisted cast-on of 72 stitches and knit in a K4, P2 pattern to the heel. I executed an eye-of-partridge heel across half the stitches until I had 18 slipped stitches on each side of the heel. I actually ended up picking up 20 on the edges after turning the heel on the first sock, so I made sure I did the same on the second. Then it was just reducing the gusset back to a circumference of 72 stitches and knitting on down, with the 2x4 pattern continuing across the instep and stockinette across the sole. The toe was pretty standard, ending with 8 stitches left to be grafted.

The yarn was Trekking XXL, which I've used before. It's nigh on indestructible. And I can get nice man-sized socks out of one ball. I could have even made them a bit longer. I had close to 7 grams left over from100 when finished. This yarn was a gift from someone in Jeff's dance class! She used to have a yarn shop, and had some yarn to give away, so Jeff brought this home for me. How nice is that? Thank you, Karen! I'm really going to enjoy these.

Spring has finally sprung around here. My college is on Spring Break this week, and some of my time-off plans involve a yarn shop not far from my hometown. More on that soon, I hope.

Sunday, February 22, 2015

Here Be Monsters

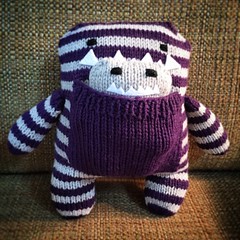
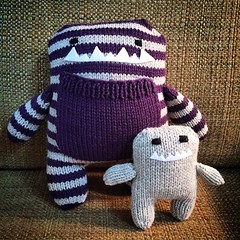
I've been doing some knitting since I last posted, but amittedly not much. I've been poking away at a pair of socks, but that's about it. Then, last week, we were invited to a 2-year-old neighbor's birthday party. I really wanted to make this little one something special. She's always happy to see us walk by with the dogs and likes to shout out our names -- a collective proper noun that sounds like "TeevenDeff!" It's such fun getting to see her grow up right before our eyes.

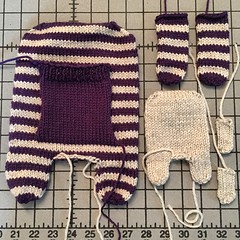
My friend Abbe had made the cutest toys for other tots, and I hit her up for info on a pattern I thought would be perfect for our little pal: Daphne and Delilah the Momma and Baby Monster by Rebecca Danger. It's a little striped stuffed monster with a pocket for carrying an even tinier monster. What 2-year-old wouldn't love that? I bought a copy via Ravelry and set to work.

I had some Cascade 220 worsted yarn in a light heathered gray that I'd already bought for a pillow project that has yet to get off the ground. And I found what turned out to be just enough worsted purple yarn leftover from some previous project. I think it might have been from a baby surprise jacket I made several years ago, in which case it's Berroco Vintage in a color called Petunia. I think they ended up working pretty well together.

I started this on Wednesday evening and wrapped it up this morning. It's a fun and fast project -- but does require paying attention to color changes, counting rows, and doing those little tricks to avoid color jogs in the stripes. It also requires a lot of sewing up, which always seems to rattle my confidence. But I managed to fudge and guess and figure out ways to do it that look okay.

The pattern calls for safety eyes, which I couldn't find locally on short notice, so I embroidered some instead. I think the eyes turned out a bit squarer and more menacing than I intended, so I compensated by curving the glued-on felt teeth into slight smiles, hoping to soften their countenances somewhat. Hopefully, they'll come across as goofy and friendly, rather than the stuff of nightmares.

It was a lot of fun getting to visit with our little host's cousins, aunt, uncles, and grandparents this afternoon. Many thanks to her parent for inviting us! We had a marvelous time. We left before the guest of honor got around to opening her gifts, but we see her nearly every day, so I'll give a report when I found out what she thought.

Happy Birthday, Amelia!


Sunday, January 25, 2015

Deflect Reflection

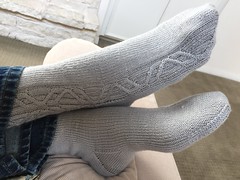
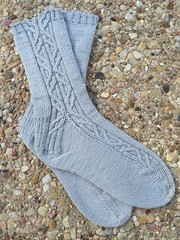
This afternoon I finished up my latest pair of socks, from a pattern called Deflect.

In my previous post, I spent some time pointing out flaws. Not this time. Okay except for the odd unevenness in the picking up of the gusset stitches on the left sock. But besides that, I'm pretty happy.

I had a bit of panic toward the end of the second (or, right) one. Even though I thought I'd divided the hank evenly by weight when winding it into balls, I either mis-weighed or wasn't consistent with my tension. The first sock had several yards remaining when it was finished; I saw that the second sock was going to cut things closer. Much closer, it would turn out.

When I finished grafting the toe on the right sock I had exactly 5 inches left over. Barely enough to weave in the ends properly. I don't think I've ever cut a project so close. I still had the leftovers from the first sock, but having to use a scrap to finish up the toe would have been so demoralizing. I kind of dodged a bullet this time. That's what I get for ignoring the yardage listed in the pattern. It seems I got lucky this time. All's well that can be woven in well.

I like so much about this pattern. I like the fact that there is a left and right sock, and hope that I can remember that when wearing them. I can imagine looking down and seeing these cables snaking down into the inner sides of my shoes (shudder). I like how the cables split and their little cablet spawn continue twisting on their merry way down toward the toes. I worry that they might sag a bit doe to their sparse ribbing, but we'll soon find out. Overall, a cool pattern.

What's next? I'm thinking pillows. We just got a new duvet cover that has a lot of earth tones in it. Rather than try and find what a friend refers to as "show pillows," why not just make some? There a lot of great patterns out there in all kinds of shapes -- square, rectangular, hexagons, round, tubes. I've seen some stranded patterns that might be fun to play with. And the cable bug hasn't departed, so there may be a few more twists and turns in my near knitting future. I've also seen some good cabled pillow patterns out there. I'm toying with the idea of coming up with something on my own. If anyone has a favorite cable stitch dictionary or design book that you could fill me in on, I'd appreciate it.


Sunday, January 11, 2015

Deflect Defect

This week has been full of working on those little chores that get put off -- a little tree limb trimming, fixing the garage doors, catching up on housework. One of of my self-assigned tasks was to tidy up my knitting basket that I keep in the living room. In doing so, I found some yarn I'd purchased last spring and decided to use it for a new pair of socks.

The pattern is Deflect from the Deep Fall 2013 issue of Knitty. Most of the sock is straightforward, but the two socks are sided for specific feet, with a cable that runs down the outside of the leg down to the toes. This cable starts in the cuff ribbing and splits at the gusset, with half of it trailing off into the heel flap. The heel flap is half cabled, half slip-stitch. And this smooth Shibui Staccato yarn in the color Ash is perfect for it.

However, I got off to a rocky start. It probably had something to do with knitting while binge-watching Vikings, distracted by all the woven and knitted garments, among, um, other things. I swear I saw a woman putting out hanks of yarn in the Kattegat marketplace in the last episode of season 2. See how easy it would be to be distracted? In my daze, I left out two 8-round cable sections in the pattern. In the first picture here, there should always be two cables leaning in and then two cables leaning out. You can see that twice I left out the second leaning-in cable. So I ripped it back.

I paid more attention the second time, and it looks better now. Cables are so strange to work with. It can be difficult to discern from the charted pattern what the resulting design will be. In a pattern like this one , it doesn't really make much difference visually if a small error is made. But this was a pretty big error, and it did make a difference in length, which is how I caught it. The sock just looked a bit shorter than it should have. Plus, not fixing it would have bothered me to no end for as long as I'd owned these. Take that, Loki!

I'm getting down to about 16 rows left for the left foot and its cable before decreasing for the toes. I think I have enough yarn left. And then it's on to foot two, where I get to do all these fancy cables in mirror on the opposite side of the foot. Here's to more luck the second time. Skol!


Sunday, January 04, 2015

Grayscale Hat

Still jetlagging a bit from the trip home. I didn't have anything on the needles for the second half of our journey after finishing the cowl for my sister-in-law, but that was okay. We were so busy. But on the flight home I got fidgety. I felt stupid carrying knitting needles on a plane without any actual project on them
So when I got home, I got to digging through some odds and ends of yarn. I remembered that I had some leftover Shelter from the sweater I made for my brother last year (proudly, I can say that he wore it while I was there!) and figured I had enough to make a hat.
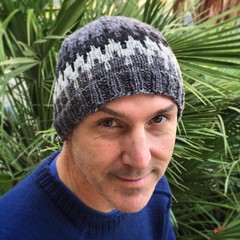
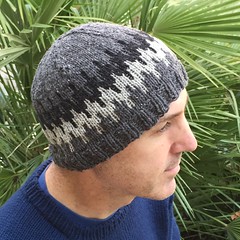
I found this four-stitch colorwork motif that I liked in Ravelry and figured I could adapt it. I've seen something similar in vintage ski sweater patterns from the 60s. I added an extra color change from the second color back to the original and had just enough. I'll put details in the notes at Ravelry later, but here are the basics:
I cast on 100 stitches. Originally, I tried 112, but that turned out too big -- you were right, Staci! She helped me unwind the colorwork I'd knit up so far. Which I think is the knitting equivalent of the sorority girl holding her sisters's hair back while she yaks. Or something like that. In any case, I appreciated the help.

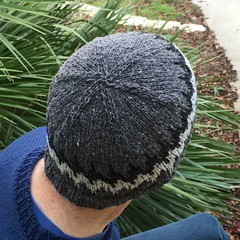
I did eight rounds of 2x2 ribbing on size 6 needles, then switched to size 7 and knit two more rounds. Then I did the colorwork section, knitted two rounds plain, and then started the decreases. According to this neat hat decrease calculator I found, I needed 102 stitches to get six even sections of 17 stitches each, so I increased two stitches randomly just before decreasing. That kind of bugged me, but I'm trying to let that go.

The first time I tried the decreases, I neglected to note that I had to decrease on each side of the 6 markers. I only did it once. And despite my years of knitting experience, I didn't think it was weird that I had to draw the yarn through 54 stitches (!) to close the hat. But I sure thought it was weird when I had finished pulling the yarn all the way through. Plus the yarn snapped, which probably wouldn't surprise anyone who has worked with Shelter. It looked like the ribs on the top of a pumpkin. A quick instructional re-read set me straight, and I ripped it back and fixed it. Much better the second time around -- only 6 stitches to pull through! And it was perfect for the chilly dog walk this evening.
I like that I repurposed and re-used these scrap ends. I wonder what other little treasures might be lurking in bins, bags and boxes around here?