Showing posts with label Doily. Show all posts

Sunday, April 29, 2018

Don't Dawdle, Amaryllis

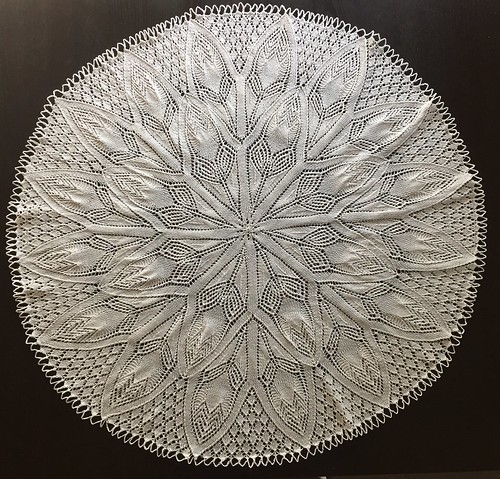
Unlike Marian Paroo's piano student of the same name in The Music Man, this Herbert Niebling Amaryllis pattern seemed to fly off the needles. One month exactly from cast-on to blocking.

There's just something about the symmetry and pattern of lace knitting that I really enjoy. To start from just 8 stitches in the center, expanding outward in an expanding spiral that gets increasingly slower as you go. By the end, there were 960 stitches on the needle, with each round taking upwards of an hour to complete. And all done with one long piece of cotton thread and just a few a basic stitches. It's all so very satisfying, like putting together an intricate puzzle or constructing a complicated model. I really do like lace knitting more than I ever thought I would. And these Niebling patterns, while intricate and seemingly complicated, are really quite accessible to more knitters than you might think. They're definitely worth a try.

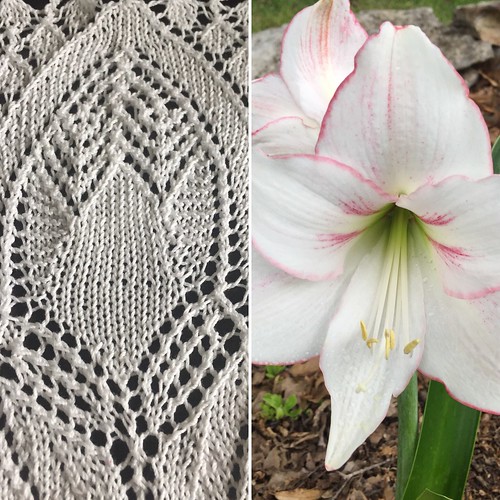
Detail of the pattern alongside my neighbor's Amaryllis
Unlike the two Herbert Neibling patterns I tackled last summer which were roughly oval-shaped (Georg and Flieder), the Amaryllis pattern is round. So there was no picking up of stitches to connect different sections -- just one giant spiral -- which was a lot easier. However, putting in life lines across so many stitches was a bit problematic - but necessary. A few times I found mistakes -- usually right after putting in a lifeline, but in each case I was able to figure out what I'd done wrong, ladder down the stitches, and re-create the pattern correctly. This is so much harder to do in lace than in more traditional stockinette knitting, but do-able if you pay attention to which row you are on. And if you're patient. And if the problems are fairly simple. I found that the surest way to avoid problems was to do a lot of counting as I went -- this left leaning section has 13 stitches on this row, the yarnovers in this direction always take place after 4 plain stitches -- that sort of thing. I have a tendency to do that in my head about all sorts of things anyway, so I kind of find it soothing.

Sample from Amaryllis pattern
This pattern can pretty much be done from the charts -- I didn't have to rely too much on the brief instructions in German that I'd run through Google Translate. There was one section I couldn't quite figure out, which features a small box near a place where the chart seemed to shift over. It looked like it read 5 M. z. , although it was a bit fuzzy. The key in the original pattern reads Maschen zurück d. h. so viel Maschen der folgenden Runde, wie die Ziffer im Zeichen angibt, auf die letzte Nadel der vorigen Runde rechts stricken. Google Translate kicked this back as Mesh back d. H. knit as much stitch as you want on the next round as indicated by the number in the symbol on the last pin of the previous round on the right. Even this didn't quite make sense to me (wish I could figure out what that d. h. abbreviation means - maybe something about the round marker?). I ended up removing the beginning-of-round stitch marker, knitting 5 stitches, replacing the marker and continuing. Seeing that visual 5 stitch difference between rounds 107 and 109 made me think this was the way to go. For the rest of that round, each of the 16 markers (one for each Amaryllis blossom) had to be slid over 5 stitches. It seemed to work. And that strange little 5-stitch section of stockinette has no effect on the entire piece, or course. Not sure if this is what Herbert intended, but it's what happened.


Blocking this thing was a bit of a bear. I used my thinnest blocking wires and ran them around the outside through every other gathering of stitches at the base of each of the 224 edge points. Then I bent them gently into arcs and tried to get a uniform diameter. It ended up varying between 32" and 33" inches across. Sadly, one of the blocking wires bent permanently. But I was able to get it more or less round. Then I needed to pin out the points. I used all of my T-pins and a bunch of yellow-headed pins that I'd gotten at some point. I still had about 50 points to pin. I found a package of safety pins and opened up each of those. Then I grabbed 8 pins from a shirt I'd just bought and unwrapped. Still two short, so I grabbed some cork board push-pins. Whew. It was close. Janelle told me that T-pins make great stocking -stuffers. Just sayin'. While it was damp, I sprayed the whole thing with spray starch (need some more of that, too) and by the next morning it was dry. I love that swishy sound it made when pealing the stiff cloth off the blocking board. Since removing it from the pins and wires, it has tended to gather in a bit and won't lie quite flat. I think it would work better if it were draped over a small table. Still not entirely sure what this tablecloths ultimate fate will be. But so glad I made it.

What's next? More lace, I think. But brightly colored. And much softer... Thanks for stopping by!

Sunday, August 06, 2017

Lilac

As it gets hotter and  hotter and the world gets crazier, all I want to do is stay indoors and make pretty lacy things.

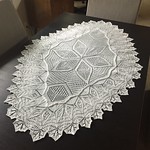
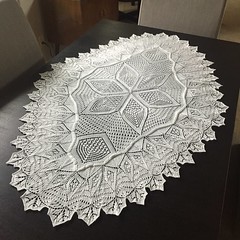
This one is Flieder, another Herbert Neibling design, but about three times larger than the Georg doily I made last month. Flieder is German for lilac. Neibling produced more than one pattern with this name, but I'm not sure how he saw anything bout lilacs in this particular pattern. The central flower has six petals, and little lilac blossoms have four. Still, it's Neibling's world and we're just living in it. Flieder it is

While shopping for thread -- and I got each of the three balls from three different craft stores in Austin --  I saw that Aunt Lydia's Classic Crochet 10 comes in a light purple, dare I say, lilac color. But that would have been a bit too literal and I would never have used it. White is the way to go with this, I think.

For those interested in such things, here's a little schematic of how this particular sausage was made.The central portion, marked in green, starts with 6 stitches in the middle, one for each petal that grows outward, knit in the round. After completing that, the two sections marked in, let's say, lilac, are knit flat (back and forth). After this, stitches are picked up around the purple sections along with the held live stitches from the remainder of the green so that the work is again done in the round. Four rounds of dense purling with the thread held doubled follow, and then 20 repeats of the pattern are knit up to the orange line. After that, the pattern shifts to 40 repeats. That's a lot of stitch markers. And a lot of stitches on the needle. By the end, there were 1,440 stitches on a 32" needle. I don't have a US0 (2mm) 47" circular needle. I wish I did. Things got quite crowded. I also experienced that weird thing with center-out projects -- the closer you get to the end, the slower your progress. It can be a bit maddening. Everything up to the orange line took 5 or 6 days to knit. Everything outside of that took an additional two weeks.
Please don't think that all this explanation is meant to impress, or to warn you off lace knitting. My point is that it's not nearly as hard you might think. I've made two oval examples, which are probably more fiddly than most. I would think that a square table cloth or round doily would be a bit easier, but just having a basic idea of the construction, using Google Translate, and finding some online German/English knitting glossaries is all you really need to get started. Then it's just a matter of not dropping stitches and not loosing one's place in the pattern. And time.

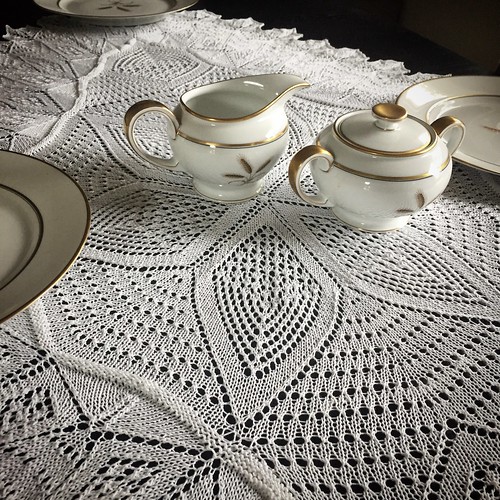
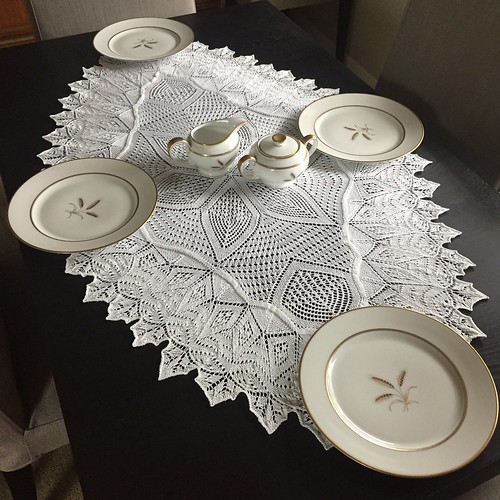
This fits our dining table perfectly, which was a fluke, really. I just lucked out on that one. I'll likely just use it for special occasions. This morning, I set out some of my Grandma Self's china on it to see what it looks like. The story in the family is that my grandmother didn't really even want fancy china, but my grandfather insisted that they get some while they were living Germany after WWII and had the means -- they'd been so poor when they got married during the Great Depression. It came down to me eventually. A scent I noticed as a I was pulling it out of the cabinet triggered a sense memory of my grandparents house and Thanksgiving dinners in San Antonio. And they look great together, I think, German dishes on a German-designed doily. My family has had so many connections to Germany -- my Kohrs and Weber ancestors immigrating from there to Texas in the 1850s, my grandparents and father living there 100 years later, and my brother's family making their lives there now.

Only 109 days until Thanksgiving!


Saturday, July 08, 2017

The Doily Chronicle

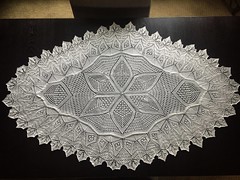
When I started knitting twelve years ago, I would have scoffed at the idea of spending time and effort making a lace doily. But today, I finished my first one -- the Georg doily designed by Herbert Niebling.

And I say first one, because I'm going to likely make more. Yes, they're challenging and fiddly, but as a process knitter, theses are the things I kind of like about knitting. Seeing the symmetry inherent in the pattern gives a certain satisfaction. And observing how the squares and symbols on a lace chart translate into leaves and petals makes me want to keep going to see what happens next. Then, of course, there's the challenge of keeping all the balls in the air as it grows and grows. The first round of this project, started in the middle, had 8 live stitches. By the time I got to the cast off, there were nearly 500.

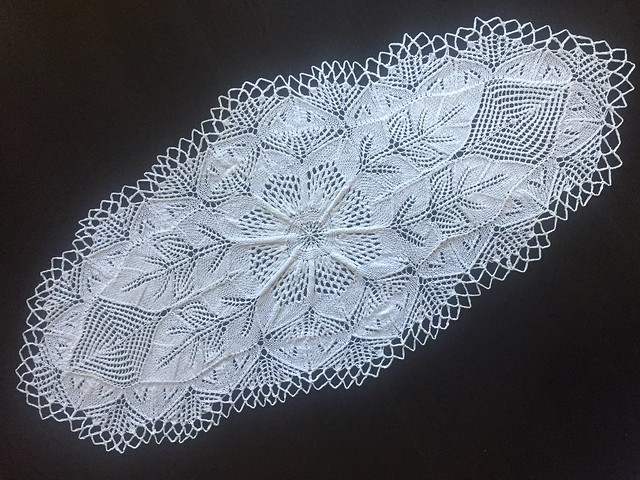
Here's a walk through how this thing is constructed. Starting at the pinhole cast on in the center, the central flower is eight repeats of the same motif knit in the round, creating the petals, with slight variations on opposite sides to set up the oval extensions. Those sections are knit flat (purling on the back side) out to the ends. Then, stitches are picked up around the oval extensions along with the remaining live stitches from the sides of the central flower.  A 20-round pattern repeated 16 times around the whole doily created the leaf points and lace edging.

Then, all that's left is the crocheted points around the outside. The first round serves to bind off the edges of the knitting and create little loops. The second round builds on those, plus pulls the ones opposite the leaf points together. I was intimidated by this part because my crochet fu is not strong, but I think I managed. It was a little tricky to figure out how do the attaching, but I just picked a method and stuck with it. I found myself really wishing my crochet skills were stronger as I finished this up.

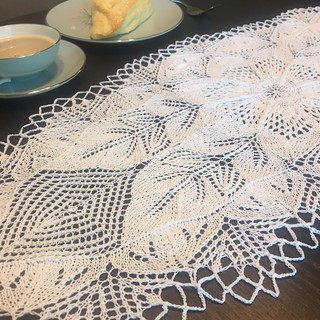
I completed the crochet edging yesterday afternoon and went online to find out some blocking options. One was to mix some liquid starch and soak the whole thing, but the video examples I saw led me to believe that it would end up too stiff. I wanted it to have some structure, but I didn't want it stiff as a board, either. I decided to go a bit simpler. I soaked it in warm water (which left the water strangely murky -- this is just cotton, what was up with that?) then placed it flat on a towel draped over my blocking board. Then I got out the regular can of spray starch that I use when I iron shirts (ahem, which isn't often) and went to town. I pinned out all the outer loops to make points. This part was fairly tedious. Not sure I did the tidiest job, but it looks pretty good overall.

In the original design, the central flower, a few rows in the middle and the crochet loop points were all done in a black yarn (see below). Couldn't quite see the point in that -- I thought it looked a bit odd. But tastes change. Consider that one of the staging shots for one of the patterns in the book features an ashtray with a lit cigarette resting on a doily. Not something you'd likely see in a pattern book today!


I enjoyed this project way more than I had anticipated. I was surprised by the sense of dimension in the finished object. The way that the fields of stitches and lacy holes ran in different directions created textures and shading that I hadn't imagined. I'd always though of lace as being very two dimensional, but it doesn't have to be. I was so impressed at the thought and care that Niebling put into this design so that everything lined up and worked together just so. I want to knit more!