Sunday, April 03, 2016

Vivacious Vividness

This morning, I finished up the first of a series of baby blankets slated for little ones arriving mid-year. They're the perfect things to be working on with all the beautiful springtime blossoms appearing everywhere.

As you may have guessed, bright colors aren't exactly my thing. But I must admit working on this was a real feast for the eyes. As soon as I got used to a color, it was on to the next one. Deciding how to arrange them was fun, too. A few colors fight each other in proximity -- sewing that reddish-orange and teal together actually hurt after a while -- but when you step back, I think it works. As you can see, a certain darker orange color was ditched for a deep red -- almost a maroon. Around here, that switch has serious implications that non-Texans may not fully grasp. Let's just say that I made this change with a mother's loyalties in mind...

I modified the pattern by adding an attached I-cord edging in gray -- a nod to one of my preferred shades. It took a while, but it helped. Despite blocking each square to 8", over time the garter edging reigned some of them back in closer to 7.5". After sewing the squares together, there were subtle pulls and dips, especially around the edges. The I-cord kind of works like a topping on a cheesecake, hiding the little imperfections and smoothing everything out to a nice uniformity, more or less.

Up next, I'm going to make a variation on this -- look for more "me" in this one. And then yet one more baby blanket, but on a totally different theme -- I think making 32 of these panels will be just plenty for one year.

But not too soon. First, I'll be working on a bit of lace. I found some lace-weight yarn in a dark greenish gray (now that's a color!) in my stash right about the time I was thinking of another gift I need to make. I think I got it in a yarn swap with friends several years ago. I forgot how much I love knitting lace. And how much concentration it takes. I'm going to be putting in a lot of lifelines on this one.

Hope everyone's spring (or autumn) is full of beauty and creativity!


Monday, March 14, 2016

Out With the Old, and...

As of two weeks ago, I had reworked one of the sleeves on my Sawyer Sweater and was beginning the second. Today, on the eve of the Ides of March, I've finished the second sleeve and sewn everything back together. Much better now. But not as much room to conceal knives...

The sleeves are still longish -- with my arms at my side they hang to the base of my thumbs. But rolled up they look and feel fine without all the sags and bags of the earlier iteration. The overall effect is much more to my liking. I'm glad I took the time to correct this, and did so without letting it languish until our next cold snap. While taking theses pictures, here in the last week of winter (technically), the temperature was 92°.

It feels good to finally put this project to rest and move on to the next knitting theme: babies.

I've heard many knitters remark on this phenomenon. Babies arrive in batches. It never seems that you have just one pregnant friend, relative or coworker. As soon as you hear about one, the news of impending blessed events just cascades. So I have at least three bundles of joy in my scopes, and I want to make a little something special for each of them.

I wrestled with whether to post anything about any of these projects, so as not to spoil any surprises. I hope to keep things vague enough so that any of the expectant moms that stumble across these will still be left guessing as to my plans. Plus, I just can't not share these.

First up is a baby blanket pattern called Vivid designed by Emily Wessel and available at Tin Can Knits. It's made with little square panels that are knit in bright colors and sewn together. The total number doesn't matter, but I've chosen 16 separate colors and am planning a 32"x32" blanket made up of 16 8"x8" squares. I'm using Knit Picks Swish DK Superwash.

I'm still playing with color placement, but I really liked what one Ravelry knitter did, aligning color families from most saturated to palest. I had to substitute an orange for one that had been discontinued -- you can probably tell which one from the photo. But I like having a column of red-oranges, blues, yellow-greens and purple-pinks. I'm almost to the halfway point and have enough yarn leftover for a very Steven-ish variation on these. The panels don't take as long as you might think to knit up, and the pattern is surprisingly easy to memorize.

Vivid, no? Just the thing to be knitting as we head in to spring, I think.

Sunday, February 28, 2016

The Fight to Pare Arms

I finally had to admit that I wasn't happy with the length of the sleeves on my recently-completed Sawyer Sweater. Something needed to be done.

At first I thought I could just unravel the end and rework the ribbing further up the length of the sleeve. But since I don't do this sort of thing often, I forgot you can't simply unravel the cast-on edge of a ribbed fabric piece like you can the cast-off edge. I knew this 9 years ago, but have since forgotten (see link below). Something about the moving of the yarn in front of and behind the work locks it in in that direction. It's possible to pick the yarn out through each stitch individually (which I laboriously did for a few rows), but that would eventually wear the yarn, and my patience, to a fragile thinness.

My second approach was to try and define a row on the sleeve from whence I wanted to start the cuff ribbing anew, and then cut the yarn. It's unnerving and plays havoc with the stitch count, but it's possible. I've done it before. But not this time. The nature of this pattern is such that it's very difficult to define a row in the completed work. I kept trying to run a line through what I thought was a row only to realize I was working on the diagonal, as this fabric naturally runs.

That left Plan C, which was remove the sleeves, unravel them (from the cast-off edge!) and start them over -- this time without the extra inch that I thought I'd needed the first time around and measuring more carefully. Daunting, but necessary. Ive got the first one finished and will start on the second today. As you can see, the length is coming out much better. The schematic in the pattern tells me it should be 25" long. This second attempt is 25 ¼" long. I'll take it.

It's going by pretty quickly now. I almost feel I can knit this pattern in my sleep at this stage. It's difficult to get motivated to do this kind of alteration for several reasons, among them the feeling that I should know better by now, the lovely spring weather and other planned time-sensitive knitting projects. But ultimately it feels good to be addressing this now so that it will all be squared away in 11 months when winter comes again.

Sunday, February 07, 2016

Sawyer Sweater

I finally finished it up today!
As of this morning, I had completed all the large pieces, sewn the shoulder seams together, and added the collar. All I had left to do was add the button bands, sew on the buttons, and seam everything together.

One of the things I'm not used to doing with patterns is knowing that when it says to make the button band a certain length, the pattern expects it to fit in a certain place and way -- and I should check that. I made the button band and the buttonhole band the requisite 8.25", but when I held them up, I could see they were an inch short. So I added an inch to the button band, and totally remade the buttonhole band, since the old one had holes in all the wrong places. This set me back a bit.

Once fixed, the afternoon was devoted to sewing. Because Shelter is a fragile yarn when pulled, it doesn't work well for sewing seams (ask me how I know this), so I found some old chocolate brown sport weight yarn that I'd used to make some gloves several year ago. Perhaps not an ideal match, but it doesn't show anywhere, so it did the job.

This pattern doesn't lend itself well to invisible seaming -- which, as the programmers say, is a feature rather than a bug. However, it's interesting to note that none of the model photographs in the pattern show any of the seams on the sides or on the sleeves. I can't remember who it was that pointed this aspect of pattern marketing out to me years ago. Flaws -- or at least details that some might find off-putting, don't make it into photos. I get it -- we all have a good side. And the seams don't bother me -- I only really noticed when I referred to the pattern to see what they were supposed to look like.

Another takeaway that I didn't catch onto in the pattern photographs was that one of the models had the cuffs rolled back. You may recall that I'd added an inch to the body and the sleeves to accommodate my anatomy. Didn't need it in the sleeves, it turns out. They go all the way to my knuckles -- which wouldn't be a bad thing on frosty mornings -- but not what I'd planned for. I did hold them up to my arms before sewing things together and saw that they looked a bit long, but I've been burned before and ended up with short sleeves. This time, it seemed I overcompensated. But I can live with turned back cuffs.

The buttons turned out great. They are a bit of a tight squeeze for the holes I made, but they work. They are also a little heavy, being metal, and tend to make the collar sag a bit when not in use. But I still like them. I'm not entirely sure I got the bands anchored at the bottom of the Henly opening quite right, but they're secure. If there's one aspect of sweater making that makes me feel like a fraud, it's sewing on buttons. I never quite feel like I know what I'm doing. I watch videos of HongKong and Saville Row tailors whip through it in a minute and think, "how hard can this be?" And 30 minutes and wads of snarled thread later, I know just how hard. Let's just say you won't be seeing photos of the back of the button band.

In the final assessment, though, I love it. It's the tiniest bit big, but that's okay. I was always thinking of this as an outer garment. The sleeves are a bit long, like I said. But looking at the photos Jeff took this afternoon, I have to admit it turned out pretty good, despite my tendency to sweat the small stuff. Thanks to my knitter pals who gave me the birthday gift of this yarn. I'm going to treasure this for quite a while. And now, I think I'll go walk the dogs in it before summer arrives tomorrow.

Sunday, January 31, 2016

I Walked the Line

I kept a close watch on this sleeve of mine
I kept my eyes wide open all the time
I saw the signs and now I'm gonna whine
I'm out of twine, I walked the line

My apologies to Johnny Cash, but this song has been going through my head all day.

I finished the first sleeve of my Sawyer Sweater late Friday after piddling away at it for a few weeks. When I finished, I saw that I only had a a little over two balls of yarn left for the second sleeve and the collar. I weighed the first sleeve -- 104 grams. I had 108 grams of yarn left, so clearly I would need to get more yarn for the collar, but at least I had enough for the second sleeve with a tiny bit to spare. Or so it seemed.

Saturday afternoon, I rode to my LYS and checked -- they were out of my dye lot, but I was okay with the collar being from a different lot, so I got two more skeins of the closest match. There was enough of a difference in the texture and the stitch patterns between the body and the collar that no one would notice on a galloping horse. While there, I got 5 buttons as called for in the instructions. I admired some wooden ones and even considered some rugged antler buttons, but decided on these metal ones with a yellowish patina that might bring out some of the yellow/gold flecks in the yarn.

This weekend I was able to get a LOT of of knitting done. I cast on for the second sleeve Friday night and all but have it done now. That's right. Almost done. Because I'm going to have to dig into one of the new dye lot skeins for the last 8 rows. Grrr. Maybe I need a better scale? I didn't think adding an extra inch to the body and sleeves would eat up that much more yarn, but now that I think about it, yeah, it would. Still, I kind of wish patterns would indicate a bit more exactly what "11 balls" means. Does it mean "10 balls and one more yard" or does it mean "Every freakin' last centimeter of 11 balls -- you know what -- better make it 12"?

So, I have a bit of ball winding to do, followed by a few more rows, some binding off, putting on a collar and some buttons, and some sewing together. And I'm rapidly feeling my enthusiasm ebbing away, despite my recent rapid progress, not least because of the unseasosonably warm weather. It really was "June in January," and not, as Bing sings, "because I'm in love," but because it was 85° Fahrenheit. In January. Beautiful, but I'm just not ready for it yet.

Sunday, January 17, 2016

Match Game

Hit a milestone on my Sawyer Sweater today; I've completed the front and the back.

Once done, I placed the front on the back to see if all the decreases on both pieces matched up and mirrored each other. And they do. But doing this also revealed a problem I've never had before; the front is about an inch wider than the back. My stitch counts were all correct at all the check-in points in the pattern, so I must have had a mid-garment gauge issue. Was I more tense while knitting the back -- or more relaxed knitting the front? I don't think it's going to make a huge difference in the finished sweater, but I'm a bit disconcerted. I hope it doesn't become a trend. I'll see when I start the sleeves.

The top of the front involves dividing for the Henley and also decreasing for the armholes. It's one of those "at the same time" instructions that are so hard for me to follow. I had to draw a little diagram to keep track of where I was on each side. All this while juggling two balls of yarn and following new selvedge edge instructions for certain rows. Not sure I quite followed that last part correctly, but I don't think it will make a huge difference. Just about 20 or so rows, but so much to keep track of. The shoulder decreases in the two pieces match, so I must have gotten the gist at least. But my brain hurts.

I'm really liking the texture that this stitch pattern creates. It looks very different from close-up and from afar. I get a kick out of looking down the long diagonal rows of little bumps. Except when I see mistakes. In this pattern, and for me, this means ripping back rather than trying to fix it with a crochet hook. If you do see any breaks or other anomalies in the pattern detail pictured here, kindly keep it to yourself at this point, please.

I got to have lunch and go yarn shopping at Hill Country Weavers with my sister yesterday. I was all prepared to be a fount of knowledge about all things fibery, but she was on a mission. She new she wanted red and black variegated yarn for a scarf for her daughter, and zeroed in on several samples. She ended up with a super-soft alpaca/merino blend from Cascade called Color Duo. I think the one she chose is called Red Queen. Within hours she texted me a picture of several inches of neat and tidy rows. She's really taking off with knitting and I couldn't be prouder!
 

Thursday, January 14, 2016

Out With the Old

I'm back from our trip to Germany and Denmark. And I didn't knit a stitch the whole time. I just wasn't feeling it, for some reason. It wasn't until I was on the plane home that I hauled out my latest sweater to do a bit of work, promptly found a mistake a few rows back, tried to fix it with a crochet hook, made a mess of that, and then, somewhere over the tip of Greenland, stuffed it back in my bag. Sigh.

I did get to wear cozy handknit socks every day, keeping my toes warm in the frigid weather. But I never visited a yarn store; we just never were in the right place at the right time. However, I did see a few people knitting, and saw some nice knitwear on the streets everywhere we looked.

And also this gem -- a mural at a construction site near the Marble Church in Copenhagen. It featured tropes from pastoral art scenes with weird twists, such as UFOs over a group of milkmaids, a giant cat looking in a window at some feasting revelers, and this shepherd, riding a dog and knitting.

When I got home, and packed away some of the things I'd taken to keep warm, I realized that it was time to let go of some of my early handknit sweater projects. A few were just failures, like the weirdly wide-lapeled green cabled vest I thought I would love, but most were just too big. And although they represented a decade of learning new techniques and hours of work, I just didn't need them any more.

So, out with the old. I told each one goodbye in a Kondo-esque way, and sent them off to charity. I suppose I could have recycled some of the yarn, but I didn't. Clockwise from the upper left, they are: Men's Sweater by Staci Perry (too big, but I'll be making this again!), Herz & Baum Vest (weirdly shaped shoulders), Branching Aran Guernsey , Cobra Sweater, ZimmerZipper Cardigan, and the Whitfield Jacket (all too large) . All of them served their purposes, whether for learning or as something to keep me warm, but it was time for them to go. I'm only a little sad about it. I'm glad I still have records of them in Ravelry, though, so I can remember what I learned from them, and perhaps make newer, better versions later.

Almost have the front of the Sawyer Sweater finished. And this weekend, I have plans to go yarn shopping with my sister and I'm eally looking forward to it. So much newness to look forward to in this new year!

Monday, December 14, 2015

Warm Feelings

This week was for starting on a new sweater for myself and hanging out knitting with my sister.

The sweater pattern is Sawyer, featured in the BT Men Vol. 2 lookbook. I like all the sweater patterns in this collection, but this particular one jumped out at me. Thanks to a generous gift card for Hill Country Weavers that I received from dear friends upon becoming a gentleman of a certain age, I was able to get the suggested Brooklyn Tweed Shelter for this project. And, because I thought the particular shade used in the lookbook sample was pleasing to the eye and jibed with my palette, I went with that, too. So the sometimes agonizing worrying over choosing the right fiber and color was easily taken care of.

However, this stitch pattern, while easy to execute and memorize, is a bear if you drop a stitch. Every other stitch is knitted into the stitch below the needle on the right side in order to get the thick textured effect. But woe be unto you if you wander off pattern. It's really hard to fix. At least four times I've noticed a spot a few rows below where I've repeated a stitch and thrown off the whole diagonal effect. I can't seem to figure out how to correct these with a crochet hook without the diagonal pattern looking broken and weird afterwards. I just have to tink back and start over. But on the upside, I am getting a bit better about paying attention to what I'm doing.

Today, I did what I resolved a few posts back and got together with my sister to practice knitting. It was fun to sit and give her tips -- seeing her instinctively do the same things that I did as a beginner knitter. She's a natural continental knitter (yay!) and she knocked out several ridges of respectable garter stitch as we sat and chatted about family, school, work, our families, our dogs. Our Christmas gift to each other is to make time to get together and do more of what we did today. I'm excited to think about what she'll do with knitting. Oh, and our oldest nephew hung out with us too, just back from his first semester in college. He seemed to be settling in to the swing of things quite well.

Next week we'll be off to see my brother's family for Christmas in Germany, with a little side trip around the New Year. Hopefully, I'll have some knitterly news to post while we're there.

Merry Christmas and happy holidays everyone! Here's hoping you have something handknit to keep you warm and fond memories of time spent with those you love.

Saturday, November 28, 2015

No Mean Feets

The past few weeks have left me little time for the needles, but I have managed to get a few things completed.

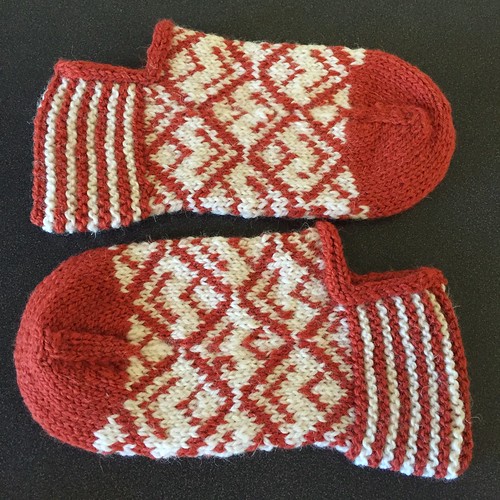
First of all, are these stranded slippers, called baffies in Scottish parlance. They're the first pattern in the Seven Skeins club I subscribed to recently. I was going to postpone making these until later in the new year, but I wanted to make something handknit for a friend of mine with a November birthday and I thought these would be just the thing. I hope you like them, Mary Peace!

They're pretty easy to make. Although you can see I had some tension issues, they're really not as different in size as they appear in this photo. They're made toe-up until the garter stitch striped heel. That's worked flat and then joined with a three-needle bind-off. Then it's finished off with an applied I-cord edging. A smart design, really. The white color is called Ptarmigan and the other is called Highland Coo after the shaggy cows of The Highlands. But everyone in Austin thinks it's UT Burnt Orange. I have to admit it's pretty close!

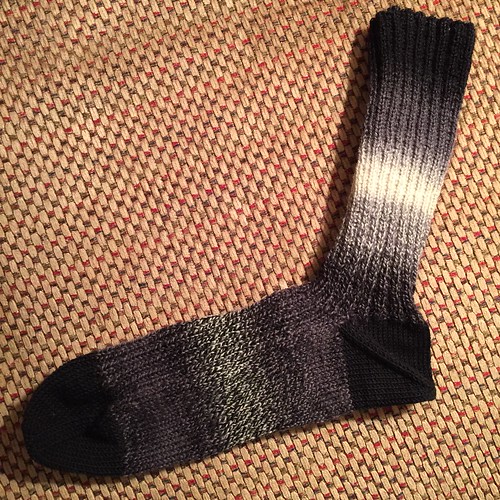
I've also finally gotten around to completing the first of my Domino socks using the ombré-spun Crazy Zauberball yarn I got in Maryland. The rainy, gloomy weather in north Texas this long holiday weekend has given me plenty of time to catch up with this project. It's been on the needles for months. I usually pick it up when something else gets too big or complicated to be easily portable, so I hadn't been working on it with any regularity. The black toes and afterthought heel are a bamboo/wool/silk combination called Panda Silk. This yarn would look better on 2mm needles instead of the 2.25mm that the rest of the sock is knit with, but it'll do. I turned once again to Janelle's excellent instructions for an afterthought heel. So helpful! One more sock to go...

I'm getting pulled in a lot of directions inspiration-wise. I've got my eye on a pullover pattern, I need to make a hat for a friend, I'm kicking around blanket ideas, and I've been wanting to try my hand at a houndstooth double-knit scarf. There's never not something to knit!

Saturday, November 14, 2015

Happy Birthday, Sis!

I finished the Miss Grace Shawl this week and gave it to my sister for her birthday. I think she likes it!

My sister is five years younger than me, so we never really overlapped at the same schools. But we now live in the same city, and while we talk and visit and follow each other on social media, we don't get together as often as we should. That can happen as siblings get older. But it doesn't have to.

My sister is a pretty amazing and inspiring person to me. She picked a kind and smart husband, has raised two responsible, bright kids, and has taught elementary music to hundreds of kids over the years. Our parents died at fairly young ages, which can be hard when you're just starting a family of your own. Susan has coped and carried on through it all. I'm amazed when I think of us all as little kids and how she and I and our brother have all created such different and interesting lives. I guess things have always been that way. Maybe you have to reach a certain age to appreciate this change? I wonder how I'll look back on all this from a vantage point even further along someday.

I was kind of stunned looking at the pictures I took of my beautiful sister modeling the shawl -- thinking about all me and my siblings have been through, and how very much she looks like our mother. Very fitting that this pattern is called Miss Grace -- that was our mother's name. And Susan wears both mantles well. She reminds me, so, so much of Mom.

And she had some news -- this just warms the cockles of my crafting heart -- she's been learning to knit! Her neighbor has been helping her learn, and we will soon be setting up a time to get together for some handwork and some reminiscing, like our mom and my aunts, like my grandmother and her friends. I can't wait to see what cool things she'll create. Happy birthday, Susan!

On the pattern itself, I can highly recommend it. As Staci said, it's just about the most fun you can have with garter stitch. I love how the instructions are as much an infographic as a pattern, and it's cool watching how the forms distort and cause the fabric to flow in different ways. Oh, and I sent in my picture from my last blog post and got in the top 10 of SKEINO's photo contest! I would follow Staci's instructions on the increases on the corners for the edging -- I didn't care for the method written in the pattern so much, although I did it. And be careful -- I had only a yard or two of the light color leftover at the end.


Saturday, October 24, 2015

The Shape of Things to Come

When I can during these past few busy weeks, I've been knitting sporadically on the purple Miss Grace shawl. But like center-out lace patterns, all the quick business happens on the front end. As the piece gets bigger, each new row takes longer and longer to complete, with more and more interruptions for all the short-row shaping. On the upside, though, there are more interesting pattern features emerging now that I'm working my way up. Starting with two stitches, I'm now up to 148. I should end up with 220, give or take a few, so I have some long days of garter stitch ahead.

Still not sure there that there is enough contrast between the base color which is a darker, slightly more solid purple (left ball of yarn in photo) and Color 2, the more neon-like deep purple (bottom ball). The more pinky-purple Color 1 sticks out just fine, and I find myself looking forward to the rows where I get to work with this stand-out and oh-so-not-me hue.

I may not have mentioned that I signed up for Kate Davies' Seven Skeins Club, which includes seven skeins (duh) of her new Buachaille yarn line in each of the beautiful colors, which arrived a few weeks ago. Then, each week for six weeks we are sent links to two patterns to choose from. Choosing one each week will go through the yarn sent. If I'd cleared my knitting dance card beforehand, I might have tried, but I gave myself permission not to panic and try to do these on any kind of schedule. I'm enjoying seeing them come in and am making plans based on what I've seen so far. Closer to the holidays, I'll receive a book with all the patterns in it. I love her stranded knitting designs and am looking forward to what will be revealed over the next few weeks.

Hope all you knitters are enjoying some fall (or spring?) knitting. And I hope all my central Texas friends are enjoying all of this wonderful rain!

Sunday, October 11, 2015

Teaching and Learning

One of my neighbors whom we see often on our dog walks, asked if I would teach him to knit when I saw him yesterday. He knows I'm a knitter since I'd made a blanket and some toys for his little sister. He has just learned to finger crochet at school, so I cut him a deal. I would teach him to knit if he would teach me to finger crochet. He thought that sounded fair, and with his parents' permission made an appointment for today at 2:30 -- an oddly specific time for a 7-year-old.

Right on time he pulled up on his bike. I've never really taught anyone to knit from scratch, but I figured we should start with a cast-on. I wasn't sure if he could handle a long-tail, but after a few tries he dug right in. In just half an hour he had cast on and done two rows of knitting! Then it was my turn to learn finger crochet using some bright chenille yarn he bright to our lesson. It was fun and he was an excellent teacher -- I learned a thing or two about patience from him, that's for sure. Then I got a bonus lesson in paper airplane making! After an hour or so of flying planes across the driveway, it was time to head home. I sent him off with some needles and yarn and an invitation to let me know if he needs more help. His mom reports via text that he had a great time. I sure hope so. He's a great kid.

In other knitting news, while knitting with friends yesterday morning, my friend (and quasi-cousin) Abbe presented me with a reprint edition of Dave Fougner's 1972 work, The Manly Art of Knitting. The cover photo alone makes this perfect. It's only 63 pages long. It covers a bit of history, the basic skills, some stitch pattern instruction, and a few simple but quite varied patterns. Along with the usual hat, there are patterns for a dog bed, a hammock, and a horse blanket! Best of all, there is a 4-item bibliography, including one item that I just found using my college's JSTOR subscription (Grass, Milton N. "The origins of the art of knitting." Archaeology (1955): 184-190.) There's a special tingle one gets when the boundaries between knitting and librarianship blur. Well, for this librarian/knitter at least. Thanks for thinking of me, Abbe. I love it!

And finally, I got started on the Miss Grace shawl I mentioned last post. I'm making it in three shades of purple variegated yarn in a 4-skein packet that Skeino calls Barb. So far, Barb and I are getting along. I'm not sure that two of the colors are different enough to show enough contrast, but that could change after I get more of the fabric made.

It's such a cool concept -- striped garter stitch with short row leaf-shaped "forms" that still manage to keep the whole thing in a triangle shape. I've had a hard time interpreting some of the instructions, which in most cases can be chalked up to me not really reading the instructions carefully. I've found that Staci's tutorial has been invaluable for when I get stuck. I kind of wish I'd watched it all the way through from the get-go.

So a bit of teaching and a lot of learning this week, bearing witness to a certain truism. The more I learn, the more I know how much I don't know.


Monday, October 05, 2015

Gray Areas

Since my last post, I've just been knitting stockinette stitch on my Shadows & Light v-neck sweater. There were some rocky moments, but I persevered and finished it up while here at a conference in Arkansas.

I fell out of love with this project about the time I started the sleeves. I got tired of all the stockinette for sure, but I also began to think that the variegation was starting to look a bit too much like camouflage -- which is a look, but not for me. And, I worried that it might be too snug. But I kept going, and by the time I was ready to head to a library conference late last week, I had all the pieces done. So I packed them, thinking I might have some time to start piecing it together.

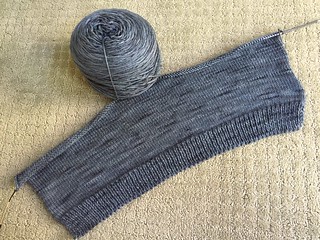
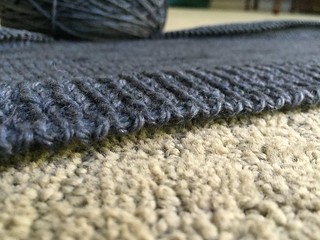
Turns out, I had quite a bit of time on my hands the first few days here, so I got to work. And as I did, I started liking it more and more. Although many knitters don't, I really do like seaming up garments. That neat and tidy mattress stitch on the sides, especially. This sweater has set-in sleeves, which might seem scary, but really aren't. You just have to pay attention to where you need to shift from a mattress-like seam near the armpits to a more selvedge-to-cast-off sea near the shoulders -- and then trying to be consistent on both arms. I messed up one of the arms, but it was no problem to pick out the seam and redo it. Better to do that now than let it gnaw on me every time I wear it. One shoulder does still look a bit tortured lying flat, but it's fine when I'm wearing it. Not so sure I'm totally in love with the 1x1 ribbed collar, but I'll live with it a while and think about it. I have plenty of yarn for modifications. I bought four hanks of this stuff and only used two! Exactly two, with nothing left over. I've been wearing it today during my meetings. Even though it will be nearly 80 outside, it's much, much colder in the meeting rooms.

While here in Little Rock, I took some time to visit a yarn shop in the Pulaski Heights neighborhood called The Yarn Mart. Much more interesting than that other retailer from Arkansas with "mart" in its name! Very friendly staff with a fun attitude (see sign) and a very uncluttered space, unlike some shops. There was a lively rug hooking class going on while I shopped around. I ended up buying some Madeline Tosh fingering merino yarn in a mottled golden-brown in a color way called Twig. Not sure if it would make good socks. Right now I'm thinking hat.

Up next, I'm thinking of tackling a shawl for which I already have the yarn, Miss Grace. Love that name! Staci tells me it's the most fun you can have with garter stitch. Can't wait to get home and get started.

Saturday, September 05, 2015

Both Sides Now

When I've had a chance to sit down and knit in the past month, which hasn't been often, I've been slowly working on my Shadows and Light v-neck.

I finished the back several weeks ago, following the dimensions listed in The Knitters Handy Book of Sweater Patterns. When I held it up, well...it didn't hold up. It was too short. My knitting friends and Jeff all agreed -- it needed another inch and a half. I should have anticipated this modification. My brother and I have a four inch difference in height, but we have the same inseam. All the difference is between my hips and my shoulders. I think I have chunky Neanderthal vertebrae.

So I started the armholes for the front side of the sweater 1.5 inches higher with the idea of comparing later. Much better. So now the plan is to rip back to the start of the armholes and add those extra rows, and then finish up. I'm hoping that I'll have some time to get that mostly accomplished while visiting the in-laws this holiday weekend in north Texas.

I'm eager to get this finished. And I'm eager for some cooler weather. Bring it on, Mother Nature. I'll be ready.

Friday, August 07, 2015

Recipes

I'd been trying to find a good pattern for some yarn I bought at the Marylamd Sheep & Wool Festival a few months ago, but I kept running into obstacles. Using Ravelry, I'd find patterns I liked, but most of them were in pattern pamphlets that wouldn't be easy to get my hands on. I found one that I thought was interesting, but when I got started I quickly realized the yarn didn't want to do what the pattern required. The shiny smoothness of the Spirit Trail Fiberworks Brigantia wasn't liking the cabled patterns I was drawn too. I started at different needle sizes three times before I decided to change course.

I have a book that I refer to from time to time when I want to make a minor modification to a pattern , but I've never knit a whole garment from it before. It's The Knitter's Handy Book of Sweater Patterns by Ann Budd. It's a recipe approach to knitting a sweater. You choose the style (raglan, drop-sleeve, saddle-shoulder, etc.), find your yarn/needle gauge, and then your'e off to the races with instructions in a table format. After my various attempts above, I decided I'd make a plain, v-neck sweater with set-in sleeves using this book and just let the yarn shine. The silk content certainly helps with that last bit. The colorway is called Shadows & Light, so that's how I'm going to refer to the sweater, I think.

I couldn't quite get gauge for the size 42 sweater I need, so I checked the numbers, and mine matched the size 46 instructions. So far so, good -- the back is exactly 21" wide with 116 stitches. I could cast on any way I pleased, so I chose the tubular cast-on using Staci's instructional video. Yes, it's fiddley, but I love the way it looks. I always feel that long-tail cast-on edges have a certain fragility about them . The tubular cast-on feels more durable to me, plus it has just the right amount of stretchiness and a clean, tidy, rounded appearance. Well worth it, I think. After adding the v-neck ribbing, I plan to attempt a tubular cast-off to match.

Speaking of recipes -- I got a great one at the family reunion I attended last weekend. My cousin Sandra (first cousin, once removed, technically) made a framed copy of my Great Grandma-Weaver's yeast roll recipe, which I won in the auction. Grandma Weaver was kind of known for these and her biscuits. Sandra remembers her coming over and making these. I asked about how many this yielded and she guessed about three dozen, which would have worked well for a family with 11 children, I suppose. My aunts remembered her as not being especially tidy in the kitchen and always being covered in flour after baking, a tradition I'm sure to continue when I attempt this. I love everything about this, from the fact that she typed it (she had bad arthritis in her later years and couldn't write easily), to the misspellings and typos, to her sugar brand loyalty. And, you can tell it's one of those old-school typewriters on which you had to use a capital "I" as the number 1.

So, I have a few recipes I need to get working on. One involves rows and rows of gray stockinette stitch. The other calls for yeast cakes. Does yeast even come in cakes anymore?

Saturday, July 25, 2015

We Come 'Round Right

I'm going to be attending a reunion of my grandmother's family, the Weavers & Armstrongs, next weekend. She was one of eleven children, so as you might imagine, it's quite a crowd. My early memories of summer visits to Texas involve this reunion, and being greeted by dozens of people whom I'd never met, but who all seemed to know me and my place in this large group. It's a day for warm memories, great food, bad jokes and just catching up. I love it.

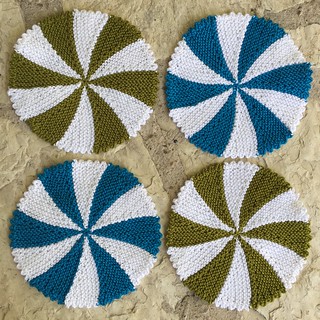
To raise money for renting the space and catering some of the food, relatives bring handmade items to be auctioned off in a silent auction -- or maybe not so silent -- we are talking about Weavers here. Items can run the gamut from preserves and jams, to handmade quilts and wooden toys, My contribution this year is a set, or possibly two sets, of Shaker Dishcloths as designed by Staci Perry at VeryPink. I made some versions of these in placemat and coaster sizes a few summers back.

Because I went rogue and chose a different yarn than the pattern called for, I had to make an adjustment. This yarn, Cascade UltraPima, while beautifully shiny, is a bit on the thin side for this project. This picture shows what was going on -- a strange gappiness right before the color change, most noticeable in the white (see photo). I tried going down a few needle sizes, but didn't like that. I settled on wrapping the slipped stitches, like one might do on a short row heel on a sock. Then I tweaked things even more by twisting the wraps just before knitting them together with their accompanying stitches. This added a bit more density to the final row, but I preferred that to the weird laciness I was seeing.

In other projects, I'm working on a pair of ombré socks using the Crazy Zauberball yarn I got in Pennsylvania in May. I love just working the 2x2 ribbing. You can't really get a matched pair with this yarn, but I did at least want to keep the patterning a bit more symmetrical, so I'm going to use afterthought heels in solid black. The toes, too. That way, even though they'll be striped quite differently, they still have the same heels and toes and look a bit more like a pair. That's the plan anyway. We'll see how that pans out.

Sunday, July 19, 2015

The Braid-y Bunch

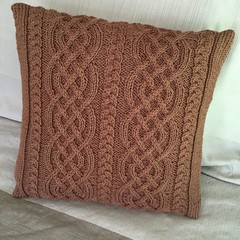
I finished what I think will be the last installment of my knitted pillow project. If you've been following along at home, I was originally going to make three, but a gauge problem saw me buying an extra (smaller) square pillow form, so I just had to knit another. And the extra pillow ended being the Celtic Knit Aran Pillow, finished this afternoon.

I loosely used a pattern that appeared in Canadian Living that I saw on Ravelry -- with some modifications. The pattern says it makes a 16"x16" pillow. I had a 14"x14" form, so I went down a needle size (US 6, 4mm) and trusted that the worsted Cascade 220 I was using would be a bit thinner than the Aran weight called for in the original. And it worked. The original also called for a split back with buttons But I didn't like how all the examples gapped around the buttons in the back. This can be fixed with a bit of ribbon, but the whole thing was shaping up to be way more fiddley than I was in the mood for. Ain't nobody got time for that. I was mostly interested in the braided Celtic knot motif, anyway.

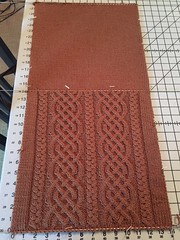
After getting 14" of the cable pattern finished, I continued knitting plain stockinette for another 14". After blocking (see right), I used an invisible horizontal seam to join the top and bottom. I don't know about you, but mine are always quite visible. Perhaps I tension the yarn too tightly? Then I just seamed up the sides. Just before sewing up the final side, I found a place on the back where I hadn't caught all of the yarn and it looked quite weak. To reinforce things, I darned a bit of yarn across this spot on the inside. That was close. It's a little noticeable when you rub your hands over it, but not too bad.

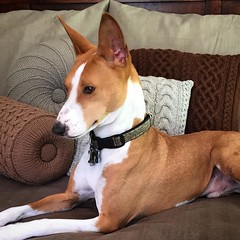
So what was originally meant to be a series of quick springtime projects dragged quite far into the summer. I'm overall pretty happy with how these turned out, even if I'm not so sure about the colors going together. I've never really trusted my color sense -- and it doesn't help that I'm drawn to grays and browns. But I think they'll do. In any case, Pona seems pleased. I hope he lets me enjoy looking at them for a while before he chews them up. I can almost see the wheels spinning in that tiny little head of his.

Next up -- yet another pair of socks.


Wednesday, July 08, 2015

Buttoned Down

Who's got the button? Me -- and two of the pillows I recently knit.

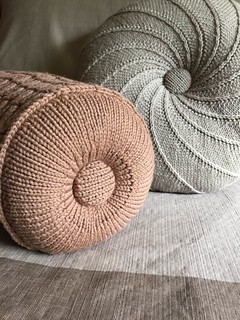
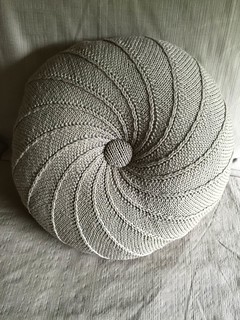
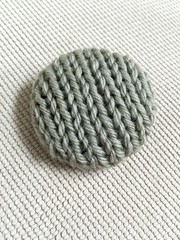
I'd been fretting about buttons for these pillows, especially the round Spiral Galaxy Pillow, for some time. I looked for a fancy glass button at the Maryland Sheep & Wool Festival this year, but couldn't find anything I liked. As I thought about it, I decided I wanted it too look like those old shiny, silky pillows my grandmother had in her living room, with a button out of the same fabric. Something to draw it all together, but that wouldn't steal the show. For the just-completed Smocked Rib Stitch Pillow, I needed buttons to rein in the end caps, which were being pushed out by the pillow form and were decidedly nipple-ish. Not a good look.

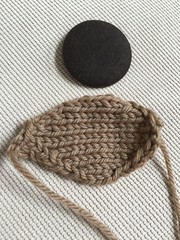
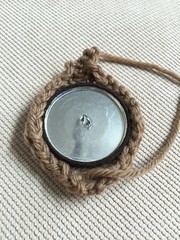
Knitted buttons made from the same yarn as the pillows themselves would be the way to go. So while running errands this morning, I stopped by Bolt Fabrics and got some Dritch cover button kits and heavy upholstery twine. The salesperson was so helpful to walk me though the process. It was pretty obvious I was in over my head.

Based on our conversation, I realized that my knitted covers would be too thick to snap on the backs. Kindly, Jeff sacrificed an old brown t-shirt so the buttons would have a base that wouldn't let the metal shine through. Then, I knit some small covers using matching yarn and constructed as follows:

  • Cast on 4 stitches
  • Purl a row
  • Increase one inside each edge stitch every right-side row until 12 ston needle
  • Make two rows plain
  • Decrease one inside each edge stitch every right-side row until 4 st on needle
  • Bind off

I ran the tails through the inside edge of every other selvedge stitch around the edge and drew the cover in tightly. And, voila -- a knit-covered button!


I found some instructions on sewing buttons on pillows and away I went. Drawing the thick twine through the long pillow was a bit of a chore, and upholsterers would probably have a special tool for such purposes, but I can report that a seaming needle, squishing hard and grunting can work in a pinch.

Way easier than I thought it would be and I'm happy with the results. Now, I have one more naked pillow form to get covered...

Sunday, July 05, 2015

Smock and Awe

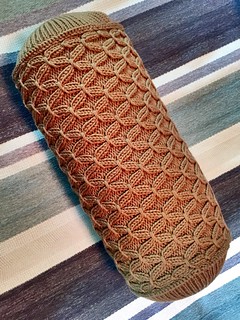
A flash of genius and a little help from my friends helped me all but finish my Smocked Rib Stitch Pillow this weekend.

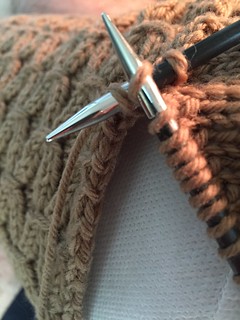
I had some real hiccups with this, mostly because I was making it up as I went along. The crochet provisional cast on worked, but it didn't unzip correctly. Which I should have anticipated if I'd thought a bit harder about it. Flipping the yarn back and forth over the chain to k2p2 meant pulling all the yarn through a loop every other stitch when trying to remove it. What should have taken 3 seconds ended up taking an hour.

Then I tried to focus on seaming the thing together by grafting the 2x2 ribbing. Staci has excellent instructions for doing this, but I just kept messing it up. I have regular stockinette Kitchener grafting so stuck in my head that I couldn't get the rhythm. And the squished together stitches made it hard to see what I was doing. I must have started and stopped four times. I grumbled about this with my knitting crew, and they convinced me that a 3-needle bind-off would work just fine. And they were right. Not totally invisible, but not too jarring. And it's a tube, right? The seam can always be rolled out of view.

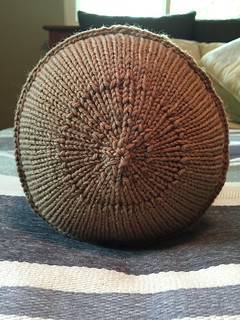
The part I was on my own with was the end caps. I wanted round pieces, which aren't the easiest thing to do in knitting. I toyed with the idea of crocheting round pieces, but thought the styles would be too different. So I went with Elizabeth Zimmerman's pi method, wherein the number of stitches is doubled after the number of rows has doubled. I'm sure I learned some theorem or proof about this in Mr. Ashorn's geography class back in high school, but if so I've since forgotten. The basics are:

  • Start with 8 stitches
  • Knit a round (2 rds) then double the no. of stitches (16 st)
  • Knit until 4 rds from previous increase then double the no. (32 st)
  • Knit until 8 rds from previous increase then double the no. (64 st.)
  • Knit until 16 rds from previous increase then double the no. (128 st)

I ended up knitting one more round just to tidy things up. The 128 stitches around the end panel happened to be only four fewer than the 132 stitches on the selvedge edge of the tube -- 11 repeats of the 12-row motif. I didn't plan this -- math, geometry, gauge and tension just worked out in this case. I couldn't have planned it.

Then I needed to figure out how to get this attached. I had live stitches on the end pieces, which needed to be both bound off and attached, so I did what amounted to a combination gusset pickup and bind off. I put the needle through a live stitch on the end panel, grabbed yarn through a selvedge stitch from the tube, pulled it through both, then bound it off on the next stitch. This created a nice exposed crochet chain edge, that was almost one-for-one between the two pieces. Every 32 stitches I skipped one and the count lined up perfectly.

The first panel was easier than the second, because I had to have the pillow form stuffed inside for the latter. And I don't think I'm quite done. The form poofs out a bit on the ends, making the pillow look like one of those canisters you put in the pneumatic tube at a bank drive-through. I'm thinking of pulling them in with some upholstery buttons.

I like how the smocking pattern makes it look like the pillow is covered with dragonflies when viewed at the angle in the first photo above. Very appropriate now that our sultry Texas summers seem to have finally arrived. Hope you're enjoying your summer as much as I am!