Showing posts with label Sweaters. Show all posts

Saturday, March 30, 2019

Big Needle Therapy

After months of knitting with cotton yarn on 2mm needles, my hands and my brain needed some big needle therapy -- forgiving wool, large gauge, easy-to-see stitches and quick progress. But first, I had to wrap up some loose ends.

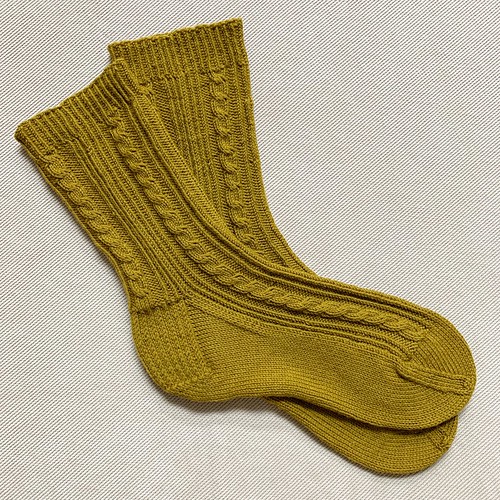
Because the tablecloth was getting bulky and the chances of major knitting disasters at such a late stage in the process were getting higher, I decided to leave it at home when we traveled to Zion National Park at the beginning of the year. I always want to have something to work on for in the air or in the evenings when away from home, so I cast on for a pair of socks using some yarn given to me by my friend Jene at Christmas. Thus, the Fickle Step Socks. They're knit on 2.25 dpns using Quince & Co. Finch sock yarn in a colorway called Honey. Such a great matchup of yarn and pattern. By the time I'd finished the tablecloth, I'd been taking this project around to knitting get-togethers, but hadn't made a whole lot of progress. But as soon as the tablecloth was done I launched right in before the momentum wore off.

The cables use a double wrap on the row before the stitch crossing, which creates less pull on the lower stitches. At first, I wasn't sure I liked it, but after blocking, the effect is quite nice. I have a tendency to torture cable stitches and this is a handy antidote to that. Not sure if it would be appropriate in all cases, but it worked here. It also made crossing stitches without a cable needle a breeze.
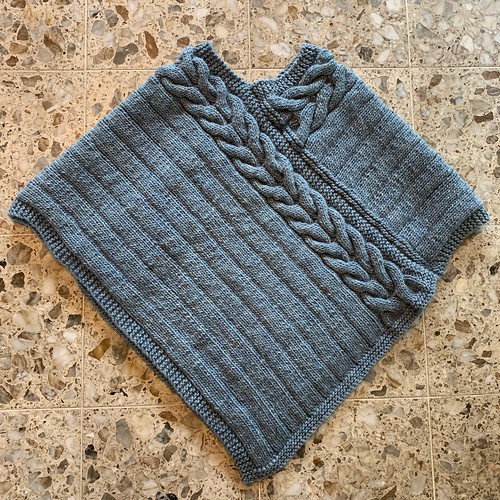
Then it was on to a project and yarn that were both outside my wheelhouse, but just the thing I needed -- the Arrowhead Poncho by Pat Walker using Kraemer Yarns Mauch Chunky in a color called Blueberry Ice, also a gift.

It uses 6.5mm (US10.5) needles. I can't remember the last time I knit something on needles this large. It went by so fast! Thirteen days from cast-on to seaming. The pieces were finished pretty much in the first week, and this week was just blocking and waiting for some time to be able to piece this together.

It's a cool construction -- two long rectangles (mine were 33" x 20") with ribbing across and a couple of squishy cables on one side. Then you sew the two pieces together in a twisted way that creates this natural poncho shape with beautiful cables to frame the wearer's head. On this one, I did use a cable needle. Four-over-Four is a bit much for trying to knit without one. I did attempt it -- once. Then I dug out a cable needle. This thing is warm and heavy. It's not for me, and I'm not sure what I'm going to do with it. I'm leaning toward donating it to a silent auction that my medical librarians' group holds in the fall. We'll see. For now, I'll just admire it.
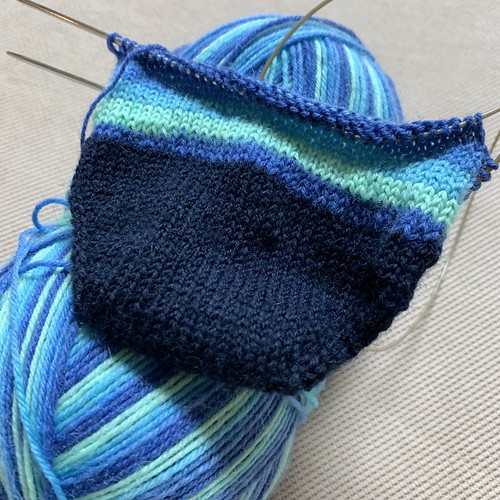
Already on to more things! I'm working on some self-striping toe-up socks using some yarn I got over the holidays. They're going to have a contrasting toe and heel. And I'm thinking of incorporating German short rows. I've never used them in a pattern before, and I'm looking forward to it. I had a bit of a problem visually while trying to do the increases on the toe with this dark yarn, so I'm anticipating a bit of trouble, but fiddle-dee-dee.

I'm also thinking ahead to sweaters. I'd like to make Ann Budd's Cambridge Jacket because I fancy a zippered cardigan. I like the purl lines that make this interesting -- and will likely help with the fit. It's been a while since I've worked with a zipper so I think I'm up for that challenge.

I also just saw an episode of the current season of Project Runway that had a sweater that really called out to me. It was worn by contestant Sebastian Grey. I kept driving Jeff nuts by pausing the show every time it came on so I could make note of some different aspect of it. I like that it has some fairly muted "me" colors interspersed with stripes in tangerine and lemon yellow, which are so not my thing. But it looks good here.

I think I could backwards engineer this. It looks like a set-in sleeve, but I think it might work also as a raglan. All the colors looked heathered up close -- the tan, the dark teal and the charcoal gray. I'm thinking solids might work better, but this doesn't look wrong. Something to think about...

As you can see, getting out from under that tablecloth (literally), has really unleashed my creativity. Hope you're feeling the urge to knit all the things like I am!


Friday, August 17, 2018

In High Cotton

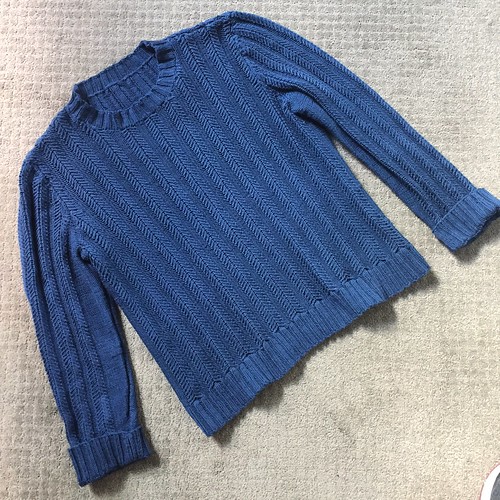
A sweater I'd been working on for a while finally came off the needles this week. It's the Barry Pullover designed by Martin Storey.

I'd been thinking about knitting a cotton sweater for a while. When fellow knitters hear that I live in Texas they often assume I'd avoid knitting with wool and would gravitate toward cotton and other "cooler" fibers for knitting. Cotton is indeed the local Texas fiber and runs through my family background. Both of my grandmothers picked their fair share in their childhoods.

And I do like knitting with wool and and am surprised by how comfortable it can be be in even our mild winters. But I loved and missed the chunky cotton sweaters I'd had back in my 80s college days, including one that was mauled by gibbons (long story).  So I thought something like this pullover might be fun. And although the rigidity of cotton yarn was a bit hard on my hands, it was a cool project.

The pattern suggested two yarns from Rowan, one a cotton-linen blend which was pretty pricey, and the 100% Handknit Cotton that I chose in a color called Thunder. I wanted this sweater to be oversized, so I chose the 48" chest size to give me some ease. I overshot it. This sweater is big on me - one size down would have been more of what I was looking for. I count 22 ball bands sitting on my table, at 50g each, which matches the finally weight of this sweater: 1.05 kg, or 2 lbs, 5oz. It's pretty bulky! It fits well enough with the sleeves rolled up, so I'm pretty happy with it.
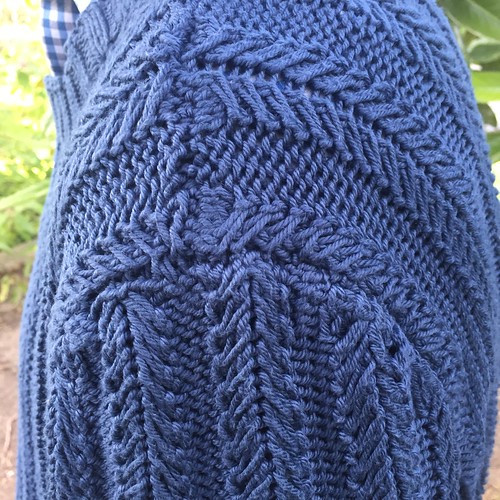
The pattern is a cable rather than the slipped stitch I assumed it was at first glance. The paired cable motifs consist of a single stitch that is carried over three adjacent stitches. In order to make this work, and to create the neat herringbone effect, the carried stitch is wrapped twice around the needle on the previous row. This took me a while a to figure out but soon became second nature. When stretched out, there is a visible gap between in the area toward which the two cables lean, but when I'm wearing it it's not really apparent.

There were two other techniques involved in this sweater that were knew to me, both involving the seaming. The side panels were in reverse stockinette. I wanted to use mattress stitch for these, which I'd never done in reverse. It's a matter of picking up "smiles" on one side and corresponding "umbrellas' on the other, which wasn't too tricky, except on the sleeves with all their increases. But unlike stockinette, where I usually pick up a few stitches on each side of the seam, I figured out that for the reverse stockinette bumps to interlock correctly, I had to seam one-to-one.

For setting the sleeves into the armscyes, I used Andrea's instructions for backstitching a sleeve from the Fruity Knitting Podcast. It worked fairly well, although I wasn't exactly consistent between the two sleeves. Since the backstitching is working on the wrong side, I couldn't tell what the visible join was going to look like until I was all done. There are slight variations between the two sleeves, but nothing I'm going to worry myself about. I'm glad I gave it a try.

In a little nod to wool, in the pictures I'm wearing the Harris Tweed cap I bought while in Scotland recently. Interestingly, I saw more weaving-related activities than knitting ones while there. I'll try to write up a post about the fibery aspects of that trip soon.

Here's to cooler weather arriving soon!


Sunday, June 10, 2018

That's a Wrap

I finished up my Orenburg Style Wrap this weekend.

I made this out of Filatura di Crosa Superior laceweight yarn, a blend of cashmere, silk and merino that is a joy to knit with. Tinking back? Not so much. Once it's knit up, it's pretty snaggy and hard to undo. But still, well outside my usual knitting wheelhouse and fun to try. It's so soft. And so light. The finished shawl is about 44" long and 21" wide. The whole thing weighs 43g, or 1.5 oz.

The construction was new to me. It starts with a crochet chain provisional cast-on from which one of the outer edge patterns is then worked, but incorporating short rows so that it comes to a point. This forms one of the corners. I never quite got the stitch count right while doing this for the first corner, although the exact same instructions worked fine on the other three, so the problem was definitely user error. After the first corner is complete, the lower edge is knit and another series of short rows creates the opposite corner. Then stitches are picked up from the edge just created and the whole piece is worked completely side-to-side, with both the interior panel and the other edge strips being made at the same time. On the far edge, short row corners are created similar to the first edge, but instead of picking up stitches, the new edge picks up live stitches from the last row as it's knit. I wasn't really clear what was going on for a while - a diagram would have made this easier for me.

The original pattern says the finished wrap should be roughly 30" x 65". It suggests 3mm needles, but I found that my 3mm needles were too dull for all the K2togs required for this, so I borrowed some sharper needles that only came in 2.5mm. It seems that this .5mm difference translated to quite a bit of a difference in width and length. Mine just drapes over the shoulders -- it doesn't hang down into the crook of an arm. It might work well as a lightweight neck scarf if doubled up.

I'm amazed at how warm this fabric is. For not weighing much, it sure traps in the heat. I had to be careful to keep it to the side rather than in my lap or else it got quite uncomfortable. I'm also impressed with design choices that make this pattern quite accessible. Unlike the Niebling lace patterns I've made, Natalia Shepeleva's design doesn't fuss with the directions that decreases run. That is, you don't have to match a left-leaning decrease with a corresponding right-leaning one. The decreases aren't really part of the design, other than keeping the stitch count balanced with yarnover increases, so it doesn't really matter. And, it's garter stitch lace! That is, it's completely reversible with no "wrong" or "right' side. I had to really concentrate to not purl on what I thought of as the "wrong side" during the first few rows.

Although there is no right or wrong side visually, it helped to think in those terms for the purposes of tracking my way through the charts. For any given row with a side chart, a diamond chart, a center chart, diamond chart again and side chart again, one of the side charts was always one row in front of the others, meaning that the beginning of the "row" wasn't actually at the beginning of the row. Not sure is this is the way it was supposed to be, but it's the way my turned out. As long as I kept track on the charts, I was fine. And after a while I was familiar enough with them that if I got lost, I could find my place again with just a bit of counting.

Up next I'm thinking of making a cotton sweater I've had my eye on. I've got the yarn and I've been swatching. Before I got the pattern, I thought that perhaps it was a slipped-stitch pattern, but now I find it's a cable pattern. So this is going to take a bit longer than I thought. Probably won't get it done in time for an upcoming trip, but I'll try.


Sunday, December 10, 2017

Alchemy

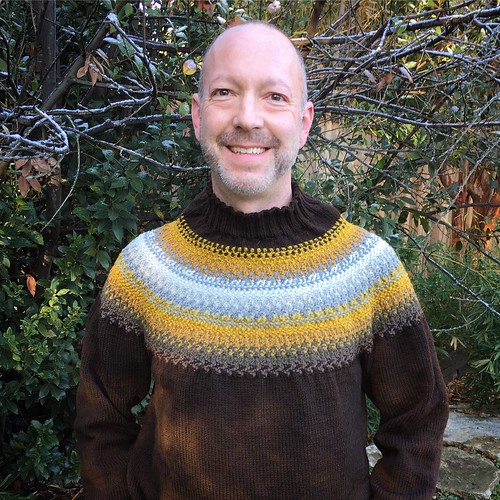
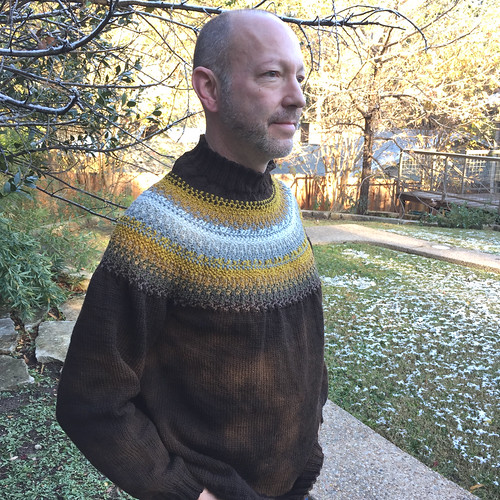
Jeff asked me to make him a sweater for an upcoming trip to Colorado with family. I happily obliged, hoping to have it finished by his birthday. I completed it with a week to spare. One month exactly from cast-on to bind-off.

This is the Alchemy Pullover, featured on the cover of Issue 3 of the new Rib Magazine. The designer, Lars Rains, was unfamiliar to me, but he's quite a prolific designer who specializes in working with color and texture in interesting and innovative ways. The sweater is made with 10 colors of Brooklyn Tweed Arbor, which I purchased from Hill Country Weavers. There's a also a 5 color version of the pattern, which I thought was very clever and thoughtful.  It almost tripped me up a few times , though, when I flipped open the magazine to consult the charts and thought I'd made a mistake, only to realize I was looking at the wrong version.

Since I had to check gauge in the round anyway, it made sense to me to just start making a sleeve and count that as my gauge swatch. As luck would have it, I was spot on with the recommended needle size (US7, 4.5mm). So I made both sleeves first, and then started in on the body of the sweater. The sizes made a leap from 42 ¾" to 46 ½" and it called for a few inches of ease. The smaller size would have left only a tiny bit of ease, so I went with the 46 ½" size. It's an inch or two roomier than I might like normally, but better bigger than too snug. Plus, I can wear it also. Just sayin'...

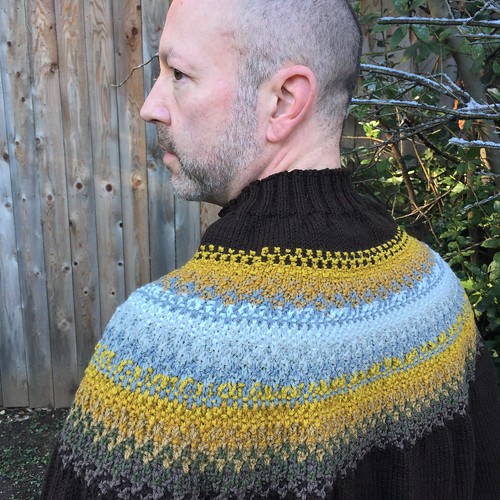
Lots and lots of brown stockinette in the round. I was kind of in heaven. But then the real fun started. Each color in the yoke is used for 8 rounds at a time, with a new color being introduced every four rounds. All but two of the colors are used twice. As an added layer, texture is introduced through purling. I was rather used to knitting with two colors, one in each hand, but I was quite unused to purling with my right hand. I found it quite difficult and now understand while some new right-handed throwers are averse to purling. All that moving the yarn back and forth! So much easier in the left hand. As with any stranded pattern knitted in the round, there is a visible line where the pattern rounds change. You can see this over Jeff's left shoulder in the picture above. I think it's only really noticeable at the top with the yellow and brown.

The one part that that I'm not entirely satisfied with is the collar. It's just more simple stockinette in the round in brown above the yoke, but then goes into a 2x2 ribbing for 15 rounds, finished with Jeny's Surprisingly Stretchy Bind-off. But something about the decrease rate, or maybe just shoulder and neck anatomy in general, makes the fabric gather and bunch up a bit. I've seen this happen in other yoked sweater patterns, but not sure why. So it looks a bit "roomy" in the neck area. I'm thinking, though, that this might not be a bad thing, giving a bit of comfort around the neck, but also trapping warm air in cold weather. I'll go with that.

Speaking of weather, you may notice traces of snow in these pictures. I took these in the morning after a freak late-autumn snow flurry the night before that hit central and south Texas. So unusual at any time, but especially this early in the chilly season. The college where we work had a delayed opening, which allowed us to get this pictures taken. I'm hoping we see a bit more snow than this when we head to Colorado in a few weeks. I know this will keep him snuggly and warm. I'm so pleased he likes it. Happy birthday, Jeff!

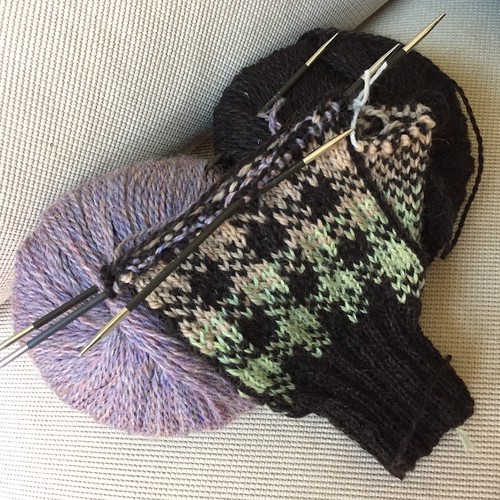
Next up, I'm going to finish the last two pairs of the Woodland Winter Mittens kit I got from Knit Picks in 2011. The kit came with enough yarn and six patterns to make pairs of mittens representing the six colder months. Texans - use your imaginations! Within a year of getting the kit, I'd made the mittens for October, January, February and March, but had never made the ones for November and December. I'm not sure why - I'd just set the box aside. From time to time I would unearth the yarn and pattern and remember I needed to get back to them. Now seems to be the time. I've gotten started on the November pair, which features mountains and a large ungulate (elk? moose?) on the back of the hands and a pretty plaid pattern on the palms. They might make nice gifts for people I know who were born in these months...


Saturday, November 04, 2017

Younger Folks & Textured Yokes

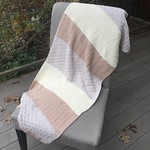
I spent much of yesterday finishing up a baby blanket for the newest person on my block.

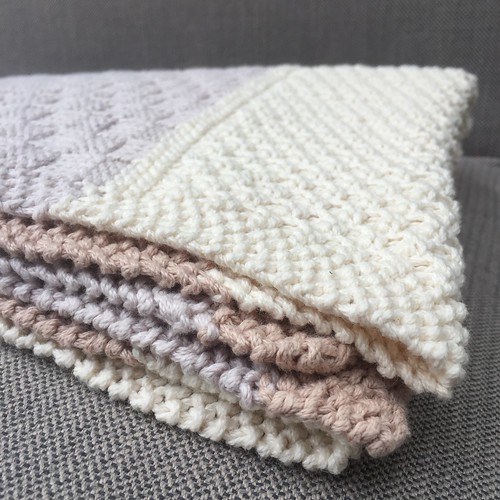
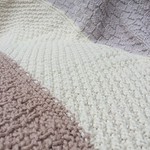
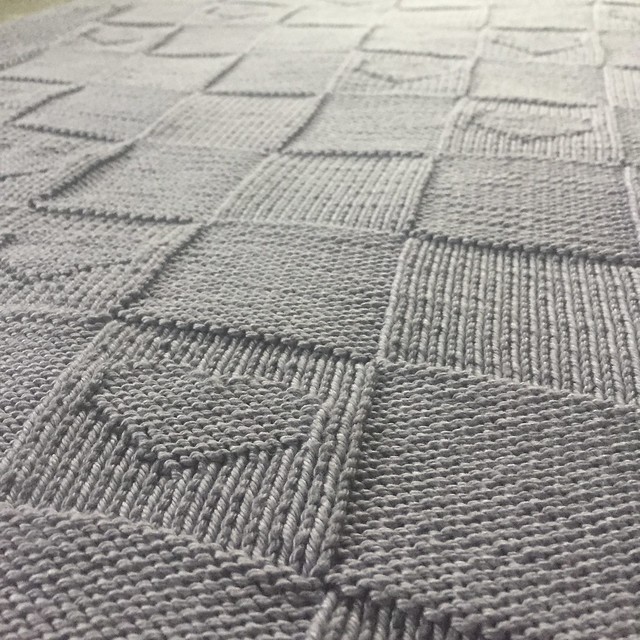
It's the Pick-a-Knit blanket from Appalachian Baby Design. I made the large size, using one of their kits, which comes with the pattern and two balls of each of the three colors in the blanket - a light silvery-gray, a beige tone, and a natural cream color. The cotton is all organic, and quite soft to the touch. And very washable. Perfect for a new little one.

I knew going into this that there would be a bit of pain and strain. Because of cotton's lack of give compared to animal fibers, knitting with cotton can be hard on the hands, depending on how tightly the knitter holds his yarn and needles. And I tend to hold them both with a death grip. I don't know why, but I've always had trouble maintaining a light touch and "soft hands" while knitting. It usually doesn't bother me, but cotton can really exacerbate the tension. My thumbs are a wee bit sore and I have a little twinge in my left elbow, but I think it was worth it.


Yesterday I finished it up, wove in the ends, washed it and dried it. It's all ready to be boxed up and taken down the street to my new little neighbor. I started this a few days after she was born last month. I hope she hasn't gotten too old to appreciate it already!

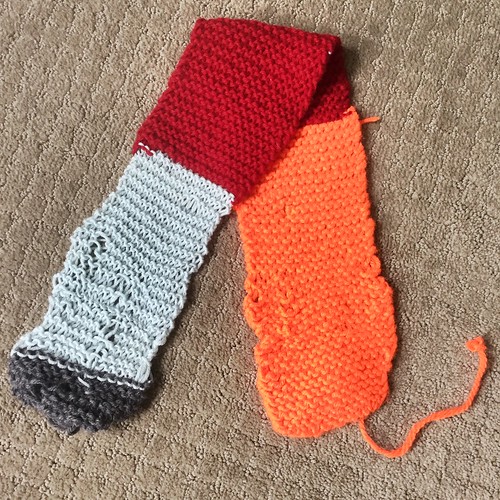
And here's a little something I just have to share. A few years ago you may recall that a young neighbor of mine asked me if I would teach him to knit. We cut a deal - I'd teach him to knit if he showed me how he made paper airplanes. Let's just say, he was a better student than I was. And, to my immense pride, he has kept at it. He's since become interested in so many things (building ramps for his bike to jump off of, Little League baseball), but we still talk about knitting from time to time as I walk the dogs by his house. When I was out of town at a conference a few weeks ago, he gave Jeff this sample that he had knitted and asked if he would make sure I got it. I love this so much - the colors, the effort, the pride in knowing how to do something that not everyone can do. A while back, he asked if I would make him a blue hat, and it's never quite happened. It's going to happen soon, I promise.

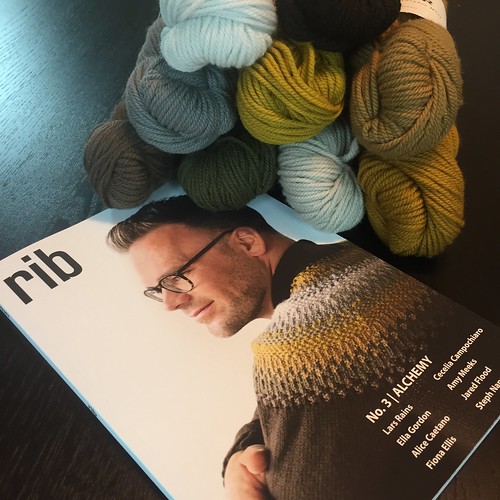
Next up on the list of things to make is a sweater for Jeff. He doesn't ask for them that often, but when he saw this pattern for a sweater called the Alchemy Pullover in the latest issue of Rib Magazine, he said he wanted one in the exact colors shown. This pattern comes in a 10-color variation and a more affordable 5-color version. He said he wanted all 10 colors. I mentioned that this would be more expensive, but he just shrugged and I'd grabbed my keys and was out the door before his shoulders had lowered. My goal is to have this finished before his birthday in mid-December and before we head up to Colorado around Christmas-time for a family get-together.

Swatching for this needs to be done in the round, since that is how this is constructed. A swatch in the round is going to look like the beginning of a sleeve anyway,  so I plan to just start knitting a sleeve and measuring for gauge once I get a few inches in. If I have to rip back and start over, so be it -- it's what I'd have to do with an unsuccessful swatch anyway.

Eagle-eyed viewers might note that there are only nine skeins of yarn showing in this photo for a 10-color pullover. I'm recycling some of the yarn in the color called Gale (yet another shade of gray) from my River Rocks scarf. I think I have enough left over of this that I can just use it. See -- I'm saving money already!

Need to go cast on for a sleeve right now. Happy knitting!


Saturday, September 09, 2017

Fibonacci Stripes

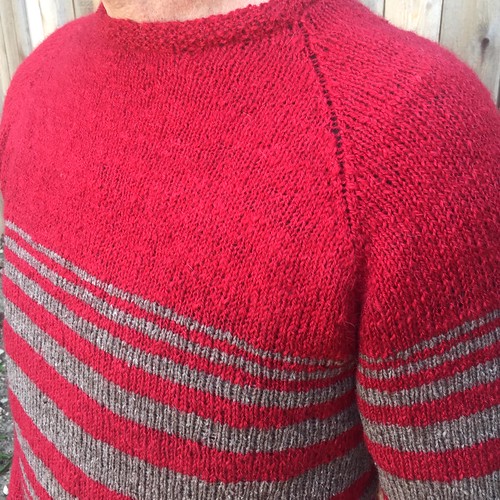
This past month (well one month and one day), I've been working on a striped sweater using yarn handspun by Janelle. It's finished!

While visiting Gettysburg this past summer, I got to admire all the amazing handspun yarn that she's made over the years. Noting that she couldn't knit it all, she said I could take a batch of whatever I want. Janelle's palette runs decidedly blue/green, so this batch of cranberry red yarn really jumped out! We both knew it wasn't enough to make an adult sweater, but she suggested that maybe I could work in another color in some way to stretch it out.  After I got back to Texas I bought some in Brooklyn Tweed Loft in a grayish-brown called Barn Owl, and this is what I came up with.

I'm using the general crew-neck raglan pullover recipe as outlined in Ann Budd's The Knitter's Handy Book of Sweater Patterns. I've had this book for years, and it's a great go-to source for when you want to branch out on your own in knitting a sweater, but still need to fall back on well thought-out formulas for increasing and decreasing and just general fit.

I couldn't quite get gauge for the 44" in sweater size I wanted to make. But I followed Ann Budd's instructions for adjusting gauge. I ended up using the instructions for the 40" sweater, but following the lengths described in the 44" sweater and it worked like magic! I didn't get quite the ease I wanted, but that's a different type of math, involving adjustments to exercise frequency and taco consumption. Ahem.

I needed to insert the contrasting color in some sort of interesting way, but wasn't sure how. I knew from other design things I've perused that the Fibonacci sequence often produces eye-pleasing results, so I played around with a spreadsheet, adjusting strips and measuring row-gauge, before coming up with a plan. I skipped the number 1 and came up with alternating rows of red and gray/brown yarn in the following sequence: 2-3-5-8-13-8-5-3-2. That is, after 1/3 of the sweater being knit in red, I started with two rows of brown, two rows of red, three rows of brown, three rows of red, etc. Originally, I thought that the top 1/3 of the sweater would be brown, but I decided I had enough to make the top red, and I think it looks much better that way. I did the sleeves the same way, and they more or less match. I like how from a distance, it looks as if you're looking down on a striped cylinder. It also give a sense of motion if I squint just right.

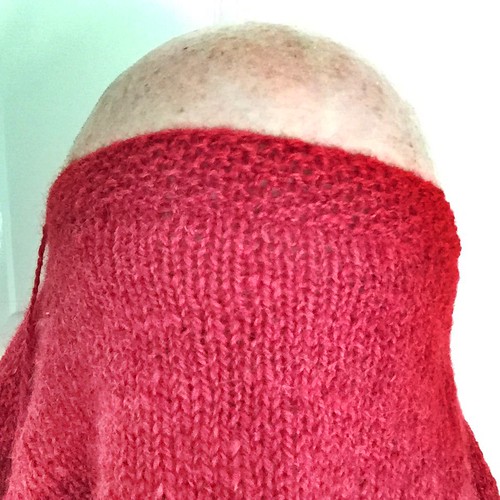
The cuffs, hem and collar are all done in 8 rounds of seed stitch. I love seed stitch, and one day I'd like to make a sweater that is entirely of it. This stitch made a good edge for the most part, although the hem still tends to curl up when I'm not wearing it. It seems to behave once it's on me. I did have an issue with the bind-off. Traditional bind-offs are notorious for forming a tight, inflexible ridge, which can cause problems getting garments on and off. I thought that going up a couple of needle sizes would take care of that, but as you can see, it wasn't enough. I probably could have tugged it down over my ears and nose, but I wasn't confident I would be able to ever remove it. So I undid the bind-off, put the stitches back on the needles, and used Staci's sewn tubular bind-off. It's very easy, I think, and although the directions are for 1x1 ribbing, seed stitch is basically a variation on that and it seemed to work just fine.

Although it's made of alpaca and wool, I was surprised how un-hot I was in it in our low-80s temperatures when we went to the back yard to take some pictures. The main problem was all the mosquitoes that have appeared since our copious Harvey-related rain. I can't wait until it cools off a bit so that they all go away, and I get to wear my new sweater.

Tuesday, May 02, 2017

Multifarious Marius Precariousness


It ended up being way more complicated than it needed to be, but at last my Marius Sweater is finished.

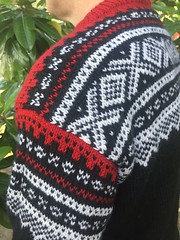
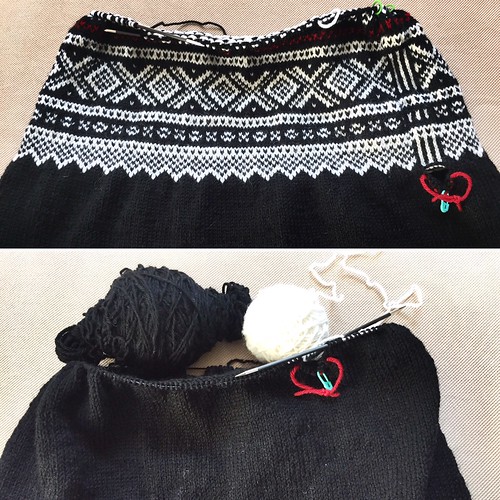
When I last checked in, I had realized that my gauge had changed once I started in on the patterned portion of the body of the sweater and had ripped that section out and started again on larger needles. This absolutely did the trick. But then, after re-knitting about 2/3 of the black-and-white portion, I realized that my yarn dominance was off.  This means I was carrying the wrong color in the wrong hand. Ultimately, this doesn't really matter, as long as one is consistent with which color is carried in which hand. But I really wanted he white color to pop, and I had my yarn configured so that the black yarn was dominant.

In the picture to the right you can really see what's going on in the striped steeks. At the top, I carried the black yarn in my left hand. At the bottom, I'd re-knit the same section with the white yarn in my left hand. When knitting with two yarns, the one in the left hand tends to stick out, for most knitters anyway. Usually, I consult my copy of Ann Feitelson's The Art of Fair Isle Knitting before starting stranded colorwork to make sure I get this right, but this time I was just sure that the dominant yarn is carried in the right hand. Oops. Wrong. So, I ripped back yet again.

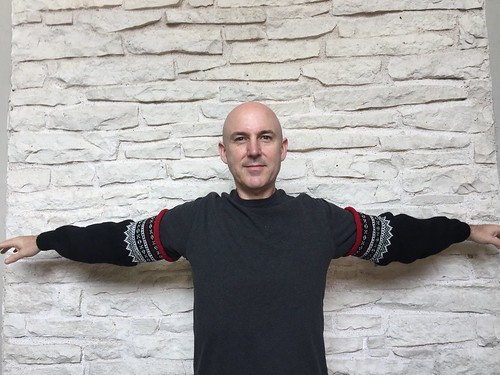
The third time was the charm -- gauge and dominance were just fine. But I'd already knit the sleeves. With the wrong gauge and the wrong dominance. So I re-knit those, too. It really didn't take that long. The pattern in the sleeves is simpler, without the complex X motif of the body. When finished, I crocheted the steeks, cut the armholes open, and sewed on the sleeves. They fit really well, to my surprise -- I saw a lot of examples online that looked bunched up. And then I tried it on.

The sleeves were too short. About 6cm (2.5") too short. You can't unravel a cast-on edge. Well you can, but you'd go insane. So I picked up stitches just below (or above) the cuffs, snipped off the cuffs, added 6cm of stockinette and then re-knit the cuffs. And THEN I was done.

This really is a cool pattern, and not as complicated as I've made it out to be. I just got so excited to get started that I forgot a lot of the details that would have made this go smoother. If I'd been more thoughtful about gauge and yarn dominance, I would have had this finished in half the time. Fortunately, I'm a total process knitter, so getting it right doesn't bother me. And it wasn't like I was on a deadline -- I only had to have it finished by December, when I'm going with my family for a big ski vacation. Even if I just sit around and sip hot adult beverages the whole time, it will have been totally worth it.

Winter is coming!


Friday, April 07, 2017

De-Tension Slip


Now you see it, now you don't. Generous readers will assume that the bottom picture is the "before" picture and the top picture the "after." That's really sweet of you, but you're wrong.

I'd noticed in the sleeves that the tension tightened up a bit once I started the colorwork. This is normal and par for the course with multicolor stranded knitting. Yarn is carried behind the work and isn't interlaced with nearby stitches. This lessens the stretchy property of a knit fabric, which by it's nature should be flexible in all directions. You can see how it pulled in once the white yarn starts n the photo bellow. But I still thought it looked acceptable and likely fixable with a bit of blocking.

Then, while knitting a few nights ago, I noticed that the body of the sweater was pulling in, too. A lot. I noticed this when I was less than 10 rounds from finishing the body. So I stopped to think. And think. Here's what I concluded:

  • Blocking wasn't going to fix this problem. I'd have to be pretty aggressive about it, and the pattern would be too stretched
  • The fabric was too dense, with little drape to it. I didn't want to it to feel like I was wearing cardboard
  • If I just forged ahead and cut the steeks, I'd have a bunch of pieces of cut yarn and re-knitting would be a splicing nightmare

So, I unraveled it back to the start of the colorwork. Sigh.

Here's what happened. The pattern called for knitting a gauge swatch, but didn't specify to knit it using the pattern. I suppose any experienced Norwegian knitter would know to do this. I would know to do this, too, if I were knitting a garment that was all stranded. But if not given instructions as to how to swatch, I usually just do the first thing that happens in the garment, which is a big old field of black stitches. I'd had to go down a size, in fact, to get gauge. So now, I'm going to go back up a needle size to get a bit more room at the top.

There's no teacher like experience. But I'm not discouraged. Process knitters knit. It's what we do. I'm kind of excited, actually, to get another crack at this beautiful pattern. Back to it! And while I'm at it, I just might revisit those sleeves, too...

Sunday, March 26, 2017

Sleeves Achieved


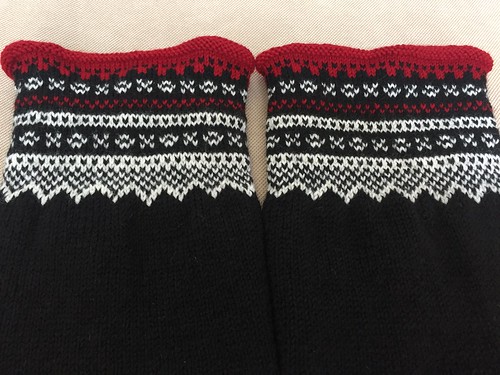
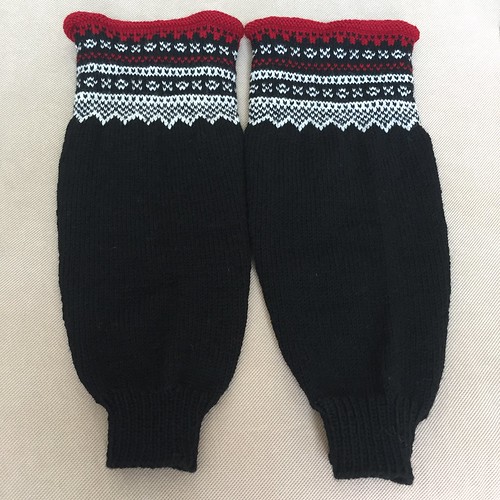
I finally got the red yarn I needed for my Marius Sweater sleeves in the mail on Friday and quickly went to work finishing up the sleeves.

I'd wanted to get the sleeves completed first to make sure that I was making the armhole steeks the correct height for the sleeves. Several pictures I'd seen of knitters who have attempted this pattern show that the armholes are bit smaller than the sleeves, resulting in some bunching when they are sewn in. I'm thinking that if I know exactly how side the sleeve openings are, I can try and make my steek for the armholes match. That's the plan, anyway.

I'm pleased with how the stranded knitting portion looks. I was a little worried that the white/black combination might be too stark, but like most stranded knitting, it looks a bit better from afar. The fabric does pull in a bit where the white yarn starts, but that's too be expected. I haven't blocked this yet, so I'll be able to add a bit of stretch. I'll need to do that anyway before I measure for the armhole steeks.

I switched from the grayish green Petroleum color for the highlights, collars and seams to the more traditional red, and I think it was the right decision. The grey was kind of sickly looking and just didn't add enough contrast. The red, which is the traditional color for this part of a Marius sweater, is perfect. I was a little worried that it wouldn't pop against the black enough, but it does just fine. If it looks like the sleeves are a bit short, that's okay. This is a drop-sleeve construction, so the sleeve seems are supposed to fall a few inches down from the natural drop in a person's shoulder. I normally don't like this kind of sweater -- I prefer set-in sleeves -- but it's kind of what you have to put up with for stranded knitting. It's possible to do a capped sleeve in fair isle, but way more complicated. And this, ultimately isn't that complicated a garment.

A testament to this is the two pages of instructions. They seem a bit sparse to me, with no schematics of how the pieces fit together. Translated from Norwegian and written in the mid-20th century, I think the designer made certain assumptions about the person reading this person -- their skill, competence, and knowledge of knitting in general. I've been able to follow pretty well, except for a strange few missing stitches toward the top of the pattern charts. Usually, this denotes that some sort of decrease has taken place, although there is nothing in the written instructions that would indicate I'm supposed to do that. After consulting with experts, I came to the conclusion that this indicated a re-set point. All the stitches are supposed to work right and left from a mid-point on the outer edge of the sleeve. You count out from that point to find out where on the chart you start and stop, depending on the size you're knitting. For most of the chart, that's based on a 10-stitch repeat, but for the last few rounds, it shifts to a 4-stitch repeat. So I just reset from that point to figure out a new starting point that resulted in the pattern matching across the whole grid. This is a bit difficult to discuss without showing the pattern, but I didn't want to do that. Trust me when I say that this took up a LOT of time trying to figure out, and that whether I'm right or wrong, I'm satisfied with the explanation I've told myself. At this point, please, don't correct me if I'm wrong! The reverse stockinette at the top is mean to be hidden when the sleeves are attached.

So now it's just back to the body of the sweater and inches and inches and rounds and rounds of knitting with black yarn on black needles connected with a black cord. I'm sitting under very good light, but it can be a bit of a challenge. I'm eagerly looking forward to the stranded portion at the top of the body of the sweater, which is similar to, but much more elaborate than those on the sleeves.

As I've tried to find out more about this pattern, I'm stunned at how ubiquitous it is and almost universally recognized in Norway.  So many cool things out there. I know things are warming up around here, but next time you have a cool snap, keep your eyes open!


Sunday, February 26, 2017

Baby Love


Another work colleague and friend of mine is expecting, and rather sooner than I was expecting (as if I had a say in the matter), so I had to knuckle down and try and get this finished ASAP. And that was today.

The Baby Love Blanket pattern is designed by Meg Hollar. It's sweet and simple, but a bit time-intensive. It's knit in sport-weight yarn on pretty small needles. I used size 3.25 (US3) needles. It took 10.5 balls of Knit Picks Shine Sport in a color called Wisteria -- a pretty pale purple. It's a 60/40 mix of cotton and rayon, so it has no give and isn't kind to the knitter with lapses in tension consistency. It can also cause a bit of hand strain. But, I love the beautiful shine on this yarn and the cool shading effects that happen when viewing the knit and purl panels from different angles. And, it's going to easier to care for than many of the other baby blankets I've made in the past year. I've already tossed it in the wash and dried it and it help up just fine.

It's a fairly simple pattern, all knitting and purling, with no shaping to speak of. The nature of the little heart motifs mean that the blanket is totally reversible. And after the first row or so, it's easily memorize-able, especially with the liberal use of stitch markers. I used different color stitch markers for the panels in which hearts were to appear, switching them out and re-position as I moved from row to row. I always forget how heavy cotton is. This is not a huge blanket (36"x36"), but toward the end, I was amazed at how much weight was pressing down on my lap. It should keep a squirmy little one quite contained. Now to box it up and get it delivered before the baby is.

A note on the color. This overcast day got away from me before I thought to take some pictures, so the pictures taken indoors make this blanket look way grayer than it is. While that's not a bad thing, the more purplish-looking image is the one that's closest to the true color. Maybe just a tad more vivid than real life.

Coming up, I'm going to be making a version of the Marius sweater (or  Mariusgenser), a design that was popular in the 1950s in Norway. We're planning to go skiing with my siblings and their families this next December, and I'm going to need something for the slopes. Or at least something to lounge around in après-ski.

I won't be using this exact pattern, but it is one from Sandnes, the company that owns it. And I've ordered Peer Gynt yarn too for that extra bit of authenticity. I had to get it from the UK -- couldn't figure out a source in the US. Traditional Marius sweaters are made in the colors of the Norwegian flag -- blue body, white stranded patterning, and red around the collar and joining the sleeves. I'm going to be making a version with black, white and gray. Because that's me. I have the pattern already, and although it's been translated from Norwegian, some of it is a little sketchy on the details. This is going to take some careful reading and planning.

Sunday, January 08, 2017

Svenson

I worked hard all day adding the neckband and working a tubular bind-off to finish my Svenson Pullover. From start to finish, this project took exactly a month. Some kind of record for me, but I never would have got it done in such time if I hadn't had a long break between semesters. These frigid past few days have been very motivating, too.

This is a great pattern. Lots of challenges, yet memorizable. I've always wanted a moss stitch sweater. Now I've got that and then some! The way the pieces were designed with purl gutters next to the edge of the sleeves and the moss stitch up against the body pieces made it very easy to figure out how to seam things together. Bonus: with this Arbor yarn, you can actually use it for the seaming, something not advised with Brooklyn Tweed's Loft and Shelter lines. The raglan decreases on the sleeves and body were half-versions of the double 1-over-2 cables done on the body so when they were seamed together they came together like zippers. That was supposed to be the effect, anyway. Not sure I got it exactly right, but for the most part I think the seams are fairly invisible. A lot of clever thought went into this design.

It's styled on the slim side, which I'm not always, so do be aware of that. The sleeves cling a bit, which I'm not used to, but find I don't really mind. I added 1.25 inches to the body length and might have done well to add even another inch. I also added an inch or so to the sleeves, and they're just right. A person commented on Ravelry that all the modeling shots show the sleeves pushed up, so it's hard to get an idea of how long the sleeves actually are on a person. Long ago it was pointed out to me that it's important to note what's not showing in the photographs. Do none of them show the back? Is the model always hunched over in a funny way? I'm not saying that's going on here, but I, too, noted the sleeve position. Since may arms tend toward Charlotte Greenwood proportions, I have a habit of adding a bit of length to sleeves in patterns. That's not always worked in the past, but this time it was a good call.

It was also pointed out that the neck opening seemed a bit wide. Once the sleeves were seamed on, there was indeed a very large head hole at the top. After adding the half-twisted rib neckband, it closed in quite a bit, but I think most people would definitely want to wear a collared shirt under this. I wouldn't call it a boat neck, but it is a bit broad. I suppose that could be mitigated by making the ribbing in the neckband longer, but at some point the proportions might start looking wrong. I don't mind it the way it is at all.

I steam-blocked the pieces as I went along, although I think I might still wet-block this before I wear it. I got the gauge called for and all the pieces fit. I just need a tad more roominess for this to be perfect. I'm thinking it'll be good to get back to campus tomorrow and away from holiday snacking.

Oh, and I should mention -- looking at these pictures, this last one is the most true to the actual color.

So happy to have this done. Here's hoping the cold snap of the last week wasn't our entire winter. I need more chances to wear this before the heat creeps back. And please, everyone --  have a wonderful new year with lots of knitting and coziness!

Saturday, December 31, 2016

Auld Lang Twine


It's the last day of the year, and I realize I haven't checked in for a while. I made some progress on a new project that I wanted to share.

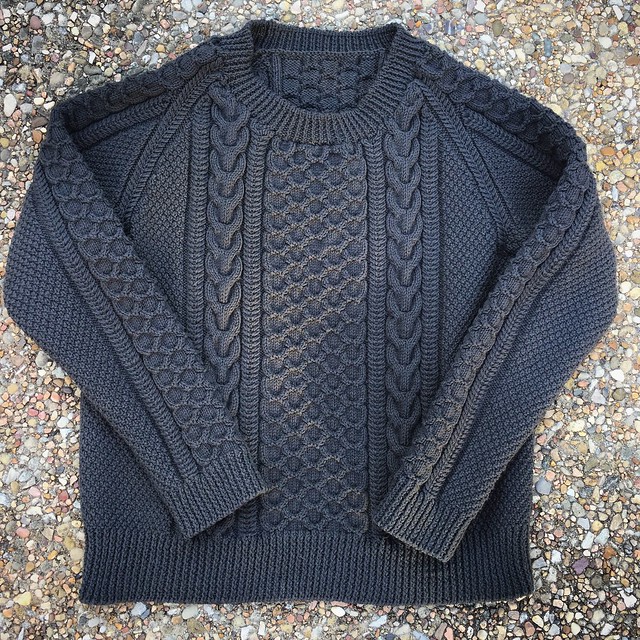
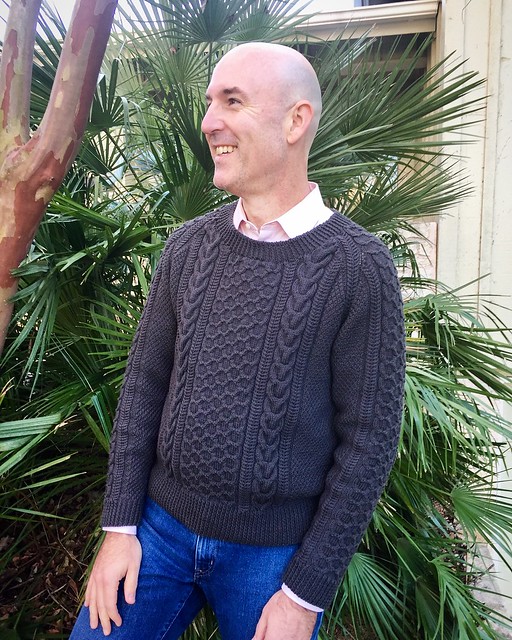
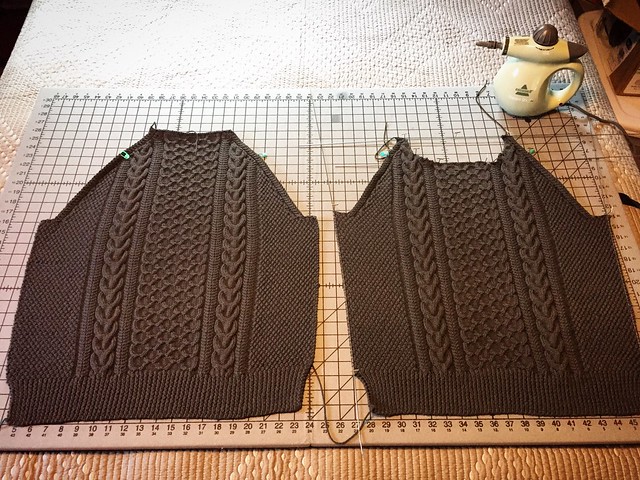
This is the back (left) and front (right) of the Svenson Pullover by Jared Flood, appearing in the Winter 2017 collection. I'd wanted to make a cabled pullover for myself. I'd made a few in the past, one for Jeff and a more abstract one for me, but they are way to big for us these days. I'm making the 43 1/4" size using Brooklyn Tweed's Arbor in the color Humpback. It's perhaps the most perfect brownish gray ever.

The stitch definition with this yarn is amazing. So glad I splurged and went with the yarn called for in the pattern. I love the moss stitch panels on the sides, the larger horseshoe cables and the smaller honeycomb cabling in the center. There are little purl stitches at the top of each honeycomb cell that add a cool bit of extra dimensionality. Between these two motifs are mirrored side-by-side 1-over-2 cables that make a pleasant ladder pattern. The sleeves are raglan, and where they are sewn to the body, the seam runs up the middle of a set of these ladders that will basically zip together as the whole things is assembled. The design is quite thoughtful in this way. I've never made a sweater using this construction, and I'm really looking forward to seeing how it all fits together. I started the left sleeve this afternoon.

Over the past few days we've played host to my dear friends Janelle and Sharon and their boys. Sharon and I were good friends from college days and Janelle is the person that got me interested in knitting so many years ago. I can't thank her enough for that.

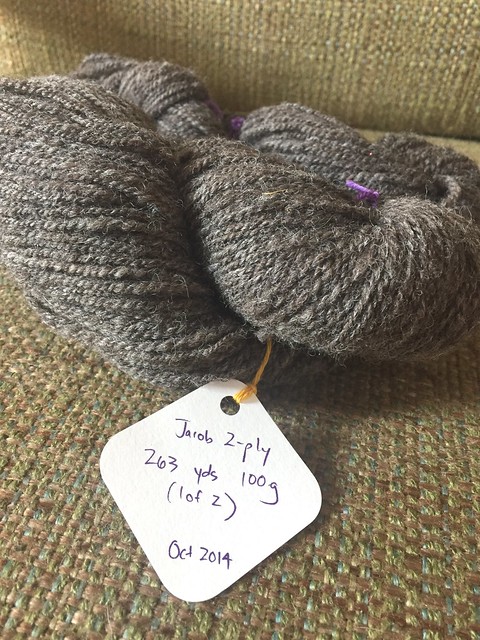
In addition to being an accomplished knitter, Janelle is also quite the spinner. What she knows about fibers and how they behave. She's the best person to go yarn shopping with. And, she brought me a little something that she spun recently. Can't wait to figure out what to do with it. It's a beautiful 2-play Jacob yarn in a lovely shade of brown. What can I say -- she knows me! And it's been wonderful seeing their boys grow up. Glad that they get to come to Texas every so often.

It was so great having them here. And most of the old college gang was able to get together for a pre-New Year's party as well. Even those who were home ill were able to Facetime in -- ah, technology.

I'm looking forward to the new year and all it may bring. Here's to a fruitful, fun and fiber-filled 2017!

Sunday, November 13, 2016

Guido Pullover


Finally finished the sweater I started for Jeff this summer, and we're both pretty happy about it. In my early knitting days, I made a few sweaters for Jeff. When I proposed making them, he happily said yes, but then rarely wore the resulting garments. He instinctively knew that I'm a process knitter and that the journey is way more important to me than the result. He knew I'd be happy making them. But he just doesn't care to wear wool that much, and our Texas climate doesn't provide that many opportunities to wear it comfortably. So I'd stopped making sweaters for him.


Then, as I started watching the Fruity Knitting podcast, Jeff admired a smart striped pullover that Andrew wears in some of the episodes. When we got to meet Andrea and Andrew this summer, I asked her about it, and she pointed me toward the pattern and yarn. Rowan Purelife Revive is (or was) composed of roughly 1/3 each recycled cotton, silk and viscose(rayon) -- much more wearable for a Texas winter -- or a German spring! Though discontinued, I managed to scrape up enough yarn from various online vendors in the right colors and got a copy of the Rowan magazine (#55) with the pattern.

I went through several mood swings with this pattern and yarn. It has no "give" to it, so it's kind of like knitting with kite string. Knitting for long periods could be a bit rough on the hands. And I mistakenly looked at an errata page and ordered one less ball of the main whitish color than I needed for the 42" size and ended up having to order that extra ball later. Fortunately, the supplier still had the same dye lot. Some parts of this I just flew through -- one of the sleeves was done in just a few days -- while others took ages. One factor for the time it took was this project's non-portability. All those different colors to wrangle and all the careful counting and slipping that had to happen.

Seaming it all up was also difficult for me. The slipped and therefore wrapped stitches on the edge made it difficult to see where to run the yearn for the seams. On the sleeves especially, the edge stitches switched from wrapped slipped edges to stockinette edges and I got confused. I tried doing a backstitch from the wrong side, but I really don't have enough experience with that and wasn't pleased with the results, although I did use it for the shoulders. I managed with mattress stitch seaming on the right side for the rest. The seams are fairly obvious, but I don't think that's a problem with this particular garment. At the point where the collar starts, the instructions say to use the color that's right in the center of the front. But in consultation with Jeff, we agreed that the ribbed collar should match the ribbing on the hips and the cuffs. I think that was a good call.

Jeff likes it and it looks really good on him. And the cotton/silk/rayon blend means it will be wearable for a longer part of the fall and winter. Especially happy that I got this done before the coolest part of the year hits. Notice I didn't say "coldest". Not sure that term applies anymore. Anyway, I like the striping, and that I branched out into colors I wouldn't normally choose. I think it has a bit of an 80's retro vibe to it. It fits me, too. Just sayin'....

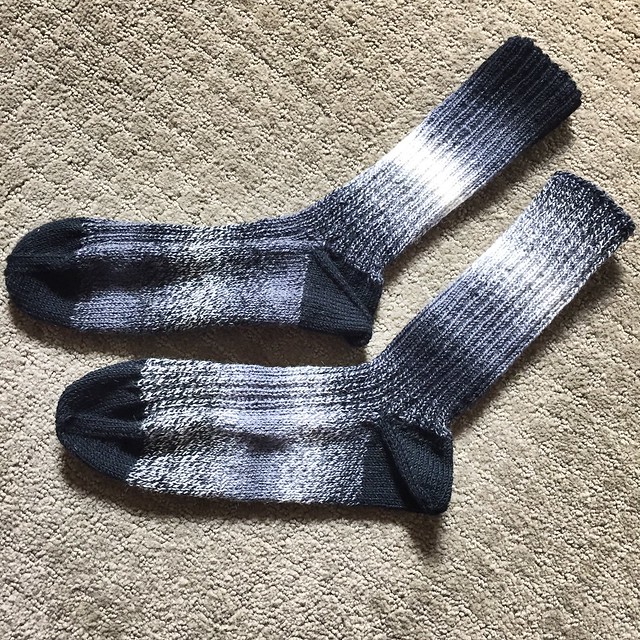
On the same day, I funneled my just-completed-a-project adrenaline into some socks I'd had on the needles for OVER A YEAR! I just wanted them done. I'm not usually opposed to fraternal twin socks with this kind of yarn, but this pair, which I dubbed the Domino Socks, just aren't doing it for me. I liked the yarn when I bought it, and loved the shop in Maryland run by two Mennonite sisters where I bought it. I remember casting on for these using my plain go-to sock recipe just to have a portable project for some event, then never really took it out of the house much again after that. But they're done and I won't have to stare at that the WIP label under it in Ravelry any more. I did enjoy the solid black toes and afterthought heels, though.

Maybe I can cast on for some socks that actually interest me soon. I also have an interesting scarf coming up and beautiful yarn for a Fair Isle hat. If you're still here, stay tuned!