Sunday, December 10, 2017

Alchemy

Jeff asked me to make him a sweater for an upcoming trip to Colorado with family. I happily obliged, hoping to have it finished by his birthday. I completed it with a week to spare. One month exactly from cast-on to bind-off.

This is the Alchemy Pullover, featured on the cover of Issue 3 of the new Rib Magazine. The designer, Lars Rains, was unfamiliar to me, but he's quite a prolific designer who specializes in working with color and texture in interesting and innovative ways. The sweater is made with 10 colors of Brooklyn Tweed Arbor, which I purchased from Hill Country Weavers. There's a also a 5 color version of the pattern, which I thought was very clever and thoughtful.  It almost tripped me up a few times , though, when I flipped open the magazine to consult the charts and thought I'd made a mistake, only to realize I was looking at the wrong version.

Since I had to check gauge in the round anyway, it made sense to me to just start making a sleeve and count that as my gauge swatch. As luck would have it, I was spot on with the recommended needle size (US7, 4.5mm). So I made both sleeves first, and then started in on the body of the sweater. The sizes made a leap from 42 ¾" to 46 ½" and it called for a few inches of ease. The smaller size would have left only a tiny bit of ease, so I went with the 46 ½" size. It's an inch or two roomier than I might like normally, but better bigger than too snug. Plus, I can wear it also. Just sayin'...

Lots and lots of brown stockinette in the round. I was kind of in heaven. But then the real fun started. Each color in the yoke is used for 8 rounds at a time, with a new color being introduced every four rounds. All but two of the colors are used twice. As an added layer, texture is introduced through purling. I was rather used to knitting with two colors, one in each hand, but I was quite unused to purling with my right hand. I found it quite difficult and now understand while some new right-handed throwers are averse to purling. All that moving the yarn back and forth! So much easier in the left hand. As with any stranded pattern knitted in the round, there is a visible line where the pattern rounds change. You can see this over Jeff's left shoulder in the picture above. I think it's only really noticeable at the top with the yellow and brown.

The one part that that I'm not entirely satisfied with is the collar. It's just more simple stockinette in the round in brown above the yoke, but then goes into a 2x2 ribbing for 15 rounds, finished with Jeny's Surprisingly Stretchy Bind-off. But something about the decrease rate, or maybe just shoulder and neck anatomy in general, makes the fabric gather and bunch up a bit. I've seen this happen in other yoked sweater patterns, but not sure why. So it looks a bit "roomy" in the neck area. I'm thinking, though, that this might not be a bad thing, giving a bit of comfort around the neck, but also trapping warm air in cold weather. I'll go with that.

Speaking of weather, you may notice traces of snow in these pictures. I took these in the morning after a freak late-autumn snow flurry the night before that hit central and south Texas. So unusual at any time, but especially this early in the chilly season. The college where we work had a delayed opening, which allowed us to get this pictures taken. I'm hoping we see a bit more snow than this when we head to Colorado in a few weeks. I know this will keep him snuggly and warm. I'm so pleased he likes it. Happy birthday, Jeff!

Next up, I'm going to finish the last two pairs of the Woodland Winter Mittens kit I got from Knit Picks in 2011. The kit came with enough yarn and six patterns to make pairs of mittens representing the six colder months. Texans - use your imaginations! Within a year of getting the kit, I'd made the mittens for October, January, February and March, but had never made the ones for November and December. I'm not sure why - I'd just set the box aside. From time to time I would unearth the yarn and pattern and remember I needed to get back to them. Now seems to be the time. I've gotten started on the November pair, which features mountains and a large ungulate (elk? moose?) on the back of the hands and a pretty plaid pattern on the palms. They might make nice gifts for people I know who were born in these months...


Saturday, November 04, 2017

Younger Folks & Textured Yokes

I spent much of yesterday finishing up a baby blanket for the newest person on my block.

It's the Pick-a-Knit blanket from Appalachian Baby Design. I made the large size, using one of their kits, which comes with the pattern and two balls of each of the three colors in the blanket - a light silvery-gray, a beige tone, and a natural cream color. The cotton is all organic, and quite soft to the touch. And very washable. Perfect for a new little one.

I knew going into this that there would be a bit of pain and strain. Because of cotton's lack of give compared to animal fibers, knitting with cotton can be hard on the hands, depending on how tightly the knitter holds his yarn and needles. And I tend to hold them both with a death grip. I don't know why, but I've always had trouble maintaining a light touch and "soft hands" while knitting. It usually doesn't bother me, but cotton can really exacerbate the tension. My thumbs are a wee bit sore and I have a little twinge in my left elbow, but I think it was worth it.


Yesterday I finished it up, wove in the ends, washed it and dried it. It's all ready to be boxed up and taken down the street to my new little neighbor. I started this a few days after she was born last month. I hope she hasn't gotten too old to appreciate it already!

And here's a little something I just have to share. A few years ago you may recall that a young neighbor of mine asked me if I would teach him to knit. We cut a deal - I'd teach him to knit if he showed me how he made paper airplanes. Let's just say, he was a better student than I was. And, to my immense pride, he has kept at it. He's since become interested in so many things (building ramps for his bike to jump off of, Little League baseball), but we still talk about knitting from time to time as I walk the dogs by his house. When I was out of town at a conference a few weeks ago, he gave Jeff this sample that he had knitted and asked if he would make sure I got it. I love this so much - the colors, the effort, the pride in knowing how to do something that not everyone can do. A while back, he asked if I would make him a blue hat, and it's never quite happened. It's going to happen soon, I promise.

Next up on the list of things to make is a sweater for Jeff. He doesn't ask for them that often, but when he saw this pattern for a sweater called the Alchemy Pullover in the latest issue of Rib Magazine, he said he wanted one in the exact colors shown. This pattern comes in a 10-color variation and a more affordable 5-color version. He said he wanted all 10 colors. I mentioned that this would be more expensive, but he just shrugged and I'd grabbed my keys and was out the door before his shoulders had lowered. My goal is to have this finished before his birthday in mid-December and before we head up to Colorado around Christmas-time for a family get-together.

Swatching for this needs to be done in the round, since that is how this is constructed. A swatch in the round is going to look like the beginning of a sleeve anyway,  so I plan to just start knitting a sleeve and measuring for gauge once I get a few inches in. If I have to rip back and start over, so be it -- it's what I'd have to do with an unsuccessful swatch anyway.

Eagle-eyed viewers might note that there are only nine skeins of yarn showing in this photo for a 10-color pullover. I'm recycling some of the yarn in the color called Gale (yet another shade of gray) from my River Rocks scarf. I think I have enough left over of this that I can just use it. See -- I'm saving money already!

Need to go cast on for a sleeve right now. Happy knitting!


Sunday, October 08, 2017

River Rocks

I'd been wanting to knit something from the new men's knitting magazine Rib since it came out, and issue #2 had a pattern that caught my eye -- the River Rocks Scarf.

I liked the graphic pattern, and it used a technique which seems quite popular these days, but which I'd never used - brioche stitch. Brioche is a type of double-knitting, using two strands of yarn that are knitted separately row by row, yet intertwined in such a way as to make a very dense fabric. It creates many pockets of air surrounded by wool, perfect for garments that benefit wearers through trapping warm air near the skin, such as scarves and hats.

This scarf pattern uses two colors to create a reversible pattern that looks quite different on either side. The dark side contains the "river rocks" motif, which uses increases and decreases to create tiny circles that mimic rocks which appear to be breaking up a current. The lighter side, which I prefer, is more linear and graphic. I wanted a contrast, which is why I went with dark (Porter) and light (Gale) tones of gray Brooklyn Tweed Arbor yarn here, though I imagine the river rocks would have shown more if the two colors weren't in the same family. But this guy just needs knit with gray yarn every so often.

The pattern calls for 18 repeats of a 24-row motif, with increasing/decreasing business going on in one out of four rows. Because I had the yarn for it and wanted just a few more inches, I did 19 repeats. It wasn't too complicated, but keeping one's place in the repeat was essential. I messed up more than once, putting a pebble in the stream where it didn't belong, and had to rip back three separate times. A lifeline helped in that regard, although for the last one I was able to rip back just a few rows and get everything back on the needles correctly. Brioche stitches are hard to backwards engineer when trying to fix mistakes. Having contrasting colors helped. If this had been one solid color, fixing in such a way would have been nearly impossible.


I'm not entirely sure I got the two-color Italian cast-on executed correctly. That edge flares in a strange way. But I did figure out the sewn two-color Italian bind off and it looks pretty neat and tidy. The final thing is about 72 inches long and between 7 and 8 inches wide, since the edges ripple. The instructions said to block it, but I don't think I'm going to just yet. I'll wait until the first time I wash it. Looking forward to wearing it in Colorado this winter!

What's next? Another baby blanket, because babies keeping popping up all around. And a sweater for Jeff because he asked, and I learned long ago to not question these rare requests. More on those later.


Saturday, September 09, 2017

Fibonacci Stripes

This past month (well one month and one day), I've been working on a striped sweater using yarn handspun by Janelle. It's finished!

While visiting Gettysburg this past summer, I got to admire all the amazing handspun yarn that she's made over the years. Noting that she couldn't knit it all, she said I could take a batch of whatever I want. Janelle's palette runs decidedly blue/green, so this batch of cranberry red yarn really jumped out! We both knew it wasn't enough to make an adult sweater, but she suggested that maybe I could work in another color in some way to stretch it out.  After I got back to Texas I bought some in Brooklyn Tweed Loft in a grayish-brown called Barn Owl, and this is what I came up with.

I'm using the general crew-neck raglan pullover recipe as outlined in Ann Budd's The Knitter's Handy Book of Sweater Patterns. I've had this book for years, and it's a great go-to source for when you want to branch out on your own in knitting a sweater, but still need to fall back on well thought-out formulas for increasing and decreasing and just general fit.

I couldn't quite get gauge for the 44" in sweater size I wanted to make. But I followed Ann Budd's instructions for adjusting gauge. I ended up using the instructions for the 40" sweater, but following the lengths described in the 44" sweater and it worked like magic! I didn't get quite the ease I wanted, but that's a different type of math, involving adjustments to exercise frequency and taco consumption. Ahem.

I needed to insert the contrasting color in some sort of interesting way, but wasn't sure how. I knew from other design things I've perused that the Fibonacci sequence often produces eye-pleasing results, so I played around with a spreadsheet, adjusting strips and measuring row-gauge, before coming up with a plan. I skipped the number 1 and came up with alternating rows of red and gray/brown yarn in the following sequence: 2-3-5-8-13-8-5-3-2. That is, after 1/3 of the sweater being knit in red, I started with two rows of brown, two rows of red, three rows of brown, three rows of red, etc. Originally, I thought that the top 1/3 of the sweater would be brown, but I decided I had enough to make the top red, and I think it looks much better that way. I did the sleeves the same way, and they more or less match. I like how from a distance, it looks as if you're looking down on a striped cylinder. It also give a sense of motion if I squint just right.

The cuffs, hem and collar are all done in 8 rounds of seed stitch. I love seed stitch, and one day I'd like to make a sweater that is entirely of it. This stitch made a good edge for the most part, although the hem still tends to curl up when I'm not wearing it. It seems to behave once it's on me. I did have an issue with the bind-off. Traditional bind-offs are notorious for forming a tight, inflexible ridge, which can cause problems getting garments on and off. I thought that going up a couple of needle sizes would take care of that, but as you can see, it wasn't enough. I probably could have tugged it down over my ears and nose, but I wasn't confident I would be able to ever remove it. So I undid the bind-off, put the stitches back on the needles, and used Staci's sewn tubular bind-off. It's very easy, I think, and although the directions are for 1x1 ribbing, seed stitch is basically a variation on that and it seemed to work just fine.

Although it's made of alpaca and wool, I was surprised how un-hot I was in it in our low-80s temperatures when we went to the back yard to take some pictures. The main problem was all the mosquitoes that have appeared since our copious Harvey-related rain. I can't wait until it cools off a bit so that they all go away, and I get to wear my new sweater.

Sunday, August 06, 2017

Lilac

As it gets hotter and  hotter and the world gets crazier, all I want to do is stay indoors and make pretty lacy things.

This one is Flieder, another Herbert Neibling design, but about three times larger than the Georg doily I made last month. Flieder is German for lilac. Neibling produced more than one pattern with this name, but I'm not sure how he saw anything bout lilacs in this particular pattern. The central flower has six petals, and little lilac blossoms have four. Still, it's Neibling's world and we're just living in it. Flieder it is

While shopping for thread -- and I got each of the three balls from three different craft stores in Austin --  I saw that Aunt Lydia's Classic Crochet 10 comes in a light purple, dare I say, lilac color. But that would have been a bit too literal and I would never have used it. White is the way to go with this, I think.

For those interested in such things, here's a little schematic of how this particular sausage was made.The central portion, marked in green, starts with 6 stitches in the middle, one for each petal that grows outward, knit in the round. After completing that, the two sections marked in, let's say, lilac, are knit flat (back and forth). After this, stitches are picked up around the purple sections along with the held live stitches from the remainder of the green so that the work is again done in the round. Four rounds of dense purling with the thread held doubled follow, and then 20 repeats of the pattern are knit up to the orange line. After that, the pattern shifts to 40 repeats. That's a lot of stitch markers. And a lot of stitches on the needle. By the end, there were 1,440 stitches on a 32" needle. I don't have a US0 (2mm) 47" circular needle. I wish I did. Things got quite crowded. I also experienced that weird thing with center-out projects -- the closer you get to the end, the slower your progress. It can be a bit maddening. Everything up to the orange line took 5 or 6 days to knit. Everything outside of that took an additional two weeks.

Please don't think that all this explanation is meant to impress, or to warn you off lace knitting. My point is that it's not nearly as hard you might think. I've made two oval examples, which are probably more fiddly than most. I would think that a square table cloth or round doily would be a bit easier, but just having a basic idea of the construction, using Google Translate, and finding some online German/English knitting glossaries is all you really need to get started. Then it's just a matter of not dropping stitches and not loosing one's place in the pattern. And time.

This fits our dining table perfectly, which was a fluke, really. I just lucked out on that one. I'll likely just use it for special occasions. This morning, I set out some of my Grandma Self's china on it to see what it looks like. The story in the family is that my grandmother didn't really even want fancy china, but my grandfather insisted that they get some while they were living Germany after WWII and had the means -- they'd been so poor when they got married during the Great Depression. It came down to me eventually. A scent I noticed as a I was pulling it out of the cabinet triggered a sense memory of my grandparents house and Thanksgiving dinners in San Antonio. And they look great together, I think, German dishes on a German-designed doily. My family has had so many connections to Germany -- my Kohrs and Weber ancestors immigrating from there to Texas in the 1850s, my grandparents and father living there 100 years later, and my brother's family making their lives there now.

Only 109 days until Thanksgiving!


Saturday, July 08, 2017

The Doily Chronicle

When I started knitting twelve years ago, I would have scoffed at the idea of spending time and effort making a lace doily. But today, I finished my first one -- the Georg doily designed by Herbert Niebling.

And I say first one, because I'm going to likely make more. Yes, they're challenging and fiddly, but as a process knitter, theses are the things I kind of like about knitting. Seeing the symmetry inherent in the pattern gives a certain satisfaction. And observing how the squares and symbols on a lace chart translate into leaves and petals makes me want to keep going to see what happens next. Then, of course, there's the challenge of keeping all the balls in the air as it grows and grows. The first round of this project, started in the middle, had 8 live stitches. By the time I got to the cast off, there were nearly 500.

Here's a walk through how this thing is constructed. Starting at the pinhole cast on in the center, the central flower is eight repeats of the same motif knit in the round, creating the petals, with slight variations on opposite sides to set up the oval extensions. Those sections are knit flat (purling on the back side) out to the ends. Then, stitches are picked up around the oval extensions along with the remaining live stitches from the sides of the central flower.  A 20-round pattern repeated 16 times around the whole doily created the leaf points and lace edging.

Then, all that's left is the crocheted points around the outside. The first round serves to bind off the edges of the knitting and create little loops. The second round builds on those, plus pulls the ones opposite the leaf points together. I was intimidated by this part because my crochet fu is not strong, but I think I managed. It was a little tricky to figure out how do the attaching, but I just picked a method and stuck with it. I found myself really wishing my crochet skills were stronger as I finished this up.

I completed the crochet edging yesterday afternoon and went online to find out some blocking options. One was to mix some liquid starch and soak the whole thing, but the video examples I saw led me to believe that it would end up too stiff. I wanted it to have some structure, but I didn't want it stiff as a board, either. I decided to go a bit simpler. I soaked it in warm water (which left the water strangely murky -- this is just cotton, what was up with that?) then placed it flat on a towel draped over my blocking board. Then I got out the regular can of spray starch that I use when I iron shirts (ahem, which isn't often) and went to town. I pinned out all the outer loops to make points. This part was fairly tedious. Not sure I did the tidiest job, but it looks pretty good overall.

In the original design, the central flower, a few rows in the middle and the crochet loop points were all done in a black yarn (see below). Couldn't quite see the point in that -- I thought it looked a bit odd. But tastes change. Consider that one of the staging shots for one of the patterns in the book features an ashtray with a lit cigarette resting on a doily. Not something you'd likely see in a pattern book today!


I enjoyed this project way more than I had anticipated. I was surprised by the sense of dimension in the finished object. The way that the fields of stitches and lacy holes ran in different directions created textures and shading that I hadn't imagined. I'd always though of lace as being very two dimensional, but it doesn't have to be. I was so impressed at the thought and care that Niebling put into this design so that everything lined up and worked together just so. I want to knit more!

Tuesday, June 20, 2017

Doppelumschlägen


My latest knitting adventure involves intricate lace patterns. Written in German. Help.

For a while I've wanted to knit a fancy lace design by the German lace designer Herbert Niebling (1905-1966), a man who needs a Wikipedia page if anyone does. He churned out hundreds of intricate knitting patterns for tablecloths and doilies in the mid-20th century. Many of the designs feature stylized flowers and plants. Reading through their names is like reading a German botany book -- Eiche (Oak), Ahornblatt (Maple Leaf), Hängeblume (Hanging Flower), Löwenzahn (Dandelion), Erdbeere (Strawberry), Tannenzapfen (Pine Cone) -- the list goes on and on. Then, randomly, there are patterns with people's names attached to them. Some of these patterns are enormous and would take months of painstaking work. Some are just tiny little coaster-sized things. I kind of want to knit them all, but can't figure out how any human being could ever knit all these in a lifetime, much less design them, too.

I decided that for my first foray, I'd settle on something smaller than a tablecloth, but which I could still trot out as a centerpiece for nice dinners. Having something like this, I assume, will make me want to host nice dinners. I decided on a pattern called "Georg," which is oval-shaped and doesn't really have to fit over a piece of furniture -- it just just has to lie flat on top of it. Plus, a knitter in Ravelry had already made a beautiful example and had basically translated parts of the pattern for English knitters. Decision made!

I got some crochet thread and some size US0 (2mm) needles and got to work. And then started over. And then started over again. I was having trouble with the double yarnovers in the pattern and dropping stitches left and right. I finally managed to fall into a rhythm, but it was a bit of a struggle.

After finishing the 40th round, I finally dug around on some online forums to find out more about double yarn overs -- for non-knitters, this is wrapping the yarn around the right needle twice. Very simple. The effect is to create a hole in the fabric, which is kind of lace's thing. But working these loops on the next row is another matter. I just knit into them again, which created a strange string that draped across. Since the row after that involved decreases that pulled the previously-created holes to one side or another, I didn't really think anything about it. It looked okay to me. But reading today, I found that everyone one in the lace-knitting universe knows that you don't just knit into those two loops. You either knit then purl, or purl then knit, or knit then knit into the back of the next loop. But one thing they all agreed on: one simply does not knit into a double yarnover twice on the next row. See the triple-strand ladders running between the honeycomb-like holes in this detail? That's what happens when you do what I did. Why didn't anyone tell me this?

Well, apparently, Herbert Niebling did. Right there in his instructions, he says Auf jede Musterrd. folgt 1 rd. rechts, in der man nur aus den Doppelumschlägen 1 M. link 1 M. rechts strickt, which Google Translate kicks out as "On every pattern follows 1 approx.(?) on the right, in which one knit 1 st on each side from the double turn." I've learned that the German words for knit and purl translate as "right" and "left," so "knit one stitch on each side from the double turn" is basically knit and purl into the double yarnover.

So now my favorite new German knitting vocabulary word is Doppelumschlägen (double yarnover)And now I know what to do with these. So it looks like I'll ripping back to row 11 again. In the meantime, I need to get back to lurking on the forums to see what other tidbits about lace knitting I don't know. Nothing like learning a whole new language in a whole new language.


Sunday, June 11, 2017

Taking the Wraps


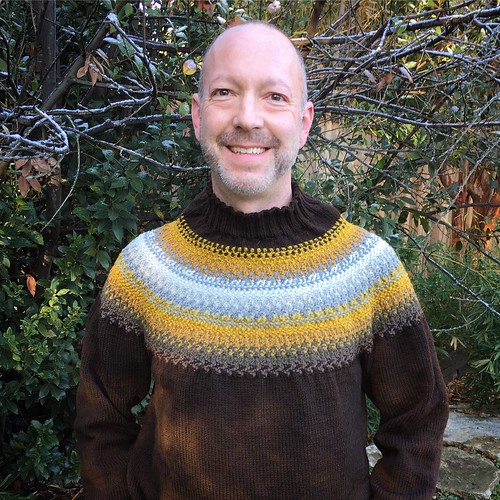
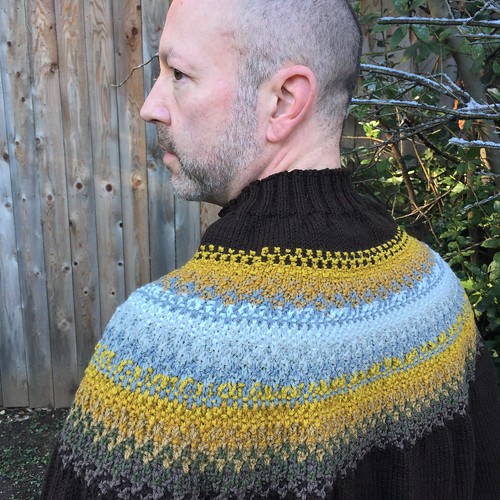
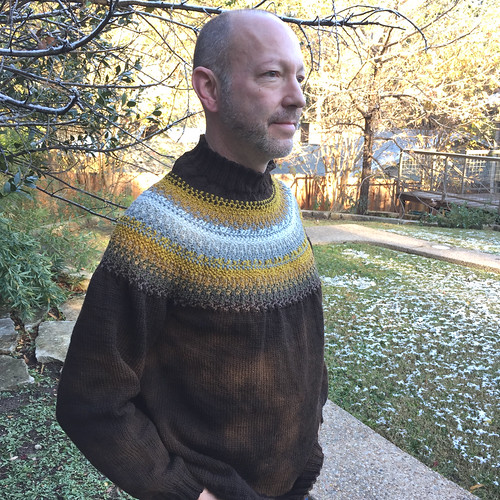
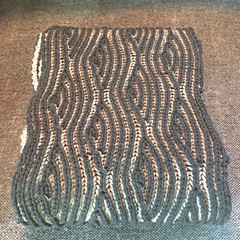
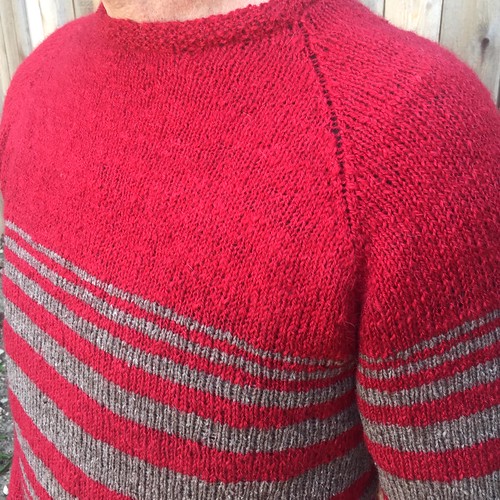
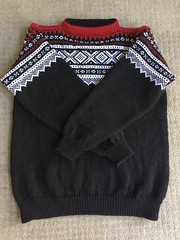
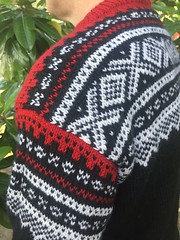
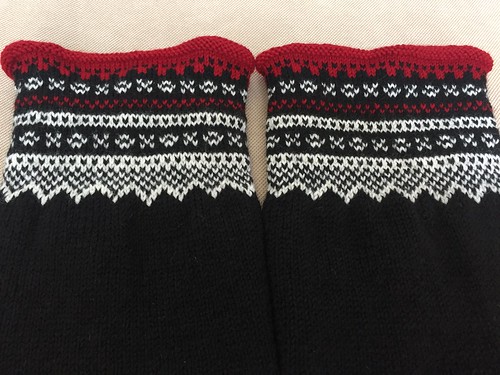
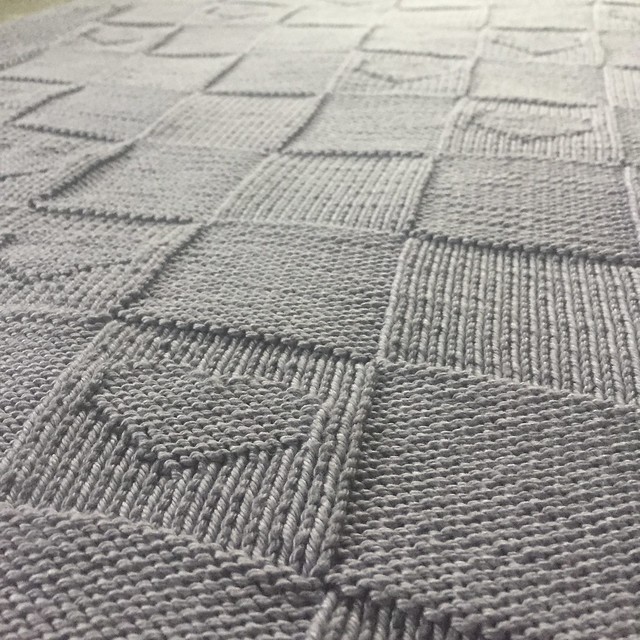
After the challenges of the Marius pullover, I was ready to work on something a bit more calming and mindless. Nothing for that like knitting quadrilaterals.

First up was the Sommerbrise Schal, the yarn and pattern for which I got from Heidi, the proprietor of Maschenwerke in Frankfurt last summer. Andrea from 
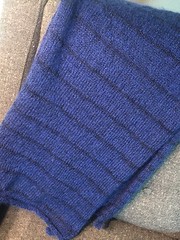
The Fruit Knitting Podcast had graciously taken us there to see her beautiful shop, and while there I saw a beautiful scarf that Heidi had knit using two kinds of Ito yarn, Gima 8.5 which is a sort of cotton ribbon, and Sensai, a mohair/silk blend. So out of my wheelhouse, yet so light and airy that I thought I'd give it a try. Of course, I went for some darker colors than Heidi, but she helped me select a dark navy Gima and an electric blue Sensai that worked well together.

I cast on for this in November, but I didn't really get started until a month or so ago. It's a relatively easy pattern, with the two different yarns held together for much of the project, but then using only the dark color for stripes that gain in frequency toward one end. It was beautiful to knit with, and a real lesson in working with fibers and yarns outside one's comfort zone. It was a fantastic exercise. It's only 50 inches long, but can be bunched up around the neck nicely. Not exactly my cup of tea fashionwise, but I'm thinking of taking it to a silent auction that a professional group I work with runs in the fall. I'm hoping it will raise some money for student scholarships.

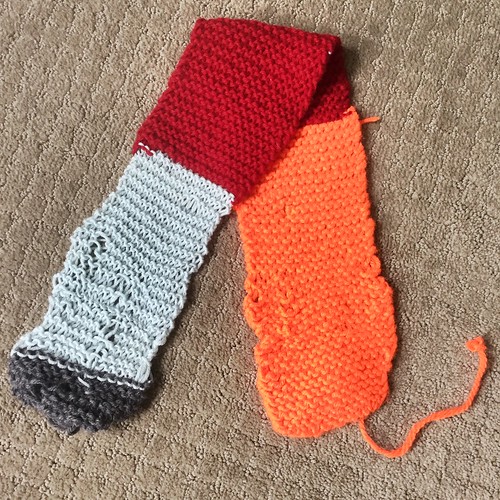
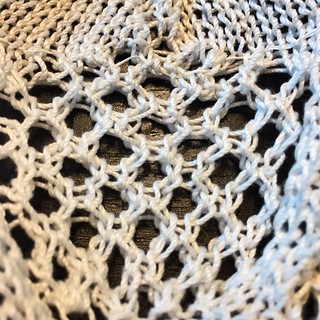
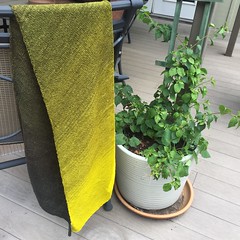
Then, after knitting with friends on Saturday a few weeks ago, my friend Jene and I headed over to 
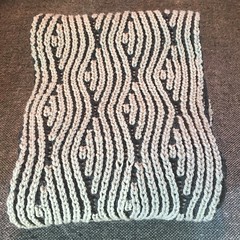
Hill Country Weavers' new location and talked each other into knitting their free A Biased Scarf pattern with some Freia Handpaints Ombre lace yarn. I choose a dark gray that slowly morphs into a bright acid yelllow/green. It's a pretty easy pattern - cast on 80 stitches, increase and decrease one at the ends of each right side row, and purl the wrong side rows until you run out of yarn. I started with the dark end. Although the pattern was simple, I enjoyed the slow gradient shift toward the brighter end. Since it's knit on rather large needles for a laceweight yarn (US 6, 4mm), it has almost no curl after blocking. It really is quite beautiful and drapey. Again, though, not really my style.

That's why I'm giving it to our friend Rhonda. She and her husband David have become such good friends in the last few years and I wanted to do something to show my appreciation for all they've done for me and Jeff. I think she likes it and it looks great on her.

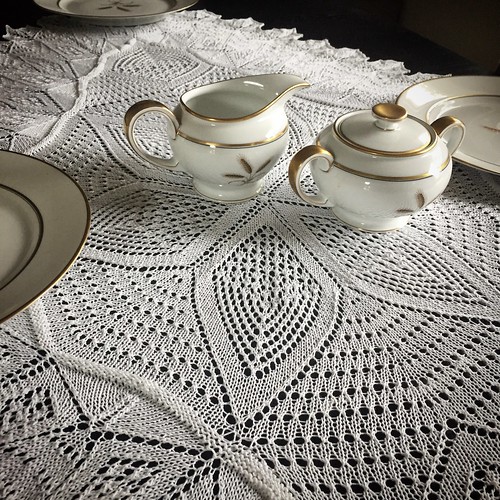
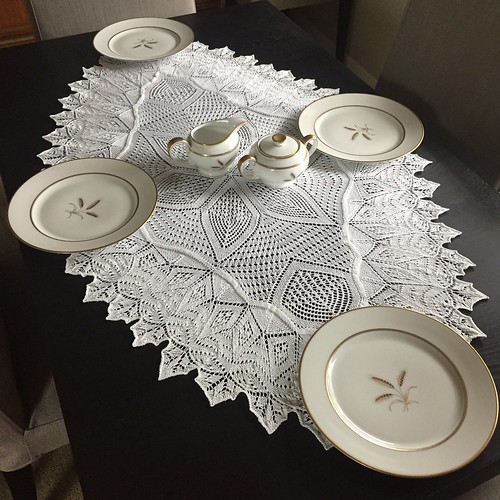
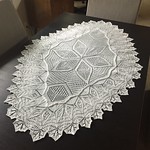
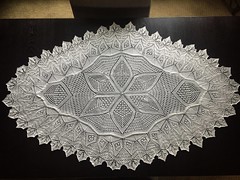
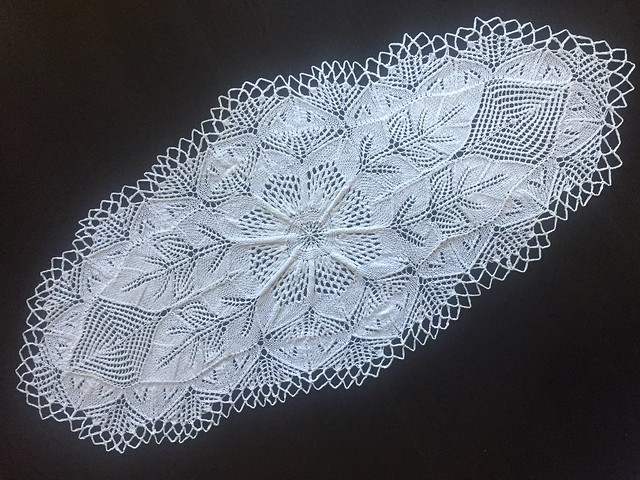
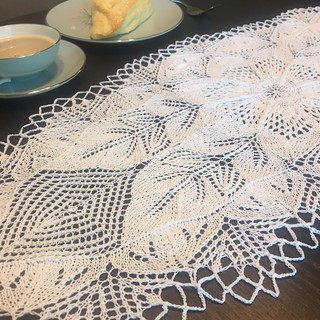
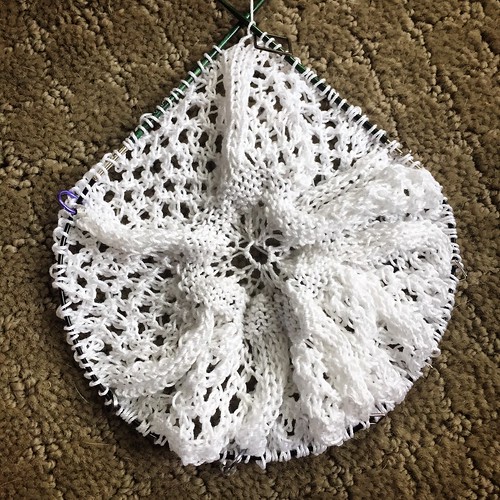
Up next in the world of things you wouldn't imagine I'd want to make -- a lace table runner. Weird, huh? I've always thought they were beautiful, and I've lately become obsessed with the intricate designs of Herbert Niebling, many of which are named after plants and flowers. I'm particularly enamored of one called "Georg" which is oval shaped. I think an oval-shape would require less "fitting" around a table. Also, it wouldn't cover the whole piece of furniture. I've never done anything quite this intricate before, and I have the feeling I'm not fully aware of what I'm getting into. First of all, there's tracking this pattern down. It's been reprinted in at least one book since it was produced in various pamphlets in the mid 1900s, but that book is hard to come by. I'm trying to get it through interlibrary loan at the moment. If that fails, I may have to bite the bullet and see if I can get a copy from an online auction, although they are rather expensive.

On top of that, there is the fact that this requires very thin cotton crochet thread, and very tiny needles. I'm not really scared of either of these things, but I'm aware the potential for frustration is quite high. Then there is the issue of translation, although other people who have knit this say the German isn't too difficult and the charts are pretty easy to figure out. Here's hoping.

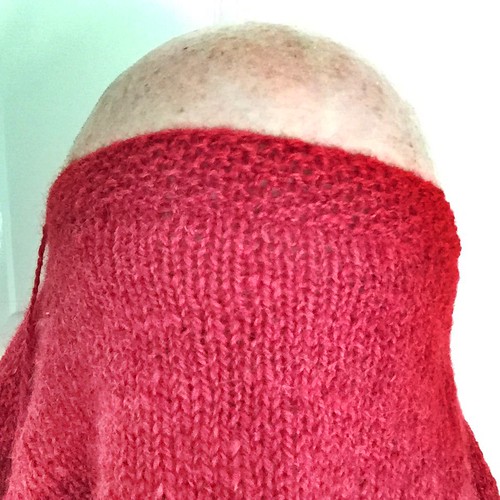
So that's on the back burner for now. In the meantime, I've ditched the socks I'd had on the needles forever. I'd gotten started on them, got uncharacteristically distracted by something else, and then set them aside and the mojo was lost. So instead, inspired by Janelle, I'm using the sock yarn to make a Sockhead Slouch Hat. I've wanted to do one of these for years and it's the perfect placeholder to keep me busy until I can track down Georg. I know he's out there somewhere...

Tuesday, May 02, 2017

Multifarious Marius Precariousness


It ended up being way more complicated than it needed to be, but at last my Marius Sweater is finished.

When I last checked in, I had realized that my gauge had changed once I started in on the patterned portion of the body of the sweater and had ripped that section out and started again on larger needles. This absolutely did the trick. But then, after re-knitting about 2/3 of the black-and-white portion, I realized that my yarn dominance was off.  This means I was carrying the wrong color in the wrong hand. Ultimately, this doesn't really matter, as long as one is consistent with which color is carried in which hand. But I really wanted he white color to pop, and I had my yarn configured so that the black yarn was dominant.

In the picture to the right you can really see what's going on in the striped steeks. At the top, I carried the black yarn in my left hand. At the bottom, I'd re-knit the same section with the white yarn in my left hand. When knitting with two yarns, the one in the left hand tends to stick out, for most knitters anyway. Usually, I consult my copy of Ann Feitelson's The Art of Fair Isle Knitting before starting stranded colorwork to make sure I get this right, but this time I was just sure that the dominant yarn is carried in the right hand. Oops. Wrong. So, I ripped back yet again.

The third time was the charm -- gauge and dominance were just fine. But I'd already knit the sleeves. With the wrong gauge and the wrong dominance. So I re-knit those, too. It really didn't take that long. The pattern in the sleeves is simpler, without the complex X motif of the body. When finished, I crocheted the steeks, cut the armholes open, and sewed on the sleeves. They fit really well, to my surprise -- I saw a lot of examples online that looked bunched up. And then I tried it on.

The sleeves were too short. About 6cm (2.5") too short. You can't unravel a cast-on edge. Well you can, but you'd go insane. So I picked up stitches just below (or above) the cuffs, snipped off the cuffs, added 6cm of stockinette and then re-knit the cuffs. And THEN I was done.

This really is a cool pattern, and not as complicated as I've made it out to be. I just got so excited to get started that I forgot a lot of the details that would have made this go smoother. If I'd been more thoughtful about gauge and yarn dominance, I would have had this finished in half the time. Fortunately, I'm a total process knitter, so getting it right doesn't bother me. And it wasn't like I was on a deadline -- I only had to have it finished by December, when I'm going with my family for a big ski vacation. Even if I just sit around and sip hot adult beverages the whole time, it will have been totally worth it.

Winter is coming!


Friday, April 07, 2017

De-Tension Slip


Now you see it, now you don't. Generous readers will assume that the bottom picture is the "before" picture and the top picture the "after." That's really sweet of you, but you're wrong.

I'd noticed in the sleeves that the tension tightened up a bit once I started the colorwork. This is normal and par for the course with multicolor stranded knitting. Yarn is carried behind the work and isn't interlaced with nearby stitches. This lessens the stretchy property of a knit fabric, which by it's nature should be flexible in all directions. You can see how it pulled in once the white yarn starts n the photo bellow. But I still thought it looked acceptable and likely fixable with a bit of blocking.

Then, while knitting a few nights ago, I noticed that the body of the sweater was pulling in, too. A lot. I noticed this when I was less than 10 rounds from finishing the body. So I stopped to think. And think. Here's what I concluded:

  • Blocking wasn't going to fix this problem. I'd have to be pretty aggressive about it, and the pattern would be too stretched
  • The fabric was too dense, with little drape to it. I didn't want to it to feel like I was wearing cardboard
  • If I just forged ahead and cut the steeks, I'd have a bunch of pieces of cut yarn and re-knitting would be a splicing nightmare

So, I unraveled it back to the start of the colorwork. Sigh.

Here's what happened. The pattern called for knitting a gauge swatch, but didn't specify to knit it using the pattern. I suppose any experienced Norwegian knitter would know to do this. I would know to do this, too, if I were knitting a garment that was all stranded. But if not given instructions as to how to swatch, I usually just do the first thing that happens in the garment, which is a big old field of black stitches. I'd had to go down a size, in fact, to get gauge. So now, I'm going to go back up a needle size to get a bit more room at the top.

There's no teacher like experience. But I'm not discouraged. Process knitters knit. It's what we do. I'm kind of excited, actually, to get another crack at this beautiful pattern. Back to it! And while I'm at it, I just might revisit those sleeves, too...

Sunday, March 26, 2017

Sleeves Achieved


I finally got the red yarn I needed for my Marius Sweater sleeves in the mail on Friday and quickly went to work finishing up the sleeves.

I'd wanted to get the sleeves completed first to make sure that I was making the armhole steeks the correct height for the sleeves. Several pictures I'd seen of knitters who have attempted this pattern show that the armholes are bit smaller than the sleeves, resulting in some bunching when they are sewn in. I'm thinking that if I know exactly how side the sleeve openings are, I can try and make my steek for the armholes match. That's the plan, anyway.

I'm pleased with how the stranded knitting portion looks. I was a little worried that the white/black combination might be too stark, but like most stranded knitting, it looks a bit better from afar. The fabric does pull in a bit where the white yarn starts, but that's too be expected. I haven't blocked this yet, so I'll be able to add a bit of stretch. I'll need to do that anyway before I measure for the armhole steeks.

I switched from the grayish green Petroleum color for the highlights, collars and seams to the more traditional red, and I think it was the right decision. The grey was kind of sickly looking and just didn't add enough contrast. The red, which is the traditional color for this part of a Marius sweater, is perfect. I was a little worried that it wouldn't pop against the black enough, but it does just fine. If it looks like the sleeves are a bit short, that's okay. This is a drop-sleeve construction, so the sleeve seems are supposed to fall a few inches down from the natural drop in a person's shoulder. I normally don't like this kind of sweater -- I prefer set-in sleeves -- but it's kind of what you have to put up with for stranded knitting. It's possible to do a capped sleeve in fair isle, but way more complicated. And this, ultimately isn't that complicated a garment.

A testament to this is the two pages of instructions. They seem a bit sparse to me, with no schematics of how the pieces fit together. Translated from Norwegian and written in the mid-20th century, I think the designer made certain assumptions about the person reading this person -- their skill, competence, and knowledge of knitting in general. I've been able to follow pretty well, except for a strange few missing stitches toward the top of the pattern charts. Usually, this denotes that some sort of decrease has taken place, although there is nothing in the written instructions that would indicate I'm supposed to do that. After consulting with experts, I came to the conclusion that this indicated a re-set point. All the stitches are supposed to work right and left from a mid-point on the outer edge of the sleeve. You count out from that point to find out where on the chart you start and stop, depending on the size you're knitting. For most of the chart, that's based on a 10-stitch repeat, but for the last few rounds, it shifts to a 4-stitch repeat. So I just reset from that point to figure out a new starting point that resulted in the pattern matching across the whole grid. This is a bit difficult to discuss without showing the pattern, but I didn't want to do that. Trust me when I say that this took up a LOT of time trying to figure out, and that whether I'm right or wrong, I'm satisfied with the explanation I've told myself. At this point, please, don't correct me if I'm wrong! The reverse stockinette at the top is mean to be hidden when the sleeves are attached.

So now it's just back to the body of the sweater and inches and inches and rounds and rounds of knitting with black yarn on black needles connected with a black cord. I'm sitting under very good light, but it can be a bit of a challenge. I'm eagerly looking forward to the stranded portion at the top of the body of the sweater, which is similar to, but much more elaborate than those on the sleeves.

As I've tried to find out more about this pattern, I'm stunned at how ubiquitous it is and almost universally recognized in Norway.  So many cool things out there. I know things are warming up around here, but next time you have a cool snap, keep your eyes open!


Sunday, February 26, 2017

Baby Love


Another work colleague and friend of mine is expecting, and rather sooner than I was expecting (as if I had a say in the matter), so I had to knuckle down and try and get this finished ASAP. And that was today.

The Baby Love Blanket pattern is designed by Meg Hollar. It's sweet and simple, but a bit time-intensive. It's knit in sport-weight yarn on pretty small needles. I used size 3.25 (US3) needles. It took 10.5 balls of Knit Picks Shine Sport in a color called Wisteria -- a pretty pale purple. It's a 60/40 mix of cotton and rayon, so it has no give and isn't kind to the knitter with lapses in tension consistency. It can also cause a bit of hand strain. But, I love the beautiful shine on this yarn and the cool shading effects that happen when viewing the knit and purl panels from different angles. And, it's going to easier to care for than many of the other baby blankets I've made in the past year. I've already tossed it in the wash and dried it and it help up just fine.

It's a fairly simple pattern, all knitting and purling, with no shaping to speak of. The nature of the little heart motifs mean that the blanket is totally reversible. And after the first row or so, it's easily memorize-able, especially with the liberal use of stitch markers. I used different color stitch markers for the panels in which hearts were to appear, switching them out and re-position as I moved from row to row. I always forget how heavy cotton is. This is not a huge blanket (36"x36"), but toward the end, I was amazed at how much weight was pressing down on my lap. It should keep a squirmy little one quite contained. Now to box it up and get it delivered before the baby is.

A note on the color. This overcast day got away from me before I thought to take some pictures, so the pictures taken indoors make this blanket look way grayer than it is. While that's not a bad thing, the more purplish-looking image is the one that's closest to the true color. Maybe just a tad more vivid than real life.

Coming up, I'm going to be making a version of the Marius sweater (or  Mariusgenser), a design that was popular in the 1950s in Norway. We're planning to go skiing with my siblings and their families this next December, and I'm going to need something for the slopes. Or at least something to lounge around in après-ski.

I won't be using this exact pattern, but it is one from Sandnes, the company that owns it. And I've ordered Peer Gynt yarn too for that extra bit of authenticity. I had to get it from the UK -- couldn't figure out a source in the US. Traditional Marius sweaters are made in the colors of the Norwegian flag -- blue body, white stranded patterning, and red around the collar and joining the sleeves. I'm going to be making a version with black, white and gray. Because that's me. I have the pattern already, and although it's been translated from Norwegian, some of it is a little sketchy on the details. This is going to take some careful reading and planning.